Heartworm walkthrough: Full game guide and puzzle solutions
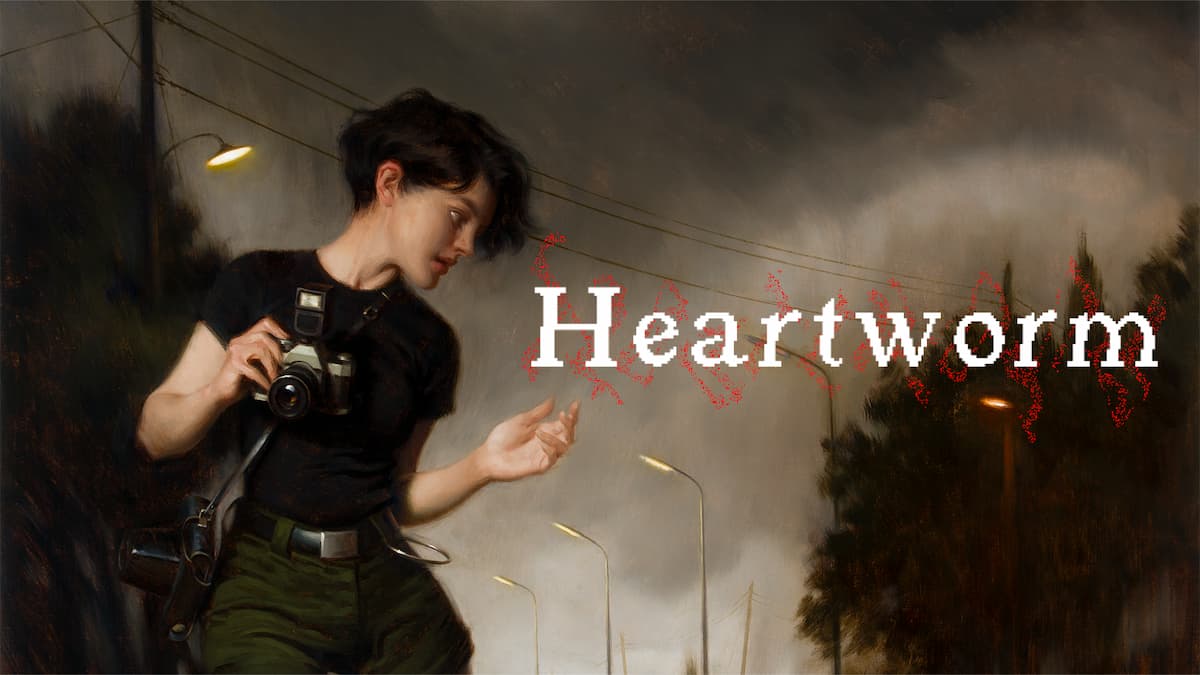
If you’re a fan of classic horror games like Resident Evil and Silent Hill, you’re in for a treat with Heartworm. This supernatural adventure channels games of the 90s while also having plenty of its own unique ideas. The result is something rather special (you can read our review to find out more), but it does have some tricky puzzles. That’s where our Heartworm walkthrough comes in: We’ve provided step-by-step instructions for getting through the game, so if you get stuck, we’ve got you covered.
Use the guide either by following each step, or simply jump to the section you need help with using the handy table of contents below. We haven’t earmarked every single object to pick up, nor have we signposted every enemy encounter, so be on your guard as you’re moving around.
The best piece of advice we can give you before you start is to make sure you save frequently! You’ll need to visit safe rooms to do this, which can sometimes mean a bit of backtracking to get to one — but trust us, it’s worth it.
Abandoned house
- Pick up the camera from the car and make your way up the road.
- When you reach the abandoned house, look in the trash cans at the left hand side to find a note. Use the side door here to enter.
Note: You can use the flash of your camera to light up dark rooms by pressing R1. Doing this won’t use ammo.
- There’s a note to pick up on the left hand side. Open the door on the left to take you to a safe room. Save your game by interacting with the PC and go back out through the same door.
- Go through the door at the end of the hall. You’ll now be in a sitting room. Go through the double entryway into a conservatory to find a note.
- Go back out into the sitting room and find the single door next to the kitchen. Go through, and you’ll find some items to pick up.
- Make your way through the room until you reach an open doorway. Go through, and up the staircase.

- Walk around the landing and go through the door right at the end. You should be in a bedroom. Pick up a note on the bed. Note the time 12:15 at the end of it.
- Go back out into the hallway and go through the open door. Interact with the grandfather clock and change the clock hands so they read 12:15. This will reveal a secret door.

- Go through the new door and make your way around the labyrinthine shelves. Pick up the emblem piece on the desk, and look at the portrait of ROSE. Note the name.
- Make your way back to the landing and go through the door opposite the stairs. You’re now in a hallway: make your way to the door at the end.
- You’re now in a large bedroom. Go to the end of the room where you’ll find an attic key on a nightstand.

- Leave the bedroom, go back down the stairs, and make your way back to the entrance hall where we first entered the house. Here, there’s a door with a combination lock. Input the word ROSE and enter the door.
- Make your way down the steps to the basement. Push the empty shelving unit out of the way to reveal a storage area. Make your way through the maze, pushing more shelves out of the way on route. You’ll eventually find a note and another Emblem Piece. Pick them up. Combine both emblem parts in your inventory to make a Heart Emblem.
- Leave this area and go back up to the entrance hall. Go up the stairs here, and make your way around the landing to the furthest door.
- In the next room you’ll find another set of stairs (along with some freaky covered statues) — make your way up those.

- There’s only one door at the top: unlock it with the attic key in your inventory. You can discard it from your inventory when you’ve used it.
- Just through the door is a note. Make your way to the end of the attic and use the Heart Emblem in your inventory on the strange door. Go through it.
- Make your way down a long staircase.

- Right at the bottom is a door to interact with. Huh: it’s locked. Turn around and start making your way up the stairs.
- Close to the top you’ll start being pursued by an enemy. Turn around and run back to the bottom. This time, the door will open.
Archive

- In the new area, make your way forward until you see a large book. In this room, there’s a save station (the PC), so be sure to save your progress.
- You’ll need to come back to this room several times as you play: to the left of the book is a large machine where you can insert photographs. You don’t have any right now, but as you play you can insert them here.
Note: The amount of photos you find and insert into the machine in The Archives will impact the ending you get with the game. There are three photos altogether: finding them all leads to a good ending with a bonus scene, finding one or two is a good ending, and finding zero is a bad ending. Don’t worry – we’ll tell you where they all are!
- Head down the hallway to the left to continue — you’ll see a flickering barrier blocking your path. Take out your camera and take a photograph to clear it.
- Keep moving down until you reach the upside down house to kick off a cutscene.
Neighborhood
- Defeat the enemy by using your camera and taking a photo of it.
- Move down the street and go in the green house on the left-hand side of the road. It’s a safe room: remember to save your game and manage your inventory if you need to.

- Leave the safe room. Go back the way you came and inside a store (it has a Platt St. Deli sign outside). In here, you’ll find a key on the counter. Beware of the enemies. There’s also film and antiseptic in this room if you want to explore.
- Leave the shop and head back up the street from the direction you came from. Interact with the first house you reach on the right this time — Sam will comment that it’s her grandparent’s house. Use the key in your inventory on the front door.
- Go through the first open door into the living room. Read the note on the table. Go through the door at the other side of the room.
- Follow the strange hallway down to another door. Go through it to enter Sam’s bedroom. Read the note on the bed — it’s a clue to the puzzle in here.
- Interact with the chess board. Move the Bishop piece from E3 to G5. You’ll get a burst mod for your camera — in your inventory, combine it with the camera to install it. You’ll now be able to take three photos at once.
Note: You can only have one camera mod installed at one time. If you find another that you’d rather have installed, you’ll first need to remove the one installed by interacting with the camera in your inventory. You can change them at any time, as long as you have room in your inventory to uninstall one.
- Look at the wall and the plaque with the missing baseball bat.
- Leave the bedroom, go back down the hallway and leave the house. Go around to the left side and use the key to open the door on the right of the garage.

- Pick up a note on your left. Move around the hole in the floor and push a shelf to reveal a fuse box. Interact with it. You need to turn all the lights green — from all red, flip the first, third and sixth switches.
- This will reveal a staircase. Go up to find a camera bag, which will increase your inventory space (go into your inventory and ‘use’ it to equip it). There’s also a train set in the back of the room to look at — note the front car is missing.
- Leave the garage and head back out into the street. Head in the direction of the shop again, but this time turn right to reach the end of the street. On the right is an entrance to the baseball field. Go through.

- Head to the benches on the left to pick up a baseball bat. Note the strange cage in the middle of the pitch.
- Go back to your grandmother’s house and up to Sam’s bedroom. Use the baseball bat you’ve just picked up on the plaque on the wall.
- The plaque will open up to reveal a model train. Take the train. Now, go back to the garage and up the stairs to place the train on the train set. You’ll get a padlock key.
- Leave the garage and move right to find a locked chain fence. Use your padlock key on the central panel here to pass through.

- Shoot the flickering barrier ahead, and it will reveal a photo on a bench. Pick up the photo — this is the first of three that you can feed into the machine in the Archives.
- Leave the garden and go back to the street (towards the overpass). You’ll pass by the safe house – remember to save regularly so you don’t lose any progress.
- You need to head to the last house on the right – it has black and white static in the windows and a long staircase up to the front door.
- Go down the snowy hallway and go through the door right at the end. This will lead you back out onto a street. Go straight across the road where you’ll find another house. It has three unlit candles in the window — read the note pinned to the wall. Our goal is to find and light three candles so we can enter this building.
- Go down the street and, just where you see a ‘stop’ sign, go up some stairs to enter an apartment.

- Make your way through the apartment. You’ll find a bandage in the bathroom. Go through the bedroom and the hole in the wall until you end up in the hallway.
- Make your way down the hallway until you see a candle. Light it using your lighter from your inventory.

- Leave the apartment, exiting the way you came. Go back into the house we came through with the snowy corridor and go back out the other side to reach the main street of the Neighbourhood.
- Go right down the street, heading in the direction of the shop. Enter the house across the road from the shop.
- Go upstairs and through the bricked-up door. Move down the hallway and go through the last doorway on the right – it leads to a bathroom. Light the candle in here using your lighter.
- Leave the house and head back to the baseball field. That cage we saw? It’s where the third candle is. You need to run across all three bases, lighting them up, and get back home before their lights go out to lift the cage. It’s easy enough as long as you avoid the enemies. Light the candle with your lighter once the cage has lifted.
- Leave the baseball field and return to the house with the snowy corridor (right at the bottom of the street). Go through and out of the door on the opposite side of the snowy corridor.
- Go back to the house across the street with the three candles in the window. You can now enter the house. On the table to your left (with the candles) is a note. Read it, then move through the house to find a casket.

- Interact with the casket to be transported to a new area. Leave the church and find a note on a table. Go through the church gates and head right, following the street around until you find a sliding door that looks like a supermarket on your right. Go inside to find a safe room. Be sure to save your progress!
- Leave the safe room and go straight forward down the street, taking the first right. Take the next right to find yourself in an alleyway. Make your way through until you see a sliding door with a red light above it. Interact with the door to enter.
- Make your way through the warehouse and go up the stairs. Follow the walkway around until you find a door. Open it — this gives you a shortcut back to the main street where the safe house is.
- No need to go through the door just yet. Go down the stairs and make your way through the store room.
- You’ll find yourself in a maze of shelves and boxes. Keep moving forward and some boxes will fall behind you, signalling the start of a monster chase. Keep moving, making your way through the maze, and eventually, some more boxes will fall, blocking the monster in.
- From here, make your way through the room to pass through a metal fence to pick up a crow bar.
- Now, make your way back and use the crow bar on a boarded-up door where you were after escaping the monster.

- You’ll now be back at the start of the warehouse. Leave, and make your way back through the alley. Turn right at the end of the alley, and you’ll see a bus. Use the crowbar on it to open it.
- Before you go through the bus, you might want to go back and save — there’s a boss fight coming up.
- Defeat the Spider boss by taking photos of it.
How to defeat the Spider boss in Heartworm
Just like any normal enemy, you defeat the Spider boss by taking photos of it. Obviously it has much more HP than normal enemies, however, so you’ll need to take a lot more photos – roughly around 40. Make sure you have plenty of ammo.
The Spider will attack by lunging, or by spraying web. You can avoid them by moving out of the way. It will also back up before charging at Sam. This is harder to avoid, but you can take a picture just as it charges to disrupt its attack.
The Spider sometimes sends out small spiders, which cannot be defeated. Simply avoid their attacks and wait for the large Spider to come back.
Note that the closer the Spider gets to being defeated, the more static will appear around it.
- After defeating the boss, you’ll receive a ‘Neighbourhood’ page and be sent back to the Archive.
- Use the Neighbhourhood page on the big book in the middle of the room. Doing so will unlock the gate at the top of the stairs. Go through the gate and follow the hallway down until you reach a door to enter the next area.
Wilderness
- After the cutscene, read the document just in front of you. Make your way down the path until you get to the start of the bridge.

- Go down the stairs to go underneath the bridge and pick up a key on the dock.
- There’s a door just behind you – go through to find a safe room. Save and manage your inventory before continuing!
- Go back up the stairs and across the bridge. Keep going forward, following the main path until you come across a sign. Read it – it’s about Cassiopeia. Keep moving down the main path, and when you reach a branch, keep to the left. You’ll eventually reach a large weeping willow tree.

- Read the sign under the tree, then go up to look closer at the tree.
- There’s a switch near the base of the tree. Activate it. We’ll be looking for seven more of these switches around the woodlands.
- Head back down the main path where we’ve just come from and back across the bridge. Across the bridge you’ll see a door underneath a sign that says ‘Devil’s Den’. Go through it.

- Go through the door, and you’ll find yourself in the parking lot. You’ll find another sign (Cetus) to examine here. Move through the parking lot to the left and you’ll find the second switch. Pull it to turn the light green.
- Move forward to enter a new area. Keep moving forward and you’ll see a water mill. Cross over the stepping stones then move right and you’ll see the third switch. Activate it.
- Enter the watermill building, using the watermill key. You can now dispose of the key from your inventory.
- Inside, look at the note on the table. This is a clue to the next puzzle – note the letters that each line of the poem starts with.
- Go to the piano, and play the notes as laid out in the poem. You need to play C, D, Eb, G, F, D, Eb, F.

- Doing that has opened a doorway outside behind a waterfall. Leave the building and go through the new door that has just opened up.
- You’ll now be in a cave. Make your way through and you’ll find the fourth switch to activate. Once you’ve activated the switch, go down the ladder.
- At the bottom, you’ll find some bolt cutters over on the right. Take them, and go back up the ladder.
- Leave the cave, and follow a path that leads to the new area — it’s to the opposite side of the switch you pressed out here earlier. Make your way forward and you’ll reach a fork in the road. Head upwards to reach the overlook.
- There’s another board to look at here (Andromeda). Interact with the telescope and move around to find the three constellations that we’ve seen signs for: Cetus, Cassiopeia and Andromeda. Select each one when you find it, and it will open up a hatch nearby.


- From the hatch, take the blood kit.
- Head towards the glowing light and go through. You’ll find yourself near a pylon. Unlock the gate here using the bolt cutters in your inventory.
- Through here, activate the switch. Ignore the other machines for now — we’ll come back here.
- Leave through the gate you came in, and head down a path directly across. Follow it down and go in the boat to find a shortcut to take you back to the save room.
- Go back in the boat to the power station and follow the path up. From the pylon, take the left path, which will lead you to a train yard.

- You now have a block puzzle to complete. Your goal is to reach the switch in the top right corner. Start by pushing the top right block upwards, then moving back to the left-hand side and pushing the leftmost block up two. Keep pushing blocks that allow you to access the centre of the maze, eventually making your way around to the switch.

- Go back towards the power station. Just as you enter the area, take the right path which will take you to the clearing.
- Make your way through the area, watching out for dogs. You’ll eventually reach a broken cottage with a deer corpse in the centre. Use the blood kit in your inventory on the deer.
- Leave the house and go further through the maze until you find another switch. Power it on, then continue making your way through the maze until you find a four-way crossroads. Take the middle path out of the maze to find the outdoor library.

- Make your way to the centre of the library where you’ll find an altar. Use the blood kit from your inventory here.
- Go back to the power station (exit the library and make your way back through the maze) and head into the gated area, where you previously activated the switch. The indicator should now be at 100, so press the red button to start the generator.
- Also note the green/red lights on the panel opposite — you’ll need this for a puzzle later on.
- Once again, go back into the maze. Make your way near to where we pressed the button in here, but look for a new path that leads out. You’ll find yourself back out in the wilderness, on the main path where we began.

- Move down the path heading towards the large tree. Go to the heart of the tree and you’ll find a hex crank — watch out for the statue as you do so.
- Leave the tree area and, instead of going straight down where you came from, take the turning, which will bring you out at a waterfall.
- Use the hex crank from your inventory in the mechanism here, which will lower the water lever. Follow the path around to reach the lower area where the water has just cleared. Here you’ll find a journal entry to pick up. Go down the winding staircase to find yourself in a cave.
- Make your way down inside the cave. There’s a safe room here – we’d recommend saving, as a boss is coming up soon!
- From here, head left towards a gate with a sun on it.

- Interact with the computer terminal at the side of it. On the screen, you now need to click the lights so their pattern matches the console we saw in the power station earlier:
Top row – green, green, red, red, red
Middle row – red, red, green, green, red
Bottom row – red, green, red, green, green - Go through the now-open gate and take a photo of the static. This will give you a cave photo — it’s the second photo to insert into the machine back in the Archives.
- Keep moving through the caves and eventually, a cutscene will kick in. It’s time for another boss, so be prepared!
How to defeat the deer boss in Heartworm
Like the previous spider boss and like standard enemies, the deer boss is defeated by taking photos of it. But to take photos of it, you’re going to have to chase after it, exploring the woods to draw it out of cover. Keep your wits about you, as the deer will jump out of cover to attack you.
Try to dodge each of its ambushes as doing this will leave it open for attack. When it’s out in the open, it can only hurt you by attacking directly, which should be easy enough to avoid. Keep your distance and get in as many attacks as possible.
Be wary of the dogs around this area. You don’t have to defeat them, but they can do a lot of damage to you if left unchecked.
- Once you’ve defeated the deer, you’ll be given the Wilderness page and taken back to the archive.
- Use the Wilderness page on the book in the middle of the archive, which will open a gateway to the right. Go through the gate and make your way down the hallway, up some stairs and up a ladder to reach a new area. After the cutscene, head across a bridge in the foreground to find the clock tower. Interact with it.
Clock Tower
- Go to the table near the fireplace. You’ll find an emblem to pick up, and a journal entry to read.
- Go up stairs and through the door on the left. You’ll find yourself in the dining room. Go through the double doors which will lead into another hallway.

- In this next area, watch out for a new enemy type that will jump on you from above. Head left through a door at the end of the corridor and you’ll find yourself out on a balcony/walkway.
- Make your way across the walkway until you see a blue door. Go through.
- You’re now in the gallery. Read the note – and note the word dwells.
- Go through the door on the other side, leading you back out to the hallway. Make your way through the hallway until you reach the end with two double-sided doors on either side.

- The door on the right can be unlocked, and it provides a shortcut back to the main entrance. The door on the left leads to a stairwell, and the first door at the bottom leads to a safe room. Go in here and save your game.
- When you’re ready, go back out into the hallway and back down the way you come. Stop when you reach a door with a missing piece. Interact with it and use the delta emblem from your inventory. Go through the door.
Hospital
- You’re now in a hospital. Head right, then go through the white door on the right to find yourself in a waiting room. Move through, and you’ll see four screens with words that flash up:
- 1. Complacency
- 2. Uncertainty
- 3. Mediocrity
- 4. Mortality
- Looks like these will be clues for a puzzle coming up soon, so make a note of them.
- Leave the waiting room and go through the door with the green light just across to enter a stairwell. Go up to the third floor and enter the door.

- In this area, you’ll find windows into rooms, each showing a very different scene. Outside each window is a button that needs to pressed. These need to be pressed in the order that matches the four words we saw previously.
- For the first word, Complacency, press the button outside the window of the couple watching TV.
- For the second word, Uncertainty, press the button outside the window of the person falling through the room.
- For the third word, Mediocrity, press the button outside the window with the person sitting at a desk.
- For the fourth word, Mortality, press the button outside the room with flowers.
- That will open up a new door. Go to the end of the hall and, in the left door, go pick up a note on the desk. Go through the door at the other side of the room, and enter the open double doors.

- Take the crucifix out of the baby’s crib, and you’ll be teleported back to the entrance hall.
- Interact with the display case between the staircases and place the crucifix here.
- Go up the stairs and go through the doors on the right-hand side. In the next corridor, go through the double doors across to be back in the stairwell (remember to jump in the safe room here if you want to save!). Go up the stairs to the second floor and turn left to find a door that leads to the gallery room. Read the note here, and note the word desires.
- Leave the room and return to the main entrance hall. Use the elevator and go to the third floor.
- Go through the doors to your left. In the corridor area, move downwards and go through the door on your left to reach another gallery room.
- Read the note on the plinth, and note the word deprives.
- There’s a side door in the gallery – go through to take the Multigrade Developer.
- Leave this room and the gallery, and make your way back to the hallway. Go down to the end of the hallway and through the double doors, which lead onto a balcony/walkway.

- Go to the end of the platform you’re on and take the ladder down. Move around until you see a box — push it into the empty cage. You can now make your way across a new path – go all the way around to grab the Beta Emblem from the cage opposite.
- Go all the way back to the main entrance and use the elevator to the second floor. Through a door on the left-hand side of the screen, and make your way to the end of the corridor. You can unlatch this door for a shortcut back to the balcony/walkway, but you don’t need to go through. Instead, take the door on your right.
- You’re now in a library. Make your way down and you’ll find a large door — use the Beta Emblem on it to open it, and go through.
School
- You’re now in the school. At the end of the corridor, go through the centre door to find yourself in a library. Make your way through to the othe rside and to the left, where you’ll find a double door. Through there is a pool area. Run around the pool to the single door at the other side.
- In the hallway, run all the way down and through the door at the bottom. Simply run through the mannequins – no need to engage them in combat.
- You’ll now find yourself in a classroom. Go and interact with the TV.

- The TV will give you a quiz with seven questions. Keep making your way to the TV until you’ve answered all questions. There are no wrong answers.
- After you’ve answered all seven questions, return to the TV to pick up a tape. You’ll be transported back to the entrance hall — put the videotape in the display cabinet where you placed the crucifix.
- Use the elevator to go to the second floor, and go through the door on the left. Go all the way through the corridor and take the end door on the left to find yourself in a dark room.
- Use the Multigrade Developer on the photograph in the tray to develop it. Pick it up — it shows a path, so we think we’ll be using this very soon. There’s also some film to collect in the darkroom before you leave.
- Make your way back to the elevator and go to the first floor. Go through the door on the right. Make your way down the corridor then through a door on the right.
- You’re now in a room with a hole that you need to cross. Here’s where that photo you’ve just had developed will come in handy as it’ll show you where is safe to walk. Here’s the photo for guidance:

- At the other side of the gap, take the Gamma Emblem, then leave the room. Go back the way you came, so you’re back out in the main hallway. Still on the first floor, take the door on the left. Run to the back of the room to use the Gamma Emblem on the locked door. Go through to find yourself in a subway.
Subway
- Make your way downstairs to reach the first track level. Run along the track until you reach a small staircase going down onto the tracks. Keep following the track down until you reach a service door. There’s a key taped to it – take it.

- Go back the way you came and back on the platform. Keep running along the tracks and you’ll eventually reach a static barrier. Take a photo of it to get the clock tower photo — that’s the third and final photo we need for the machine in the Archives.
- Go back to the platform. In the middle, you’ll find a locked gate – use the lower track key in your inventory on it and go through.
- Make your way down the stairs and on the platform, go through the open train door. Make your way down it and out the door right at the other end. Go through the door here to reach an office.
Office
- Head to the computer and printer in the middle of the office. Interact with it, and it’ll print a red piece of paper. You need to deliver this to a red receptacle, which is signposted in the corridor with a red sign. You’ll then need to make your way around to find a red glowing box to place the piece of paper in.
- Go back to the computer. You’ll have to repeat this three more times, once for a green piece of paper, once for a blue and once for a yellow one.
- Be warned: once you’ve delivered the yellow piece of paper, you’ll get trapped with enemies for a short while, so do your best to avoid them.
- Once the gate opens, return to the PC to pick up a work ID on top of the printer. You’ll be transported back to the entrance hall — place the ID in the display case along with the crucifix and the video tape.
- Go to the third floor, head left to go to the end of the corridor. Go through the door on the right.

- Go across the balcony to the right and examine the lectern on the way. There’s also a safe room, so be sure to save your game and sort your inventory.
- Go through the door to reach another gallery room. Read the note here, and note the word dread.
- Interact with the emblem just in front of you, and recall the four words you’ve read in the gallery rooms: select dwell, desire, deprive and dread. Take the Omega Emblem.
- Leave the gallery and the library, and go through the door at the side of the save point. In the next corridor, go down and through the double doors on your right.
- You’re now in a garden room. Read the note on the wall and make your way down to a locked door. Use the Omega Emblem on it to open it.
Spooky house
- Move through the next room to go through a hole in the wall and enter the spooky-looking house.

- Make your way through the house, seeking out grandfather clocks. There are 11 in total, and each one is stopped on a specific time and is etched with a particular image. They are as follows:
- 1 = Moon
- 2 = Book
- 3 = Ship
- 4 = Candle
- 5 = Cloud
- 6 = Water
- 7 = Widow
- 8 = Time
- 9 = Death
- 10 = Earth
- 11 = Devil
- Once you’ve got them all, go upstairs and to the end of the hallway where you’ll find a sliding puzzle.
- You need to complete the sliding puzzle, putting the pictures in the respective places. There’s no solution we can give here as the positions of each piece are random. It took us a LONG time. Sorry. You’re on your own for this one.
- Once you’ve (finally) solved the puzzle, a new room will open up. Go in and read the note on the bed. Go through the hole in the wall and pick up the Eulogy at the end of the floating path. You’ll once again be transported back to the entrance hall.
- Place the Eulogy in the display case – we have all four items now, and a new floor, R, will be available via the elevator.
- Go to the elevator and choose floor R. Go up the stairwell and keep moving along the path until a cutscene kicks in.

- After the cutscene, make your way to the cathedral steps and pick up the Clock Tower Page. Go back down the stiars and enter the crypt to your left — this will take you back to the Archive.
Archive
- You’re back in familiar territory. Remember to save your game here.
- If you’ve picked up all three photos, you can place them all into the machine to get the best ending
How to get the best ending in Heartworm
There are three endings in Heartworm: a bad ending, a good ending, and a good ending with an extra cutscene. What ending you get depends on how many photos you’ve found while playing. There are three altogether, one to be found in each main area of the game — we’ve laid out their locations in our guide above.
Any photos you find need feeding into the machine in the Archive. If you feed in no images, you’ll get the bad ending. Feeding in one or two images will get you the good ending, and all three images will get you the good ending with an extra cutscene.
If you want to see all endings, we’d recommend saving your game before feeding in any images. Leave them all until after completing the Clocktower section of the game. That way, you can reload your save, repeating the last section of the game with none, one or three images given to the machine.
- Interact with the book and give it the Clock Tower Page in your inventory.
- A key will appear on a shelf to your right. Take it.
- Go through the door at the side of where you are to go back to the cathedral. Use the key you’ve just picked up on the main cathedral door. Go inside.
- Final boss time!
How to defeat the final boss, the Tape Keeper, in Heartworm
If you’ve made it to the end of Heartworm, well done! But before it’s over, there’s a final boss for you to defeat: the Tape Keeper.
There are two phases to this fight. Getting through each one involves three things: avoiding the Tape Keeper’s attacks, taking photos of the lanterns that appear in the arena, and photographing the Tape Keeper when he is stunned.
You cannot attack the Tape Keeper to begin with – all you can do is dodge his attacks. Once lanterns appear, you can take photos of these, and once all four have been photographed, the Tape Keeper will be stunned. At this point, you can photograph him to attack him.
You’ll need to do this process four times to finish the first phase (it’s worth using the burst mod if you have it to deal more damage). The second phase is similar, but the Tape Keeper will introduce new attacks. Keep on the move to avoid them. In this second phase, there will also be an extra lantern in the middle of the arena that you need to take a picture of before being able to attack the Tape Keeper.
Did you find this guide helpful? Please consider making a one-off donation to GameSpew. All money raised goes directly towards the running costs of the site and helps us continue to make guides, walkthroughs and more content.