My Friendly Neighborhood walkthrough – full guide and puzzle solutions
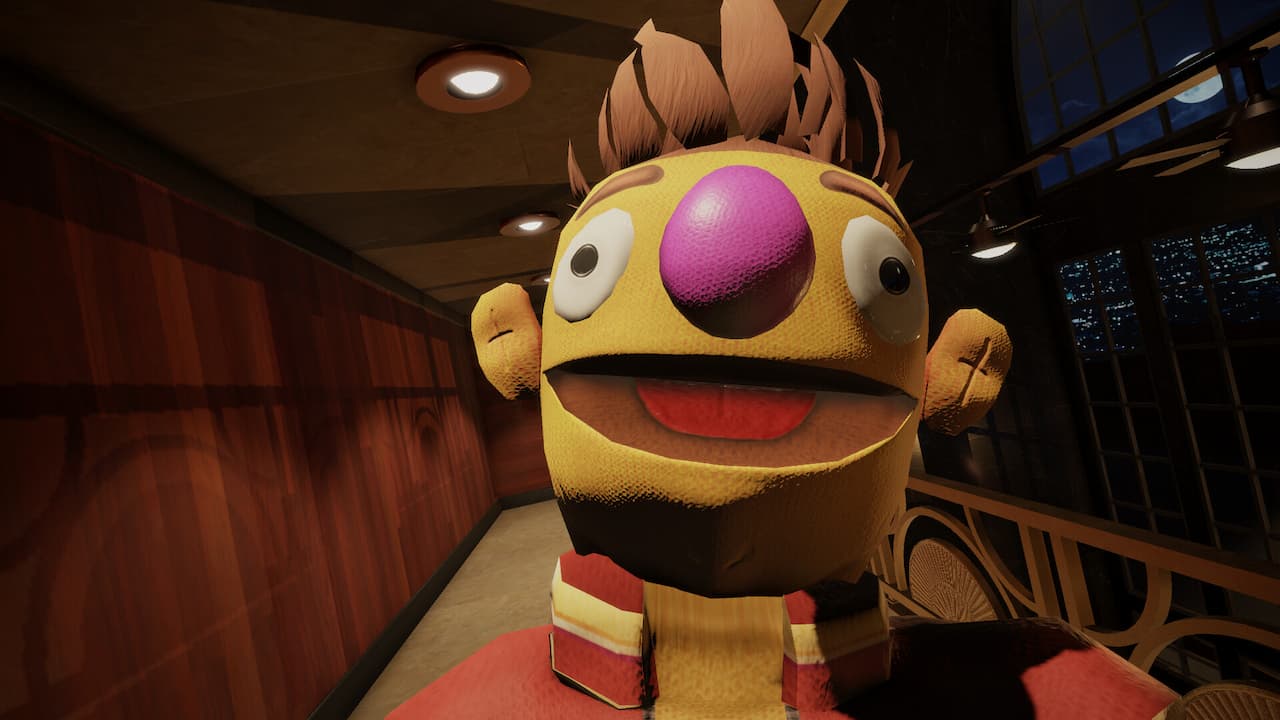
Have you ever wondered what would happen if the puppets of something like Sesame Street suddenly went bad? That’s basically the premise of My Friendly Neighborhood, a first-person horror game available on both PC and consoles. Playing as a simple repairman, you’ve been sent to a TV studio to deal with a malfunctioning aerial. Once there, however, it soon becomes apparent that it isn’t going to be an easy job. But don’t worry, we’ve put together a handy walkthrough for My Friendly Neighborhood which will guide you though the game and help you solve its puzzles.
No matter which difficulty you choose to play My Friendly Neighborhood on, our walkthrough should prove to be invaluable as you make your way through the game, trying to progress forward while fending off puppets turned evil and solving puzzles. Follow it step by step or just consult it if and when you get stuck – it’s up to you. We just hope that our guide proves useful to you reaching the end of this entertaining and sometimes scary adventure.
My Friendly Neighborhood walkthrough
Outside
- Look in the glovebox and pick up the candy bar, then exit the truck.
- Enter the 123 building via the revolving door ahead. Inside, go forward and ring the bell on the desk.
- After the scene, pick up the Stage 4 keycard from the desk. Head left, past the vending machine – ignore the stairs for now, but take the medallion from the display case.
- Leave the building via the revolving doors again. Ahead you’ll see… something… running up the ramp and through the open shutter ahead. Head there and open the door with your new keycard.

Stage 4
- Inspect the lockers – one of them contains a token that you can use to save your game or heal later on. Take the note on the wall.
- Go through the open doorway on the right and follow the path around. Go through the door ahead.

- In the next room, there’s something talking and creating a shadow ahead. Ignore it for now and go down the stairs on the left. Go through the door.
- Drop down the ledge and grab the token next to you. Make your way around the room, towards the source of the noise, and quickly make your way past the puppet to the door while the traffic light is green.
- In the corridor, enter the second door on the left to find a Health-O-Lax, an ammo magazine, and a note. Leave then enter the next door on the left to find some duct tape in the toilet.
- Go through the door at the end of the corridor, then go up the small flight of stairs and exit via the door ahead.
- You’ll now be in a stairwell with the path upwards blocked by another puppet. Go down the stairs and through the door at the bottom.
- Pick up the wrench from the table – you finally have a weapon!

- Leave the room and go back up the stairs – you can now clobber the puppet with your wrench. Once it’s down, it’s up to you whether you wrap it in duct tape or not. Go through the door at the top of the stairs.
- In the next area, first go through the door on your left – it’s a safe room. You’ll find two tokens on the table and a map on the wall to collect. You can also heal or save your game using tokens here, as well as manage your inventory using the tools box.
- Leave the safe room and go down the corridor, taking out the puppet ahead with your wrench. At the bottom of the stairs, pick up the Health-O-Lax and ammo magazine on the table, then unlock the double doors but don’t go through them.
- Go back up the stairs and unlock the door on the left. Go though the door to find yourself in a familiar room. Go up the stairs though the door on the left.
- Now that you have the wrench, you can knock out the puppet banging on the door in this room. Once you’ve done that, enter the door.
- In the next room, go down the stairs to start a scene. You now have a gun! Shoot the puppets that enter the room, pick up the note on the table, and then leave.

- Head back to the room where you picked up the wrench. That’s through the door on the left, down the stairs and through the door in the next room, through the next door on your left, then into the room at the bottom of the stairwell.
- Shoot the target in the room to get the Blue Circle Key.

- Now that you have the Blue Circle Key, leave the room and go back up the stairwell. Enter the door at the top.
- Open the door with the blue circle on it in this area and enter it. Check the cabinet to find some duct tape. Go through the door at the end of the room and pick up the cheat tape sat on the table.
- Go back through the door and then pass through the next room. Enter the door ahead and to the right, then take the door on the left. Open the double doors in this room with the Blue Circle Key and enter the next area.
- Enter the flower shop on your left, then once inside, go left again and leave via the door. Head left up the stairs and enter the door at the top. Inside, go up yet more stairs and pull the lever at the top.

- Go back down the stairs and leave via the door. Go down the stairs in the next area and then up the stairs ahead. Follow the path around to the right, avoiding the puppet in front of you and go through another door. Drop down into the laundrette.
- Deal with the puppet, then pick up the ammo magazine and the Orange Square Key on the desk. Unlock the Laundrette door and then leave, heading left to the flower shop.
- In the flower shop, open the cash register using the Orange Square Key and pick up the X letter block and the two tokens. Leave the flower shop and then enter the pizza restaurant, just ahead and to the left.
- In the pizza restaurant, pick up the note on the counter, then interact with the clock on the wall nearby and set it to the mushroom symbol.
Note: The clock in the pizza restaurant can be set to various foodstuffs, which will open boxes in the area with the same food item on them. The boxes hold items such as a Health-O-Lax and ammo, but if you set it to anchovies it will open a box on the highest level which contains some glasses which you might want to pick up.
- Optional: Leave via the door at the back of the pizza restaurant, then head left down the corridor and deal with the puppet ahead. Pick up the shotgun shells sitting on the barrel on the left. Go up the wooden stairs – you might have to deal with another puppet at the top. Go left and pick up the ammo magazine sitting on the chair.
- Leave the pizza restaurant via the way you came and head left, into the alleyway, avoiding the big bird. Pick up the U letter block sitting on the barrel.

- Keep making your way around until you find a stairwell going up the side of the building. Before you start to go up it, check a crate nearby for an ammo magazine.
- Go up the stairwell, and before going up the second set of stairs check the open box nearby which had a mushroom symbol on it to find the L letter block. Now go up the second set of stairs to reach the top of the buildings.

- At the top, first take the left path and go through the door. Follow the walkway around until you enter a room – grab the P letter block on the table.
- Inspect the wardrobe in the same room to find some duct tape. Go back and leave through the same door you came through.
- Go down the nearby steps on the left but don’t go through the door ahead. Instead, go left and enter the open room with the drum kit. Grab the M letter block. There’s also an ammo magazine on a table.
- Leave the room and go back up the stair and across the wooden walkway. Head left across another walkway and then open the door with the Orange Square key. Inside you’ll find a puppet in the bath. Drain the water to get the A letter block.
- Go all the way down back to ground level, and enter the building with the red doors in the centre of the area.

- Move through the door ahead, then go left. Don’t go up the stairs just yet, instead go past the stairs towards the door with the orange square on it, picking up the Health-O-Lax on the shelf on the way.
- Unlock the door with the Orange Square Key and then enter. Inside you’ll find a token, as well as the S letter block.
- Leave the room and then head up the stairs. Enter the door at the top. It’s a safe room. Grab the duct tape and the token on top of the crates, then heal or save your game if you’d like.
- Leave the room and then exit the building. In the corner of the space ahead, near to the flower shop and the pizza restaurant, you’ll find a stand with just one letter block on it. Interact with it and place all the other letter blocks you’ve picked up. Rotate them to spell ‘Neighbor’. You’ll get a letter.

- Turn around and put the letter in the post box in front of the building with the red doors. Take the crank and the note, showing where stage 2 is.
- Leave the area via the double doors with the red exit sign to your right. Continue forward through the next door marked with a red exit sign. Then once again until you’re back outside.
- Head across the outside area, and head towards the flashing lights on the right hand side. Past the truck, go down the slope and use the crank on the device ahead to gain access to the sewers.

Sewers
Note: Be careful of a puppet hiding in the pipes sticking out of the walls while in this sewers area. Thankfully it makes a distinctive laughing noise, and is generally easy to spot. If it’s blocking your path, you can shoot it to make it go away.
- In the sewers, move forward to trigger a scene. Once it’s over, pick up the duct tape and ammo magazine in the display stand.
- Instead of going through the nearby door, follow the upper walkway around until you find a note you can pick up sitting on a crate. Do so, then go through the door next to you.
- Move through the corridor and enter the door at the end. You’ll now be in a dark area with some noisy puppets.
- Go straight forward, and be prepared to deal with a puppet on the left as you move through some railings. Enter the door near to where you were ambushed.
- You’re now in a locker room. Pick up the note on the table in front of you, then check the lockers in the room to find a Health-O-Lax, some duct tape, and some ammo. In the locker with red paint on it, you’ll find a metal piece.
- Leave the locker room, and head left into the opening where a puppet is raging against a wall. Go past the puppet and go through the blue door at the end.

- In the next corridor, enter the room on the left and inspect the cabinets to find some ammo magazines, some shells, and some tokens.
- Grab the note on the desk and, more importantly, the shotgun on the wall. If you don’t have room in your inventory for it you might have to come back later.
- Leave the room and go back to where you entered the sewers. So, go right, through the door, head left through the next door, and then follow the corridor around and through the door at the end.
- Drop down the ledge ahead, then go through the door under the ‘RAY’ sign. In the next area, move forward and deal with the puppets as you see fit.
- Turn right at the bright MFN sign, go past the board with Stage written on it, and go down the stairs. Enter the double doors at the bottom.
- Go up the stairs and enter the room ahead via either of the double doors. Inside the room, grab the note on the desk on the left hand side, then pull the lever on the wall just to the right of it. The lights will come on, and the puppet making the racket will scarper.
- Go up into the area that’s now lit up and check the note on the green tray.

- Check the white drawers below the tool rack in this area to find a Health-O-Lax, numerous ammo magazines and some shotgun shells.
- Inspect the nearby red workbench and insert the metal piece you found earlier into the object on it to create a power source. Take it with you.
- As you go to leave the room, a puppet will enter the area from the far end. If you shoot it, it might turn into multiple puppets, so it’s better to simply draw it into the large room and then run past in, quickly making your way to the double doors.
- You’ll be in the corridor with the bright MFN sign again. Go to the other end and enter the blue door on the left.
- Go up the stairs and then left in this room to find a safe room. Pick up the two tokens and the Health-O-Lax on the table, then grab the map hung on the bars at the top of the stairs.
- Look at the note to the side of the map you’ve just picked up and try to make a mental note of it. You’ll need it to solve an imminent puzzle.

- Save your game or heal if you wish. You might want to manage your inventory, too, and go and grab the shotgun if you didn’t have the space to pick it up. Once done, go back down the stairs and leave the room.
- Interact with the machine ahead. Grab the note sitting on the left of it. Interact with the machine again and place the power source in the space at the top of it to bring it to life.
- You need to use the machine to print cards, which can then be inserted into the smaller machines at the side of the room to move the clocks above them. The clocks need to match the numbers taped to the machines below.
- The first clock, for example, needs to be set to three. So, using the note earlier, if you punch a card with square (+2), square (+2), triangle (-1), that should do the job. Press the required buttons, pull the lever on the side to print the card, then take it from the slot.

- Take the card you’ve just created and put it into the slot of the smaller machine on the left with ‘III’ taped to it. Pull the lever and the clock above the machine should move.
- Now for the middle machine: print a card with circle (+6), square (+2), square (+2), then place it in the machine and pull the lever.
- For the last machine on the right, you want to print a card which equals seven. Use circle (+6), square (+2), triangle (-1). Put the card in the machine and pull the lever.
- Once all three clocks are at the correct time, the door to the left which was previously sealed shut will open.

- Go through the green door which was behind the sealed door to enter a new area of the sewers – the East Basement. Open the blue door at the end of the stony tunnel.
- You’ll now be in a room with numerous puppets. You might want to knock them out and then duct tape them – it’s up to you. In any case, first take the left path and go up the yellow stairs at the end. Go through the door at the top.
- Inspect the shelf to find an ammo magazine and a token, then when in front of the door with the red exit sign, go left, through an open door into a corridor.
- Follow the corridor around. Just past the puppet on the table you’ll find some duct tape and an ammo magazine in a cabinet. At the end of the corridor you’ll find a note and a lockbox key on the wall. Take them.

- Leave the corridor the way you came, and go right when you reach the door with the exit sign above it.
- Open the box on the wall ahead with the lockbox key. You’ll find a fuse with a heart on it, as well as a note indicating that it should be placed in the third of four holes. Take both.
- Turn around and now go through the door with the exit sign above it. You’ll be in a safe room.
- Check the cabinet in the safe room to find an ammo magazine. There’s also a note to pick up on a chair. You know the score: save your game, heal and/or manage your inventory before carrying on if you need to. You’re going to need space for multiple fuses.
- Head through the door with the red exit sign above it. In the next area, which is full of walkways and railings, go left and down the stairs, then turn right and go through the door at the end, dealing with any puppets as you see fit.
- Follow the dark corridor around to the left until you reach another box on the wall. Open it with the lockbox key and you’ll find a fuse with a club icon on it, as well as a note indicating it should go in the first of four holes. Take both.
- Turn around and go straight down the corridor ahead. Go through the door that’s on your left. You’ll now be in an area with a boat. Get in it.

- Check the lockers for an ammo magazine. Unlock the door nearby and then head though it. Go down the corridor and take the second door on the right.
- In the next room, head straight forward, take the second opening on the left, then head across the room and go through the door on the right to enter the locker room again.
- Inside the locker room, deal with the puppet, then make your way around from the right until you find another box on the wall. It contains a fuse with a diamond on it, as well as a note indicating that it should go in the second of four holes. Take both.
- Leave the locker room and then head right in the big room, moving through the broken fence. Enter the door ahead. Go down the corridor and through the door at the end. You’ll be in the starting area of the sewers again.
- Drop down the ledge, then go right, through the door under the ‘RAY’ sign again. Move forward in the next room, then turn left at the bright MFN sign. Enter the door on the left.
- In the next room, move up the stairs and then enter the door on your left. It’s a safe room. On the left is another box on the wall. Open it with the lockbox key. Inside there’s a fuse with a spade on it, as well as a note indicating it should go in the fourth of four holes. Again, take both.

- Save your game, heal, or manage your inventory in the safe room if you like, then leave. Go through the green door straight ahead and move through the stony corridor. Open the door at the end and you’ll find yourself back in the East Basement area of the sewers.
- Take the left route again and go up the yellow stairs. Open the door at the top. Go up the steps ahead, turn right, and then enter the corridor to the left of the door with the exit sign again.
- Follow the corridor around, and at the end, inspect the box on the wall. It has four holes, which you need to place the fuses in.
- The fuse with the club icon needs to go in the first hole, the fuse with the diamond icon in the second hole, the fuse with the heart icon in the third hole, and the fuse with the spade icon in the fourth hole.

- You’ll now be able to open the door on the right. So, open it. In the room, grab the shells and the Health-O-Lax from the table, then grab the cutters being held by the statue of a puppet. Use the cutters on the chained door in the room, then go through it.
- There’s another boat ahead. Get in it. At its destination, go up the steps and unlock the door ahead. Go through it and you’ll be in the starting area of the sewers again.
- Head left, up the steps leading towards the door with the ‘RAY’ sign above it, then go right and through the other door in this room. At the end of the corridor, go through the door.
- You’ll be in the large room that’s becoming all-too familiar now. Head straight to the end of the room and use the cutters on the door which is chained up. Open the door and go down the corridor to the left of the stairs to find a cheat tape in an alcove on the right.
- Go back down the corridor then up the stairs. Head right at the top of the stairs to find an elevator. Push the button to summon it.

MFN Studio Offices
Note: There’s a chance that a big green puppet could appear in some of the rooms in this area. If you enter a room and it’s there (you’ll usually hear it before you can see it), perhaps leave the room, visit another, and then go back in the hopes that it’s gone. It’s not worth wasting your ammo on it.
- You’re now in a new area: the MFN Studio Offices. Head straight forward, down the corridor, then take either set of steps up and enter the large and rather opulent room ahead. It’s the main hall. The music is a bit reminiscent of something, isn’t it?
- Take the ammo magazines and duct tape from the reception desk, then, facing the stairs, go through the door on the right.
- There are lots of puppets in this room. Stick to the left hand side of the room to avoid them, then enter the door at the end. You’ll be in a safe room. Pick up the token sitting on the box, the duct tape on the crate, and then the ammo magazine and the Velvet Mask on the workbench.
- Save your game, heal, or manage your inventory while you’re here, as usual. When you’re ready, leave the safe room and pass through the room with the many puppets again. You’ll be back at the reception desk.
- Head up the stairs near the reception desk and enter the double doors at the top. You’ll now be in a room with loads of puppets on the floor. Just what happened here? Pick up the Punctuation weapon from the display case. It’s basically a grenade.
- Go to the left-hand side of the room and turn to your left. There’s a door that leads to a storage cupboard. There’s another Punctuation to pick up here, and a note.
- Move forward into what appears to be a cinema room. Grab the Velvet mask from the display case on the stage in front of the screen. The puppets in the previous room will now all come alive. Maybe it’s a good time to try the grenade?

- Once you’ve done with all the puppets, leave the cinema room and exit via the double doors ahead. Head right, up the stairs, then enter the door on the right.
- Check the cabinets ahead for an ammo magazine, then the cabinets on your left for some duct tape and a Health-O-Lax. The next set of cabinets on your right contain some shells. Turn around: ahead of you there’s an ammo magazine on one of the desks in the cubicles. Leave the room via the double doors past the cubicles.
- You’ll now be in a long corridor. Move forward and watch out for a sneaky puppet attack coming from the right. Keep moving down the corridor, and after dealing with another puppet, take the last opening on the right, then go through the door on the left.
- There’s a map on the wall. Take it. Also, check the desk and cabinets in this room for an ammo magazine, some duct tape, some shells, and a token. Leave the room and go right. Enter the double doors at the end of the corridor.
- Grab the Health-O-Lax on the table ahead, then turn right and go down the corridor, ignoring the stairs for now. Deal with the puppet then go through the door ahead.
- Grab the ammo magazine on the chairs in front of you, then go down the nearby stairs. Go through the door at the bottom and you’ll be in an entrance lobby. Grab the shells on the desk, then the cheat tape on the floor in front of it.

- Move across the entrance lobby and enter the door ahead. In the next room, grab the note on the desk near the window, as well as the ammo magazine. Enter the small room across from the desk and pick up the game piece from the chess board. There’s also a Health-O-Lax on the other desk here if you need it.
- You can’t do anything else here just yet, so leave via the door you came through, head back across the entrance lobby and go back up the stairs. At the top of the stairs, go through the door on the left.
- Deal with the puppet on your right, then check the cabinet on your left to find some shells. Leave the kitchen area and follow the corridor around, dealing with the puppets as you go. Enter the door at the end.
- You’ll now be in large room with a shooting gallery. Pick up the note on the pool table and grab the duct tape and ammo magazine on the shooting gallery counter. There’s also another note to grab on a chair near the double doors at the end of the room.
Note: If you want to earn yourself a Health-O-Lax or two here, press the bell on the shooting range counter to reset the targets. If you then shoot all of the targets, a box will open on the wall at the back of the room, above the note you just picked up. Inside will be two Health-O-Lax bottles.
- Go to the table with the game board on it and a puppet sat near it. Inspect it, place your game piece, and then ring the bell. You now need to play and win the board game. If you lose you’ll get hit by the puppet you’re playing with.
- The aim of the board game is to reach the end of the board first. Landing in a brown area will let you draw another card, while if you land in a yellow area you must play the top card of the deck immediately on your next turn. If you don’t it’s an instant loss, and so is landing in a green area. If you land in a purple area you’ll only be able to play a ‘1’ card to leave it.
- Once you’ve won the board game, either via skill or persistence, pick up the Red Diamond Key that the puppet was protecting.

- With the Red Diamond Key in your possession, head up the stairs in the corner of this room and unlock the door at the top. Go through the door and into the next room. In the projection room, grab the ammo magazines on the shelving ahead of you, then go right and grab the film reel on the chair and the note on the ledge.
- Inspect the projector to the right of the note which you just picked up and insert the film reel. Go to the centre of the room and inspect the console there. Press the ‘3’ button to play the film reel you’ve just inserted into the projector. Move to the opening in front of you to see a short scene with the big green puppet investigating what you’re playing.
- Unlock the other door in this room with the Red Diamond Key, then go through it. Head down the stairs and enter the long corridor you visited earlier. Head right, then right again, and unlock the door on the right with the Red Diamond Key.
- Inside the room, pick up the Velvet Mask on the desk. There’s also a grenade in the wardrobe and an ammo magazine in a cabinet if you need them. Leave the room and retrace your steps, travelling back through the projection room and into the room with the shooting gallery.

- Go down the stairs and unlock the double doors at the end of the room. Go through them and you’ll end up in a room that’s a bit of a mess. Ahead of you there’s a token on one of the desks, and past that there’s a box on the floor containing a Health-O-Lax and a grenade. Check the nearby cabinet for an ammo magazine as well. Leave via another set of double doors to the right of the cabinet to find yourself back in the main hall again.
- Go down the stairs to the bottom level. Now might be a good time to return to the nearby safe room to save your game, heal, or manage your inventory. Facing the stairs, it’s through the door on your right and then beyond the next room. Keep any Velvet Masks you have in your inventory, however, and the Red Diamond Key.
- If you’ve gone to the safe room, return back to the main hall. From there, head down the corridor behind the stairs, to where you first entered the MFN Studio Offices. You’ll have to deal with some puppets along the way. At the end of the corridor, go left and unlock the door at the end with the Red Diamond Key. Enter the door.
- You’ll now be in a live stage area. Ignore the door on your left for now. Instead, pick up the ammo magazine on the table ahead, then head right through the room, dealing with the puppets as you see fit. There’s a candy bar in the fridge in the centre of the room if you want it.
- Unlock the door with the red light at the side of it, then move into the next room which you’ve already been in previously. Use the Red Diamond Key to unlock the door to the other small room here, and take the Velvet Mask from inside. There’s also a token in the cabinet.

- Instead of going back the way you came, leave via the closed door which takes you to the entrance lobby. Cross the lobby, go through the door at the other side, and then go up the stairs. At the top, turn right and go through the door ahead.
- Move down the corridor which overlooks the entrance lobby, and go up the stairs on the right towards the end which you ignored earlier. Unlock the door at the top with the Red Diamond Key and go through it.
- There’s a puzzle in this room, and it involves the masks you’ve been collecting. Read the sign in the middle of the busts. It says: Junebug had a good day, Norman had a bad day, Lilianna found a big mouse, and George got cut off in traffic.
- You need to put the right masks on the right busts. So, Junebug needs to look happy, Norman needs to look sad, Lilianna needs to look shocked, and George needs to look angry.
- From left to right, the colours of the masks should be blue, yellow, pink and red. Simply interact with each bust to put a mask on it. When you’re done, the area with the sign will rotate, revealing a model of a building with a lever on it.

- Interact with the model and pull the lever. Some dice will come out of it. Pick them all up. There’s a safe room through the door just to the left of the busts if you want to use it.
- Once you’re done, you need to go back to the elevator that you used to enter the MFN Studio Offices. From the room with the busts, leave via the door you came through, go back down the stairs, and then go left down the corridor, entering the door ahead. Go down the stairs on your left, through the door at the bottom, across the entrance lobby, and in the next room go left through the door into the live stage area, then through the door on the left at the end of the room. Phew!
- Once you’re back in the corridor in which you entered the MFN Studio Offices, push the button on the lift to summon it and take you back into the sewers.
Sewers
- Jump down the ledge ahead of you, and then go forward and unlock the door ahead with the Red Diamond Key. Enter the room and first go left. Inspect the toilet cubicles to find a film reel. There’s also an ammo magazine in one of the sinks.
- Leave the toilet cubicle area and enter the shower area at the other side of the room. Pick up the pump piece that’s on the floor.
- Leave the room via the door you came through, then head left, down the corridor, and go through the doorway on the right at the end which you previously opened with the cutters. Go up the stairs, head right, and then summon the lift to take you back to the MFN Studio Offices again.
MFN Studio Offices
- Go forward, down the corridor, and then go up either small set of stairs to enter the main hall yet again. Go up the stairs and follow them around to the right. At the top, go through the double doors on the left.
- Move through the exhibit room, into the room with the shooting gallery. What appears to be a safe is on your left. Interact with it and it’s apparent that some things are missing. You need to place the dice you picked up into the correct squares here.
- Press the red button while looking at the safe to open the circular hatch, allowing you to see which side of each die should be connected properly. Basically, whatever number is displayed on a green square on the right, the die that goes in front of it should display a number which when added to it equals seven.
- So, the die placed in the top-right position should display six, while the one to the left of it should display one. See the screenshot below for the answer.

- Pull the handle on the safe when you’re done to open it. Inside you’ll find a tank. Take it. Leave the safe and head through the opening on the right and then go up the stairs. Go through the door to enter the projection room.
- Inspect the left-most projector in this room and insert the film reel you found in the sewers. Go to the console in the centre of the room and press the ‘1’ button to play it. Move to the opening in front of you again to see another scene with the big green puppet. This time the film makes it sad.
- We need to go back to the main hall again. So, leave the projection room via the door you came through, go down the stairs, leave the room with the shooting gallery via the double doors, and then leave the exhibit room via the double doors.
- In the main hall, go down to the lower level via the stairs, then go down the corridor behind the stairs again. Turn left at the end and enter the live stage area once more. Take the door on your left to enter the machine room.
- Pick up the ammo magazine on the chair to your right, and the duct tape on the shelves ahead. Inspect the machine in the corner of the room and place the tank on it. The elevator at the side of it should now work.

- Once again we need to return to the main hall. So, leave the machine room and go through the door on the right.
- Go down the corridor, following it around to the right. At the end, go up either set of steps. When you reach the reception desk, go through the door on your right to enter a room you haven’t been in yet.
- Grab the note on the table, then go to the other end of the room and push the button to summon the elevator.
- You’ll now be on the top floor on the MFN Studio Offices. Unlock the door ahead. Behind it is a safe room if you need to save, heal, or manage your inventory. In the desk and cabinets in this room you’ll find shells, ammo magazines, and a grenade. There’s a Health-O-Lax on top of the desk, too.
Note: We’d highly recommend you do visit the safe room, heal yourself and stock up. Grenades and good weapons might come in handy — you’ve got a boss fight coming up.
- When you’re ready, go through the double doors to enter the CEO Office. On the desk you’ll find the Front Door Key. Take it. Inspect the desk again and push the button under it to open up a secret passageway in the wall. Go through it.

- Inside the hidden room, pick up the cheat tape on the floor ahead. There are also some shells in the nearby cabinet. Go back through the secret passageway into the CEO Office.
- We now need to head back to the main hall yet again, so go through the double doors and take the elevator back down and follow the green carpet through into the next room.
- Here, there’s a huge puppet monster boss that spits out smaller enemies. Shoot its eyes to defeat it, though be careful – watch out for its projectiles. If you see him suck up all enemies in the room, take cover behind one of the pillars — he’ll spit them all out at you.
- Once the boss has been dealt with, unlock the main doors with the front door key and leave.
Outside
- Once outside, head to your right and look for the blinking neon arrow next to the ‘Public Park’ sign. Head to it and you’ll find a box with a red diamond on it. Open it, and flip the switch.
- Now, head to the left and you can open the door to the public park.
Garden and Backlot
- Follow the path straight forward, past the gate, until you reach a shed. Open the door.
- You’ll find a safe room here. Take the map from the wall, and pick up a token, and an ammo magazine from a crate. As always, you can save your game, heal or manage your inventory here.
- Leave the safe room via the door next to the tools box. A cutscene will trigger as you move forward.
- Head left and unlock the green gate, but don’t go through it. Head up past the big climbing frame and through the green double gates at the other side.

- Go right and follow the corridor around, and go up the stairs to exit via the green double gates.
- Enter the leftmost hut in the top right corner. There’s a note on the table and some shells in a cabinet.
- Leave, and go into the greenhouse.
- On the left, you’ll find two tokens on a table. On the right, there’s an ammo magazine.
- At the end of the room, pick up the note and the green triangle key. The note tells you how to make ‘Barry’s Jam Solvent’, which requires weed killer, film developer and trumpet polish. Looks like that’s what we’re finding next.
- Leave the greenhouse and use the green triangle key on the right hut door. Pick up the battery and the note from the table. You’ll find a Health-o-Lax and a magazine by checking the lockers. Leave the hut.
- Go back through the green double gates and follow the path to the left. Right at the end you’ll find a yellow box. Open it, insert the battery and flip the switch to provide power.
- Follow the path back around, and you’ll find that the lift is now working. Push the switch and open the door.

Sewers
- Make your way around the circular obstacle to move forward and make your way up the yellow stairs at the opposite end of the room. Go through the door at the top.
- In here, go up the small set of steps and head right. You’ll find a lockbox with a green triangle on it. Open it with your green triangle key. Inside is the other half of the medallion that you found right at the start of the game. If you’ve not got enough room to pick it up, there’s a safe room just to your left where you can manage your inventory.
Note: If your inventory and storage is getting a bit cluttered, you can get rid of some stuff. Look out for any item with a tick at the side of it. You’ll see it next to things like keys. If it’s ticked, it means you’ve used it the maximum possible number of times, so you can safely discard it.
- From the lockbox, turn around to enter the corridor ahead. Beware of the puppet just ahead. Unlock the door with the green triangle and enter.
- You’re now in a film storage room. Make your way around the shelves, grabbing the note from the shelf and the film reel from the chair as you go. At the end of the room, pick up the film developer from the desk. One down, two to go!
- Leave the room the way you came in. Watch out for the puppet again. Head left, then enter the door on the left to enter the safe room.
- Exit the safe room through the opposite door, and you’ll be in the area with the yellow railings again. Make your way down the left-hand side of the room, watching out for puppets as you go. Go through the door marked with the green triangle.

- In the next room, go up the steps straight ahead and first head left around the water tank. Inspect the box on the side. Place the pump piece that you found earlier here. Now, inspect the valve on the front of the tank. A cutscene will kick in.
- After the scene, go back down the steps. Examine the lockers on the left to find some shells. Leave the room. Go left and up the stairs, keeping left until you reach a blue door (not all the way up to the top).
- Move through the corridor and follow it around to the right. Leave via the door at the end that leads back to the circular area.
- Go left and take the elevator back up to the garden.
Garden and Backlot
- Head right around the room – beware of a dog-like puppet that will come at you. Shoot at it until it falls down momentarily, then run past it. You don’t seem to be able to fully knock it down. Go through the green double gates — you’ll be back in the playground area.
- There’s another dog in here. Go around the edge of the area and through the single green gate. Leave the garden area to head back outside.
- Head left and enter the office building again.
Note: At this point, you’ll seemingly encounter dogs in various areas now. It’s better to just try to avoid them when possible, but if they’re blocking your route, knock them down then run past before they get back up.
MFN Studio Offices
- We’re now heading to the Music Studio now that we’ve got a green triangle key to open the door. Head straight across the hall and go down the corridor behind the stairs. Turn right at the end of the corridor, and unlock the green double doors.
- Inside the music room, look in the sound booth. Pick up the note and the token on the table. Look in the cupboards to find an ammo magazine and a Health-o-Lax.
- Head to the other side and into the recording booth on the right. Pick up some ammo. In the recording booth on the left, you’ll find trumpet polish. That’s two out of three.

- Before we hunt down the weed killer that we need, let’s pay a visit to the projection room. Leave the music studio and go back to the main hall. Go up the grand staircase and follow it around, entering the double doors on the left at the top.
- Go through the exhibit room, exiting via the double doors at the opposite side. In the room with the shooting gallery, head left up the stairs and go through the door at the top.
- We’re now in the projection room. Interact with the projector second from the left and insert the last film reel. Inspect the console in the centre of the room and press the ‘2’ button to play the film.
- Leave the projection room via the way you came and head back through the room with the shooting gallery, into the exhibit room and through the double doors into the main hall. Turn right and go down the first flight of stairs and enter the double doors ahead.
- Move forward into the cinema area to trigger a scene with the big green puppet. You’ll get an achievement/trophy for your troubles.

- Leave the cinema area and go back through the double doors into the main hall. Turn right and head up the stairs. Enter through the double doors on the right. Head right in the next room, through the double doors at the end.
- Make your way down the corridor, going through the double doors right at the end. In the next area, go up the stairs, going through the door at the top.
- There are now puppets in the room with the busts – deal with them! Unlock the door on the left with the green triangle key.
- Go through the door and follow the corridor into the next room. You’re now in a conference room. You’ll find a cheat tape to pick up on the table just to the right. There’s also some tokens to pick up on the other side of the table.
- Leave the conference room and go back through the corridor and into the room with the busts. Just to your left is another door – go through here into the crawlspace/safe room. Save here and manage your inventory, etc. Make sure you’ve got both pieces of the medallion in your inventory. When you’re done, head up the stairs and through the door.
- You’re now in the waiting room near the CEO’s office. Take the elevator, and pass through the next room to go through the double doors.
- Once again, you’re in the main hall. Go right, and leave to go back outside again. Head across the outside area to the door marked Aviary. Inspect the door, and insert the two medallion pieces. Go through into the aviary.

Garden and Backlot
- The aviary is a safe area – you’ve got a new, second tool box here to give you more space to organise your inventory. Huzzah!
- You’ll find a yellow box to the right of where you came in. Open it up and flick the switch to turn on the power. That opens up a second box just to the right of you that contains a battery.
- To the right of the big shutter at the end of the room is an Index machine. You can use this to convert magazine ammo to Punctuation grenades.
- Go up the stairs and interact with the yellow box that you encounter on the way. Place the battery inside, but don’t flip the switch for now.
- Continue going up the stairs and keep going forward until you find another yellow box. Flip the switch, then go back down the stairs.
- Go to the yellow box at the bottom of the stairs and flip the switch to off. Just behind you, there should now be an open cache of useful items. Take what you can. This seems to suggest something nefarious is waiting for us…
- Go half way up the stairs and flip the switch in the yellow box to green. The big shutter door should now be open. Go through it.
- There’s a bag of dog food on a bench straight ahead. Pick it up. Open the double gates to the right and walk through. Before heading forward to enter the Stage 4 area, there’s an ammo magazine to collect on a barrel down to the left if you need it. There’s also duct tape at the other end of the area.
- When you’re ready, enter the darkness to go into the stage 4 area.
Stage 4
- Turn to your right to pick up the cheat tape on a table. There’s also an ammo magazine and a Punctuation grenade on tables in this area. Head towards the other side of the room, dealing with the puppets as you go.
- Unlock the door at the end to go through to the next area. Turn right, and right again, and go through the double doors with the blue circles.
- Go forward and enter the building on the right with the red doors. This area will now have small puppets in, so be careful as you move through. Unlock the door with the red diamond and go through. You’ll find another cheat tape inside.

- Leave the building with the red doors to get back outside onto the main set. Head left and go through the ‘exit’ doors that you came in from.
- Go down the stairs to your right, and through the door at the bottom. Drop down the ledge in the next room, and follow the room around, watching out for the puppet as you do so (go when there’s a green light). Go through the door just to the left of the puppet.
- In the corridor, open the first door on your left with the green triangle key. Go inside to find the playground key. Leave the room, and carry on making your way down the corridor. Go up the small set of steps and out of the door.
- Go down the stairwell and through the door at the bottom. In the next room, unlock the red diamond door to your right.
- Once through the diamond door, head right and keep walking until you reach a shutter. Open it using the control panel on the left. Go through, and you’ll be in some sort of garage. There’s a cheat tape on the floor just to the right as you enter. Go through the exit at the other side of the door — you’ll be back outside.
Garden and Backlot
- Head to the public park sign across the way, avoiding the dog as you go. Go through the public park gate, move forward and go through the gate you’ll reach on your left.
- Back in the playground area, head up the wooden stairs of the climbing frame just ahead. There’s another dog for you to avoid or momentarily incapacitate here. Unlock the door at the top of the stairs – watch out for another door, too.
- Keep climbing the structure until you reach the top. You’ll find a peg board on the wall and some pegs in a bucket. Take the pegs, and inspect the game board.

- Each peg has a picture of a puppet on it, and each one needs to go in a specific location on the peg board — which looks very similar to your actual map. We need to work out what puppet peg goes where, and that means visiting each peg hole location and looking for a painting of a puppet.
- Here’s where each pin should be:
- Top left pink pin: Green hair and hat
- Top right pink pin: Pink puppet with yellow hat and jacket
- Bottom left pink pin: Brown puppet with big mouth
- Bottom left pink pin: Bird with glasses
- Top yellow pin: Blue sock puppet
- Middle left yellow pin: Three puppets
- Middle right yellow pin: Green puppet with huge mouth
- Bottom yellow pin: Pink puppet with blond hair

- Once all those pins are in the right place, a door will open up. Turn around from the peg board, and you’ll see an open door with weed killer behind it. Pick it up. You now have all three items to make the solvent.
- Make your way back down the wooden climbing frame. Head through the double green gates and make your way around the corridor to the double green gates at the other side.
- In the next area, go to the other side where the dog kennels are and pour the dog food you picked up earlier in the three dog bowls. Ring the bell on the wall by the bowls to summon the dogs.
- Head into the greenhouse and go towards the back, where you can mix the solvent. Place the LumaLux film developer, WeedOut! weed killer and Virtuoso trumpet polish into the bottles.

- Once they’re added, turn on the water tap to the right, then press the red button for 1-2 seconds, the green button for 1-2 seconds, the blue button for 3-4 seconds, then finally the green button for 2-3 seconds. If you’ve done it right, it will ding, and a bottle of solvent will appear underneath the machine. Take it.
- Leave the greenhouse, go through the green double gates ahead, go through the corridor and out of the other green double gates. Head forward and right, passing the playground to go through the single green gate. Leave the gardens by following the path to the right and going through the gate.
- Once outside, enter the 123 building with the revolving doors, just to your right.
Penthouse
- You’re now in the hotel. To the right of the main entrance is a lift sealed with a weird purple goo. Use the chemical solvent you’ve just created on it. Once the goo has gone, press the button to summon the elevator.
- Head right, and grab the note on the table at the left-hand side of the room. There’s also an ammo magazine on the other side. Go through the door with the scribbles on it.
- There’s a Health-o-Lax on a table on the right-hand side if you need it. Go through the blue door on the other side of the room.
- Inspect the podium just ahead of you. There’s an unfinished jigsaw puzzle – looks like we need to find the missing pieces.
- Go left, and head through another blue door to find a safe room. There’s a note on the table to your left. There’s also a token to collect. Remember to safe your game and manage your inventory if oyu need to. When you’re done, go back out the way that you came in.

- Go up the stairs and you’ll find four doors, all with different colours. Let’s start on the left-hand side, and go through the green door.
- On the desk in front of you, you’ll find some duct tape. You’ll also find a penthouse map – make sure you pick it up. Leave the room, and go through the next door – a blue one.
- In the next room, inspect the PC. Click on the lock icon, then click ‘Log in’. Choose Cam A, then click on the picture to open it. Press the X button to go back, then click on Cam B. Once again, click the picture. Keep pressing the red Xs to leave the PC. You can click around to see some photos and documents if you want.
- Before you leave the room, check the drawers nearby for an ammo magazine and a token. Leave, and go through the third door – the purple door.
- You’re inside a kitchen. Look on the wall – there’s instructions of what you need to do here, but we’ll walk you through it.
- Inspect the shelf on the right and pick up the tomato, the milk and the cans. Next, inspect the counter with the pictures of a knife and a leek. Place the tomato then select the knife on the right-hand side. You’ll now have ketchup.
- Go to the cardboard microwave and place the milk inside. Exit out of the microwave, and wait until it’s done. Take the cheese.
- Put the cheese on the counter, then chop it with the knife to get a banana. Take the banana.
- Now, put the ketchup in the microwave. Wait for it to ding, then take out the hot sauce.

- Next, place the tins on the cooker. Then look away for 20 seconds (remember, a watched pot never boils!). After 20 seconds has passed, take the soup.
- Place the soup, the banana and the hot sauce in the fridge, and close it. Wait five seconds, and you can now retrieve the cardboard key from the fridge.
- Leave the room, and head into the final door — the red and white one. In here, deal with the puppet then interact with the display to switch the cardboard key you just picked up for a purple pentagon key. Open the book on the right-hand chair and examine the paintings — make a note of the number of each painting.
- Head back into the first door (green). Open the toy box using the purple pentagon key and take the puzzle piece inside. There’s also a roll of duct tape here.
- Leave the room, and go down the stairs. Go back through the door leading out into the foyer area. Head to the right, where a new alcove has opened up. Look in the drawers to find a puzzle piece and some shells.
- Walk across the hall where a second alcove has opened up. Look at the bookshelf, and examine the purple pentagon book. Unlock the book. Back out of the bookcase, and interact with it again to go through a secret passage.

- In the secret area, follow it around and go through the opening at the other end. You’re in a pool room – deal with the puppets. Make your way across and go through the blue door.
- Now, you’re in a hallway with lots of paintings. Some of these will look familiar, from the book you recently found. You need to press the buttons under the paintings in a particular order:
- 1: Triangle, circle and square
- 2: Dog-like animal
- 3: Blue and yellow cubist-style blocks
- 4: Dots and lines that look like a map
- 5: Banana, apple and grapes
- Once you’ve pressed them all in the right order, the final painting will slide up, revealing a puzzle piece and some ammo.
- Carry on making your way through the corridor and go through the green door at the end. In the next room, grab the note on the table just to your left. There’s also a Punctuation grenade and an ammo magazine on other tables. Go through the blue door ahead to find yourself in another corridor.
- Make your way through, watching out for the puppets as you go. Unlock the blue door at the end. Go through, and you’ll find yourself back in the safe room.
- Use the purple pentagon key on the toy boy, and pick up the final puzzle piece. Before continuing, remember to save, heal or manage your inventory if you wish.
- Go out of the door just to the left of the toy box, and go to the podium with the jigsaw puzzle on it. Click each missing piece to place them in. Once the puzzle has been completed, the puppet will stop playing the piano.

- Walk up to the puppet and a cutscene will trigger. After the scene, pull the lever next to the piano. You’ll find yourself ascending upwards.
- In the new aarea, first head to the door to the left. Pick up the note on the console, then press the big red ‘stop’ button. Huh. Pull the lever on the wall, which will open a door across the corridor.
- Leave and go through the newly opened door, which leads out on the roof. Go right on the roof, then climb the ladder leading up to the bottom of the aerial.

- Climb the next ladder, going all the way up to the top. Once you’ve reached the top, climb again – this time up to the aerial itself, where a cutscene will kick in.
- After the cutscene, move forward and read the note on the noticeboard. Turn left and push the button to call the elevator. The telephone will start ringing, so go and answer it. You now have a torch!
- Go through the door to the left of the phone box – you’re in a safe room. The usual drill: save, heal, manage your inventory. There are some tokens on the floor if you need them. Leave the safe room.
- Head left down the corridor, and instead of using the elevator, head into the dark area to the right. You’re in a backstage area. Make your way around the edge of the room. Watch out: you’ll soon find yourself being chased by several puppets. Keep moving, and at the end you’ll find a wooden plank to climb up then drop down.
- Down here is a monstrosity of multiple puppets joined together – get ready to run and shoot to avoid getting attacked. Shoot it enough times and it’ll fall to the ground. Phew.

- Once you’re done fighting, pull the emergency lockdown release lever on the wall. The shutter to the left will open. Head through it, and go through the dark entryway to the right, which leads back to where we started in this area.
- Now it’s time to use the elevator. Push the button again, and you’ll go inside.
- In the next room, pick up the note on the desk. In the right-hand corner, you’ll find a cheat tape on the floor. Unlock the door ahead and go through it. You’re now back in the hotel. Go down the stairs, then head to the revolving door entrance and leave.
- There’s a final cutscene, where Ricky will ask you if you’ll help him restart the studio. You’ll get to choose yes or no. Make your decision, then get in the truck. Interact with the steering wheel to start driving.
That’s it: you’ve completed My Friendly Neighborhood, and we hope our walkthrough came in handy. Now you’ve finished, you’ll have unlocked cheats as well as some additional modes, such as speedrun mode, free-cam mode and ‘Neighborhorde’ mode. And if you’re up for the challenge, you can now play on Veteran difficulty.
Did you find this guide helpful? Please consider making a one-off donation to GameSpew. All money raised goes directly towards the running costs of the site and helps us continue to make guides, walkthroughs and more content.