Hollowbody walkthrough – full guide and puzzle solutions

If you’re planning to jump into Hollowbody, a chilling tech-noir survival horror game in the vein of Silent Hill, you’re in for a treat. We loved our time with the game, calling it one of the best examples of survival horror games in recent years. It really is — but it can also be a little tricky at times, thanks to its wealth of puzzles. That’s where we come in: our Hollowbody walkthrough will guide you through the game, start to finish.
You’ll find solutions to all of Hollowbody’s puzzles here, as well as guidance on navigating some of its maze-like locations. There are a few things to note, though: some of our directions might not be quite so precise, so it’s worth you exploring more open areas yourself to make sure you don’t miss anything. We also haven’t mentioned very often when enemies appear. Once you’re out of the block of flats, they’re practically everywhere, so be on guard.
We’ve broken up the guide into chunks based on location, and you can jump to the relevant section using the table of contents below. We’ve also bolded important items of interest: either collectibles or items that you need to interact with to continue.
Note: this walkthrough was updated on 4th June to reflect updates to the PC version of Hollowbody and its release on consoles.
Prologue: the beach
- Follow the man, Charlie, down the hill, engaging with the conversation as you go.
- Once you reach the beach you’ll talk to two other figures. When you’re done, you’re free to explore the beach. You’re looking for a man called Mark: head back up the path where you came from, go past the tent, then look for another way down to the beach ahead.
- Keep heading forward, running parallel with the sea. You’ll eventually reach a cave in the rocks. Pass through it.
- Keep moving through the cave. You’ll eventually reach a large hole and a cutscene will play out.
The Tower block
- After the cutscenes, you’re now in control of Mica. Head down the street. Use R3 to toggle your torch on to see a little better. In the trailer at the bottom of the road, you’ll find a Repair Spray. Pick it up and use it (enter your menu, select your ‘items’ then scroll across to find the Repair Spray).

- Turn left at the trailer, heading through some blockades. Use the COTAC radio in your inventory to get signal 1.
- Head back towards the trailer then go left, carrying on down the main road. Keep following the road around until you can go no further – there should be a document on the floor to collect. Now turn around and go back until you reach a wrecked mech collapsed onto a building. Across from it, you’ll find a pathway leading up to a block of flats. Take the path, passing through a playground.

- To your right you’ll see an illuminated window that’s open. Nearby is a dumpster: move it to climb onto the ledge then through the window.
- In the room you find yourself in, there’s a house register to pick up on some shelves. Just by the door is a ‘Staff only’ box: it’s locked, but looks like we can pry it open if we find the right item. We’ll come back here later.
- Move through the door and turn left down the corridor. Head up the stairs, then up the next set of stairs. Go through the open gate, take one right turn then a left until you reach door 2.14. Look down the hole in the floor and note the dead body. Leave the apartment.
- Head left back down the corridor and go straight on until you come to an unmarked door. Go through. There’s a newspaper article to pick up on the table. Out on the balcony, you’ll find revolver ammo. In the next room you’ll find a dead body with a keycard to 2.3 in his hand. Take it.
- Leave through the door you came in from then go into door 2.10 just across. In the main room, you can use your COTAC device from your inventory to receive signal 2.
- Leave through the front door and turn left down the corridor, then take the first left turn, then the next right. Just to your right should be door 2.3. Use the card from your inventory to open the door.
- Jump down the hole in the floor to get to the floor below. The phone by the door will start ringing – answer it. (You can save your game here).
- Walk into the bedroom and pick up a child’s drawing from near the bed. In the next room, you’ll find a hammer embedded into a family portrait. Take it.
- Head into the bathroom and interact with the radiator to pull it off the wall. Now, use the hammer on the plasterboard to make a hole through to the otherside. Crawl through.

- At the other side, move up the corridor to the end to investigate the body and the battery. Take the portable battery. There’s also an ammo crate you can stomp on (press the Triangle/Y button with a weapon equipped). Head back up the corridor, taking the left turn. At the end, turn right to find another ammo crate, then turn back around and move up the corridor. You’ll eventually reach a door with a club sticking out of it. Take the club then, from your menu, equip it.
- The door will open: go inside. Head right through the apartment: there’s a letter in the kitchen to examine. Go into the next room and get prepared to fight.
- Once you’ve defeated the enemy, you’ll find that there’s a safe on the wall that you’ll need to get open.
How to open the safe in Helen’s bedroom in Hollowbody
There’s a safe in Helen’s bedroom, and next to it is a graduation picture. We need to work out the year she graduated. There are three pieces of information to find around the apartment:
- The letter in the kitchen tells us she was born in 2025;
- A photo by the bed shows her 30th birthday with a three-year old child;
- On the wall in the bedroom is a graduation photo and she’s heavily pregnant.
So: she turned 30 in 2055. Take away 3 (the age of the child) and we have 2052. That’s the safe combination. Open it to get an old key.
- Leave the apartment, turning right up the corridor, then turn right. Get ready to fight an enemy. Turn left, and use the old key on the gate at the end of the corridor.
- Go down the stairs, and head back to the room we first started in. Use the hammer on the box on the wall that we couldn’t open before. You’ll get a ground floor gate key, a card writer and a note.
- Leave the room and head to the gate in the corridor. Use the battery on it to melt the expanding foam. You can now use the GF gate key to open it.
- In your inventory, combine the 2.3 room key with the card writer to create a new Master Key. You can now open any door in the building.
- Head into door 0.2 to find a Repair Spray in the bath tub. Leave the room and take the next right in the corridor, then go right at the end until you find room 0.1. Inside you’ll find a note in the bedroom and a repair spray in the bathroom.
- Leave the room and go back down the corridor, taking a left turn and then a right to find room 0.5. There’s a note on the resident to pick up. Now leave and enter room 0.6 to find some ammo.
- Head back out into the corridor and squeeze under the half-open shutter.
- At the other side, go through the first open door. Pick up a notice to tenants on the table. Use the phone by the TV. You can save here if you want to.
- Head into the bathroom and examine the makeshift distillery. Pick up the bottle of alcohol.
- Leave the apartment and turn left down the corridor. Eventually you’ll reach a pile of trash. Use the alcohol with the trash then use your lighter on it to set fire. The fire alarm will go off and so will the sprinkler system.

- Go through the door just ahead of you. In here you’ll find a letter on the sofa. On the wall is a guitar, which you can take as a weapon. In the kitchen is a pair of chopsticks you can pick up.
- Go into the bathroom: you can use your COTAC radio here to get signal 3.
- Go into the bedroom and through the large hole in the wall. On the wall in the next room is a locker with a cheap padlock: use your hammer on it.
- Inside you’ll find some sort of electricity meter. You need to get the gauge to 600, but a switch is missing. Use the chopsticks on it.
- Go through the doorway and pick up the note next to the elevator. You’ll find a solution to power up the elevator here, so go back to the meter.
How to power the elevator in Hollowbody
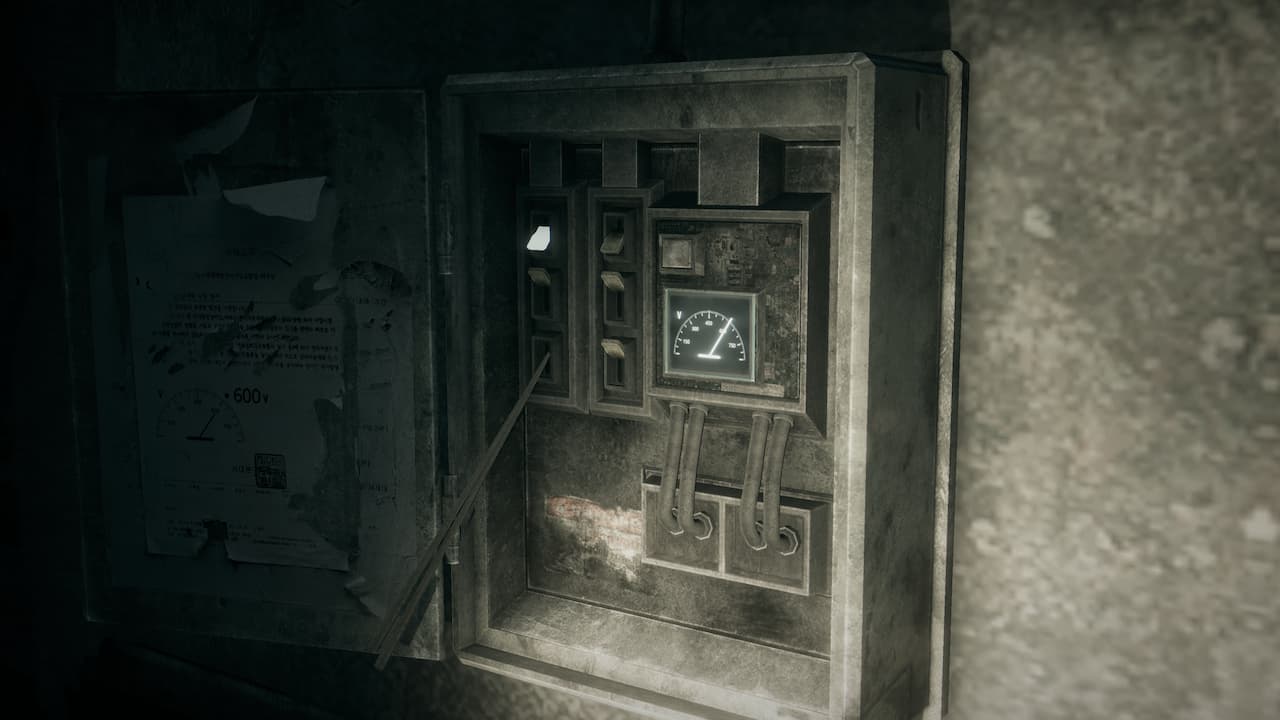
When you’ve found the note by the elevator in the tower block of Hollowbody, you’ll have everything you need to get the elevator powered. The note has a pattern on it that shows you which position each switch should be in on the power meter — Os are down, and Xs are up:
O O
X X
O X
Go to the meter, and make sure you’ve used the chopsticks to replace the missing switch (as we laid out in #30 above). Move the switches into the position as laid out in the pattern, then push the square button next to them: hey presto – the elevator will now have power.
- Go back out into the hallway and interact with the panel at the side of the elevator. Inside, press the ‘up’ button.
- Once you reach the top, exit the elevator, and leave through the door next to you to reach the roof of the building.
- There’s a man standing on a ledge that you can talk to. The choices you make here lead to one of two different outcomes and endings on your first playthrough. We chose to say “That’s a long way down”, “Maybe we should talk inside”, “I forgot to ask your name…”, and “Why do you keep checking your watch” before choosing to answer the radio, which locks you into the Reunion ending. If you manage to get the man to not jump off the ledge, you’re locked in for the Riven ending.
- When you regain control, go look at the note by the tent. It says 8053.
- Go back down in the lift. When you get out, interact with the keypad by the double door and use the note on it. Go through the door.
The park and houses
- We’re now outside. Head onto the road ahead, then take a left turn followed by a right. When you pass through the red gate, look for an opening on your right just ahead – there you’ll find a quiver of arrows.
- Keep moving down the road and pass through another red gateway. Ahead it looks like there’s a dead end – interact with what looks like a partly open door shutter to pass through.
- In the next area there’s a phone box on your left. Answer it (and also save your game).

- Just past the self help sign further up the street you’ll find a healing spray on a bench. Now go down the path just to the right of the phone box and follow it. When you reach a crossroads, go left. Examine the body on the fountain and take the wooden bow. Combine the wooden bow with the quiver of arrows to make the bow and arrows.
- Go back, and now take the path to your left (originally the path leading up). Keep following, and eventually you’ll reach a fork in the path. Take the right fork and you’ll find a body on a gate. Examine it, and take the wallet on the floor. Note the body has a heart-shaped lock on its chest. Inspect the wallet to find a digilock house key. Inspect again to find the house number: 21. It seems we need to find a specific house.
- Turn around and go back down the path. Head a little into the park ahead and look for a strange mass nearby – here you can interact with your COTAC radio for signal 4.
- Go back to the path and keep following it back the way you originally came. When you reach the crossroads, go straight ahead to leave the park.
- Make your way under the shutter in the large barricade to enter the previous area again. Here, we’re looking for house 21. Keep following the road and you’ll eventually reach it – it’s on the right side pf the street.
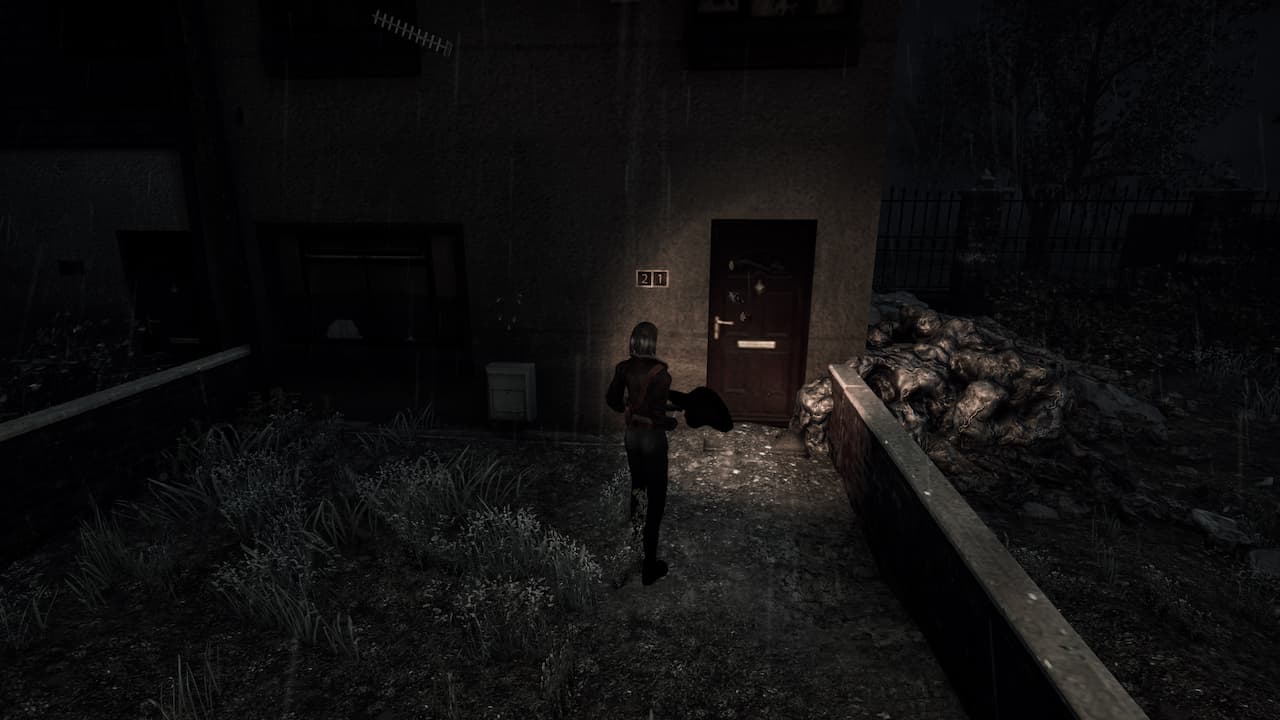
- Use the key on the door and enter the house. Walk through and interact with the TV monitor. Get ready to fight a huge enemy. Interact with the TV on the desk once it’s dead, and take the camcorder.
- Look in the bathroom to find ammo. Head upstairs. In the first room at the top, you can use your COTAC radio for signal 5. In the next room you’ll find a tripod. Set up the camcorder on it and interact with it.
- Leave the house and go across the street to the house that the camcorder was pointing at. The door is open, so go straight in.
- In the living room you’ll find some ammo on some boxes, and a newspaper article on the sofa.
- Go through to the next room and examine the fuse box that’s sparking. Go into the bathroom and examine the body in the bath. Go upstairs.
- In the first room you come to, take the makeshift axe out of the body on the wall. Examine the wardrobe and take the coathanger.
- In the next room along the hallway, there’s a health spray just to the side of the door. On the bed is a child’s drawing. On the desk is a yo-yo. Take it.
- In your inventory, combine the yo-yo and the coathanger to make a makeshift hook.
- Go back downstairs and use the makeshift hook on the bathtub. The water will drain, and you’ll find a heart-shaped key. We reckon this will be for the padlock on the body on the gate, so we need to head back to the park.
- Leave the house and go back the way you came. Re-enter the park and head back to the body you found on the gate earlier.

- When you reach the gate and the body, use the heart-shaped key from your inventory and interact with the gate to open it. You’re now in a graveyard. Great. Cross through and go head to the church.
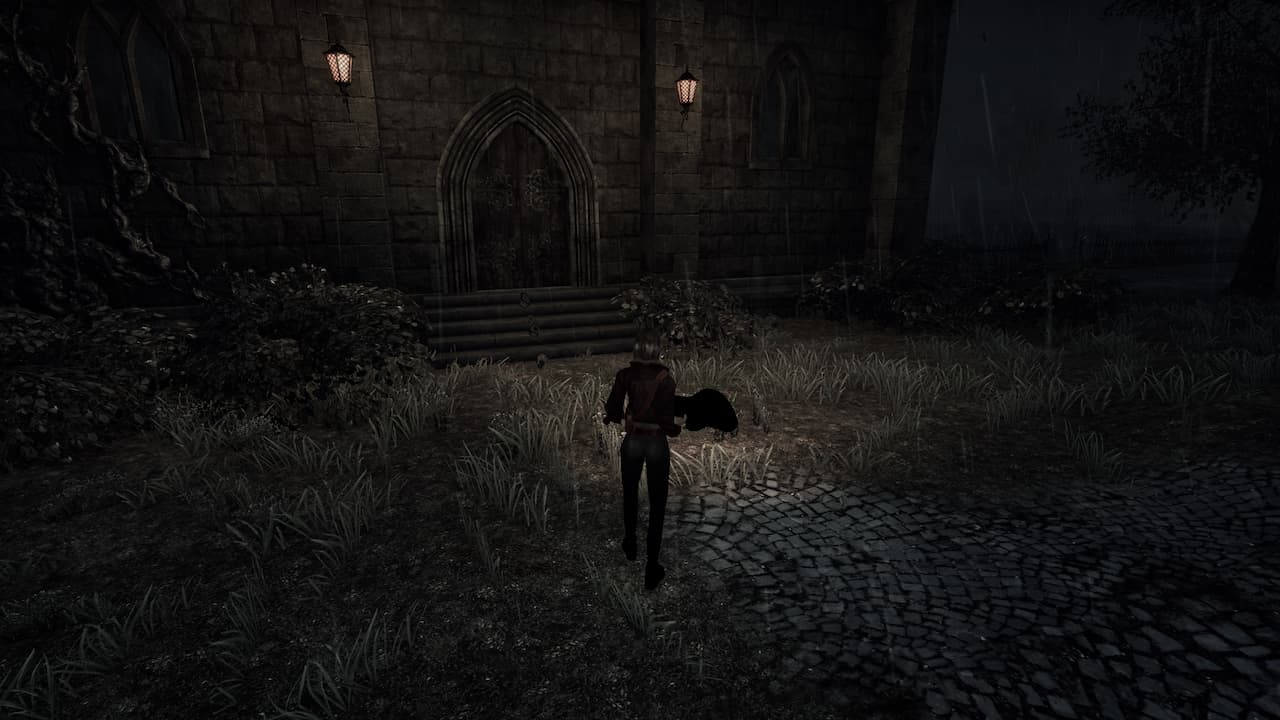
- Go inside the church and straight ahead. There’s a shotgun on the altar.
- Back near the entrance to the church is a table with 10 candles. There’s a puzzle to solve here.
How to solve the candle puzzle in the church in Hollowbody
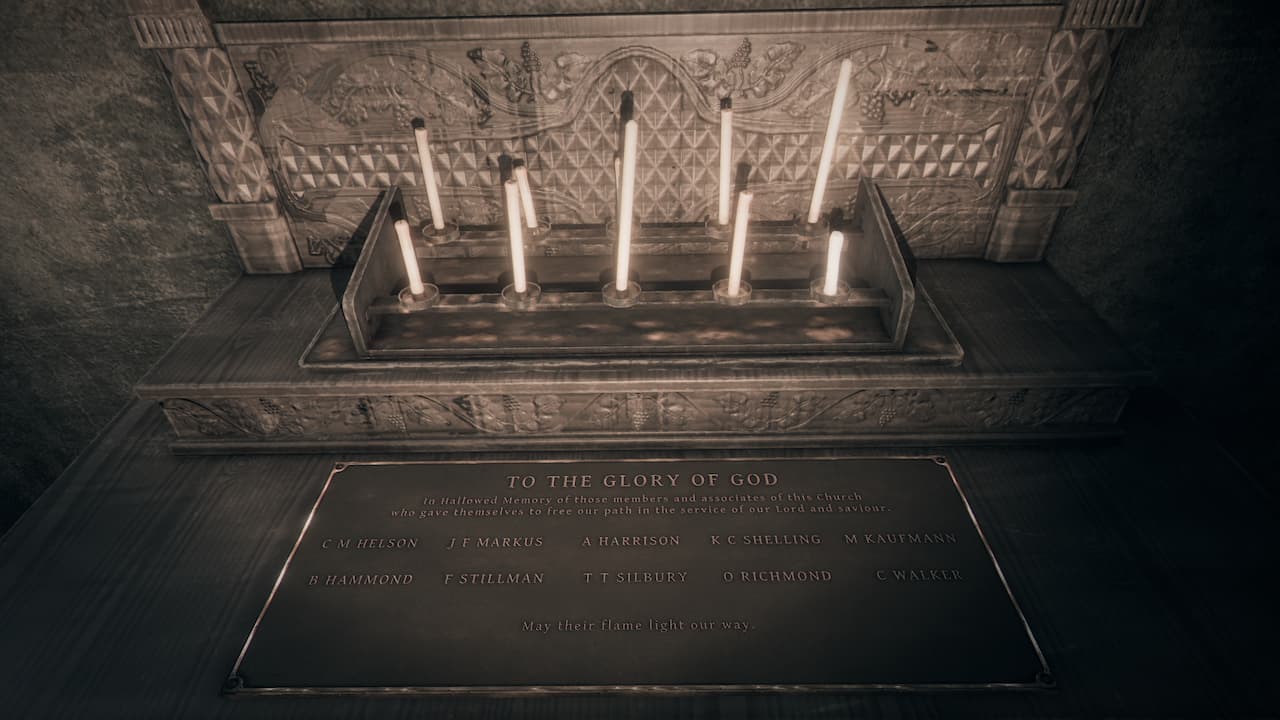
Under the candles in the church in Hollowbody are ten names. Make a note of them, then head outside. In the graveyard, you’ll see that five graves are illuminated. The names on these graves match some of the names on the candles. We need to light only the names that are illuminated in the graveyard.
So, using the lighter, light the candles for:
- A Harrison
- B Hammond
- F Stillman
- O Richmond
- C Walker
Note: this puzzle may be randomised, so you might have to go into the graveyard and check the graves for yourself
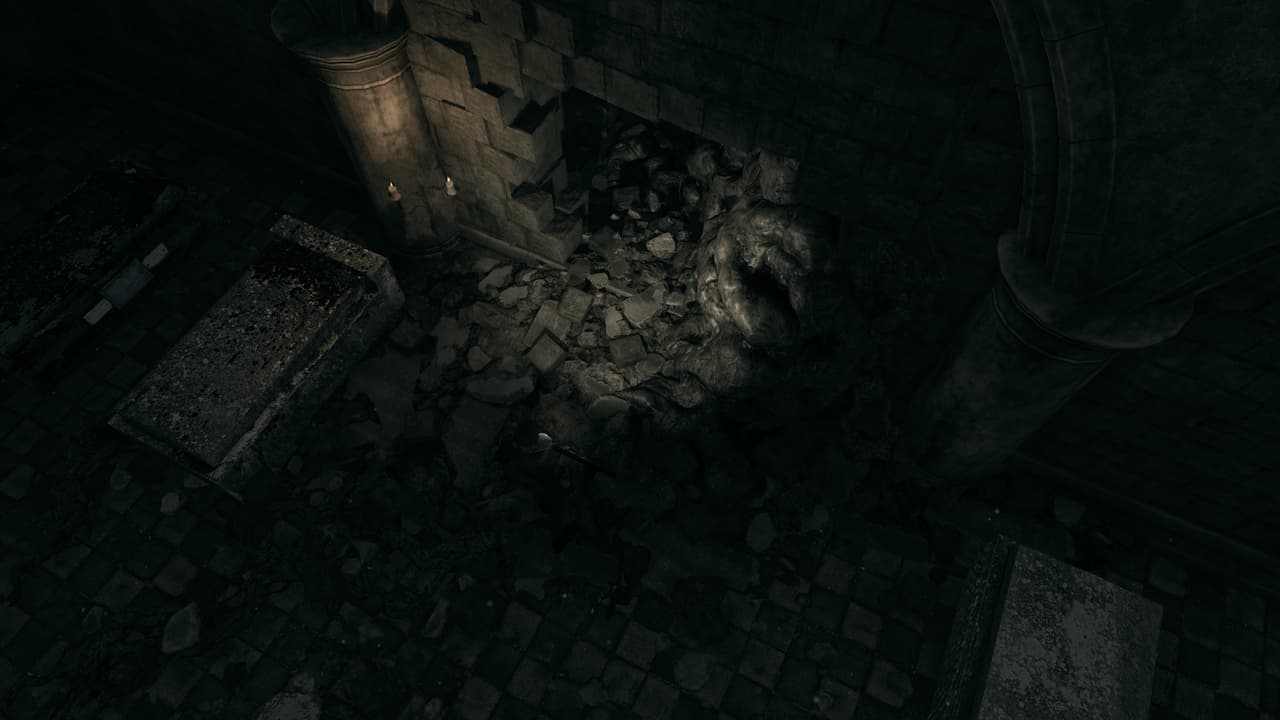
- A hidden compartment will open up in the church. Head down it. After the scene, in the crypt, there’s a Repair Spray on one of the tombs. Go through the hole in the wall to enter the Sewer area.
Sewer
- Follow the corridor down. When you reach the sewer, make your way around the outside, following the blood on the floor until you find a gate with intestines on it. Examine it.
- From there, backtrack a little and take the path going to the left up. Go down the first tunnel you come across – you’ll eventually find a room with heart on a desk. Pick it up.
- Go back down the tunnel and turn right at the end. Go down the next tunnel you come across. Follow the passageway until you come out into another open area. Move to your character’s right and enter another tunnel. There’s a chamber to your right in this tunnel containing another a heart for you to pick up.
- Keep going down the tunnel until you find another opening. Head right and enter another short tunnel to find yet another heart for you to pick up at the end of it.
- Head back through the two tunnels you just came from, then head right in the open area. Ignore the first tunnel you encounter for now and enter the second: the fourth and final heart you need is just ahead.
- Back out into the open area and head right, entering the tunnel you just ignored. It should lead to a room with a strange altar with hands. Place all four hearts in the hands.
- Leave the room via the tunnel and you should find yourself back in an open area that looks familiar. Head through the other long tunnel in this area and you’ll find it eventually leads to another open area with a ladder. There’s a body at the bottom. Examine it to find some ammo. Climb up the ladder.
The streets
- You’re now out on the street. Head for the road and move towards the ambulance on your right. Just past the ambulance, to your left, is a phone box. Answer it, then save your game.
- Go across the street and into the alley a little – there you can use your COTAC radio to get signal 6. Now return to the phone box and go down the alley to the left of it. Climb though the window at the end.
- In the building, investigate the fuse box that’s flashing red – try to flip the switch to turn on the power. Go to the toaster and take the scissors. Go back to the fuse box and flip the switch again – you’ll start a fire so leave the building via the window through which you came.
- Head back down the alley and turn left at the end. Follow the road around until you reach a dead end. A window on the left will shatter – pass through it.
- Follow the road, taking a left turn, a right turn, then a left turn again, until you eventually reach a ‘Star’ shop that you can enter on your right.

- Inside the shop, in the top right corner, you’ll find a pack of fuses. Take them. Go through the ‘No Entry’ door at the side of counter .
- Interact with the fuse box, and place the replacement fuses you picked up inside them. The shutter at the back of the room will now half-open. Before you go through, grab the newspaper article to the right of the room. Go under the shutter.
- Outside, move left to find a discarded letter by the dumpster. No go to the road and follow it around to the left. Take a right turn when you can, and keep an eye out for a playground on the right ahead. You can use your COTAC radio to get signal 7 here.
- Return to the road and keep following it until you reach a barricade with a hand scanner on the left. Investigate it.
- Now go back the way you came, and where you previously turned right head straight on instead. You’ll find a body up against a building on the left that stands out. Use the scissors on it to get the severed hand.
- Return to the hand scanner and use the severed hand to unlock the door to the right of it. Go through to the next area.
- Follow the road to the right. There’ll be a delay notice document to grab on a tree on the right. Eventually you’ll reach the station: look for a ‘No Public Access’ sign on the left. Go through and down the stairs.

- Head left and go through the ‘Kingsway Court’ signage. Move down the escalator.
Train station
- Go straight forward and through the gate near the ticket machines. In the next area, a phone is ringing: answer it (and also save your game).
- From the phone, head right, going down the corridor that’s glowing red at the end. Follow it around and go down the stairs. At the bottom, you’ll be able to use your COTAC radio for signal 8.
- Move forward in this area to find yourself in a large room. First enter the restroom with the white door and grab the confidentiality letter in one of the cubicles. Now leave the restroom and grab the plastic explosive from the corpse resting against the wall at the far end of the large room.
- Leave the large room, and in the area just before you go back up the stairs, squeeze through the gate that leads to the platform.

- Move down the platform and jump down onto the track at the end. Make your way slightly into the tunnel where you’ll find a door to go through.
- In this next room is a repair spray. Look at the fuse box on the wall, and use your fuse pack in your inventory to repair a faulty fuse.
- Head all the way back up from where you came – to the room with the phones. This time go left from the phones, going down another corridor. You’ll find a brick wall – use the plastic explosive on it to bring it down.
- Keep going down the corridor and head down the stairs at the end. At the bottom of the stairs, move forward to reach a worksite of sorts. At the entrance is a note on the wall to pick up.
- Move forward to find another large room with two restrooms ahead. Enter the restroom on the right and open the cubicle inside in which there appears to be a corpse. Turn it over and take the gold coins from its eyes.
- Leave the restroom and go back up the stairs to the entrance area. Interact with the ticket machine there and use the gold coins with the ticket machine to get the train ticket.

- Now, go back down the stairs to the worksite area you were just in, and use the train ticket on the machine near the barrier. You can now interact with the gate to pass through.
- Jump down onto the tracks and move left. Eventually you’ll meet a big hole. Oh no. Interact with it and climb down.

- Once down the hole, follow the wires on the ground. When they’ve stopped, keep moving right, and you’ll end up crossing a strange bridge. Interact with the body on the wall and take the detonator out of their hand.
- Go back the way you came and prepare to be chased by… something big and nasty. Run! Each time you pass explosive canisters, press the Triangle/Y button to use your detonator and blow them up just as the monster is next to them.
- You’ll need to explode four lots of canisters before the monster is dead. Once you’ve defeated it, go back to where you found the body with the detonator, and crawl through a hole underneath it.
- After the cutscene, answer the call.
Well done! You’ve now completed Hollowbody – hopefully our walkthrough has been useful.
Did you find this guide helpful? Please consider making a one-off donation to GameSpew. All money raised goes directly towards the running costs of the site and helps us continue to make guides, walkthroughs and more content.