Strange Antiquities walkthrough: Complete item guide and puzzle solutions

You’re in for a treat if you’re playing Strange Antiquities. This narrative puzzle game is all about deducing information to correctly identify items, and following clues to unearth secrets. You’ll need an analytical mind to solve some of Strange Antiquities’ hardest puzzles, but that’s where our walkthrough will come in. Here, we’ve provided a rundown of all 18 days in the game, along with a full guide to identifying every item.
How you use this walkthrough is up to you. You can follow it through step-by-step if you want, or you can simply use our Strange Antiquities item guide to help you identify the objects you’re struggling to figure out. We’d recommend at least having a go at figuring things out for yourself, because that’s all part of the fun. But if you do get stuck, we’re here to help.
How to play Strange Antiquities
The overall gameplay loop of Strange Antiquities sees you serving customers and giving them the item they’re asking for. They will either ask for an item by name, or by its properties. In most cases, you’ll need to identify the item from those on your shelves. To do this, you have a book outlining all objects — it’ll give you clues as to what you’re looking for.
To summon a new customer into your shop, ring the bell on your desk. You’ll also have a series of notes and letters that you’ll amass as you play. You can follow the clues on these by using the map(s) available to you.
You have no time limit on anything you do, so feel free to go at your own pace and spend time examining objects and items whenever you need to.
You’ll want to label everything you identify to help you out in the future. You can write on labels yourself, and you can also change label colours and add symbols if you want to devise your own clever way of finding things in the future. If you don’t want to have to type out item names, you can turn on an auto-label option in the game’s settings.
Too many wrong answers? How to play the dice game in Strange Antiquities
If you guess too many items in Strange Antiquities incorrectly, you’ll need to play a dice game to clear your mind. Get this wrong and you’ll need to start the day over. It’s easy (and kind of fun) to play, though, and once you’re done, you’ll simply go back to the beginning of the customer you were previously serving.
This mini-game is about placing pictured dice in the appropriate container. You have five containers to fill, each requiring two to four dice. If the container shows two cats, then you need to roll two ‘cat’ dice to place in. Stars are wild, so a container showing two stars can be any two matching dice.
Press the ‘roll dice’ button to get started. If you can fill a container, it will light up: click it, then choose ‘bank dice’. You need to place all dice in one container at one time – you can’t place some, then add more on your next roll. You can, however, click on a die to lock it so you don’t roll it again.
How to find your map in Strange Antiquities
You won’t have a map available to you right away in Strange Antiquities, but it’s easy to find. Pan down the screen (using your d-pad on a controller) to access your work desk. There are drawers around the side of it. Open the one on the top right by clicking on it. You’ll find a map of Undermere on the inside. Click it to make it available to you.
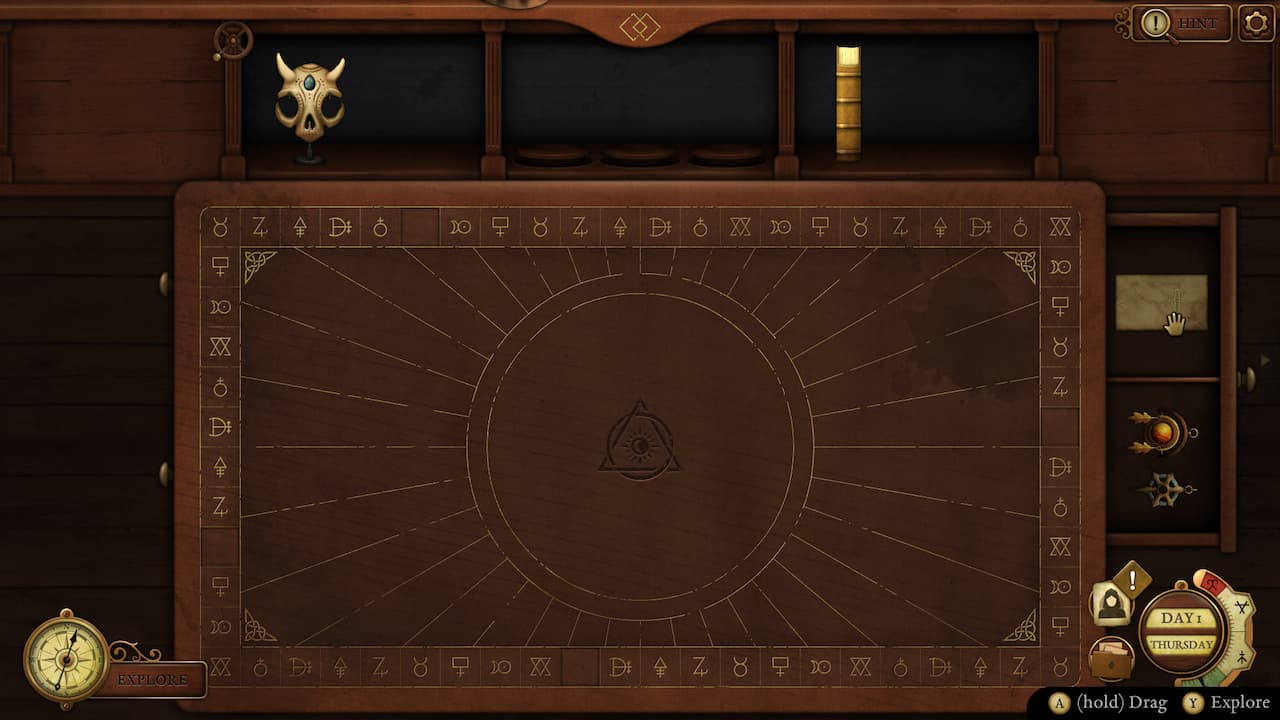
You can now access your map at any time by finding it again in your belongings, or simply clicking on the ‘Explore’ button at the bottom-left of the screen. Later, you’ll get two more maps: a map of a castle, and a catacombs map. Both of these are accessed in the same way, and when you have one open you can flick through them with your shoulder buttons.
Strange Antiquities walkthrough: Day by day
Day 1
- Press the bell to get started.
- Thomas Pope: Needs a Hunter’s Boon.
- Jack Hungerford: Needs a Shadow Hold.
- David Chafer delivers a letter from Charlie Weathers. He tells you about a location. You’ll need to access your map for this. Open it up, and find the Boat Yard – it’s labelled no. 8.
- Stanley Hume: Ossic Ring.
- Edmund Bishop: Voice of Cernunnos.
End of day 1
At the end of every day, you’ll need to trace an item: Click the glowing dot, then trace the pattern as prompted.
You’ll be given a card that contains some sort of clue. Today’s says:
“An escaped prisoner ran north west. He hid in the first building he came to.”
Open the map. The prison is building number 10. Click the building just above and to the left.
Day 2
- Tess Sherwood: Horned Shackle.
- David Chafer brings letter from John Royston. Go to Royston Farm — it’s no. 30 on your map.
- Julia Braddock wants a ‘Moon Heart’. She needs the Selenic Totem.
- Daisy Winters: She wants to teach a thief a lesson. She needs either Binding Seed, which amplifies feelings of guilt, or Zeah, which instils fear and paranoia. It’s your choice.
- Emmett Burrows: Libula
End of day 2
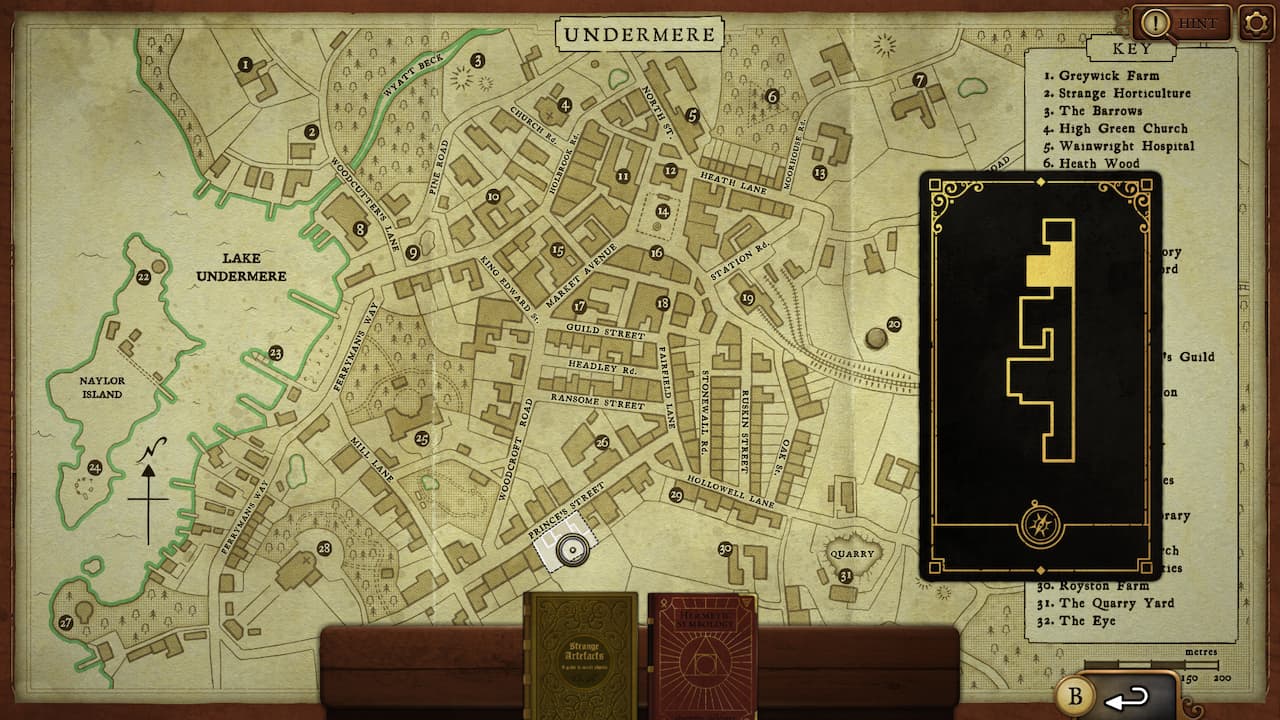
You’re given a card showing a section of map. Match the card you’re given to part of your map of Undermere. It’s on the south side of Prince’s Street, between 28 and 29.
Day 3
- Francesca Robertson: She wants an Evocant. The book tells us it’s an object that’s precisely 1lb. If you want to find it yourself, you’ll find the weighing scales to the right of your counter. The weights are in a cupboard to the right.
- Temperance Parker: Shield Charm
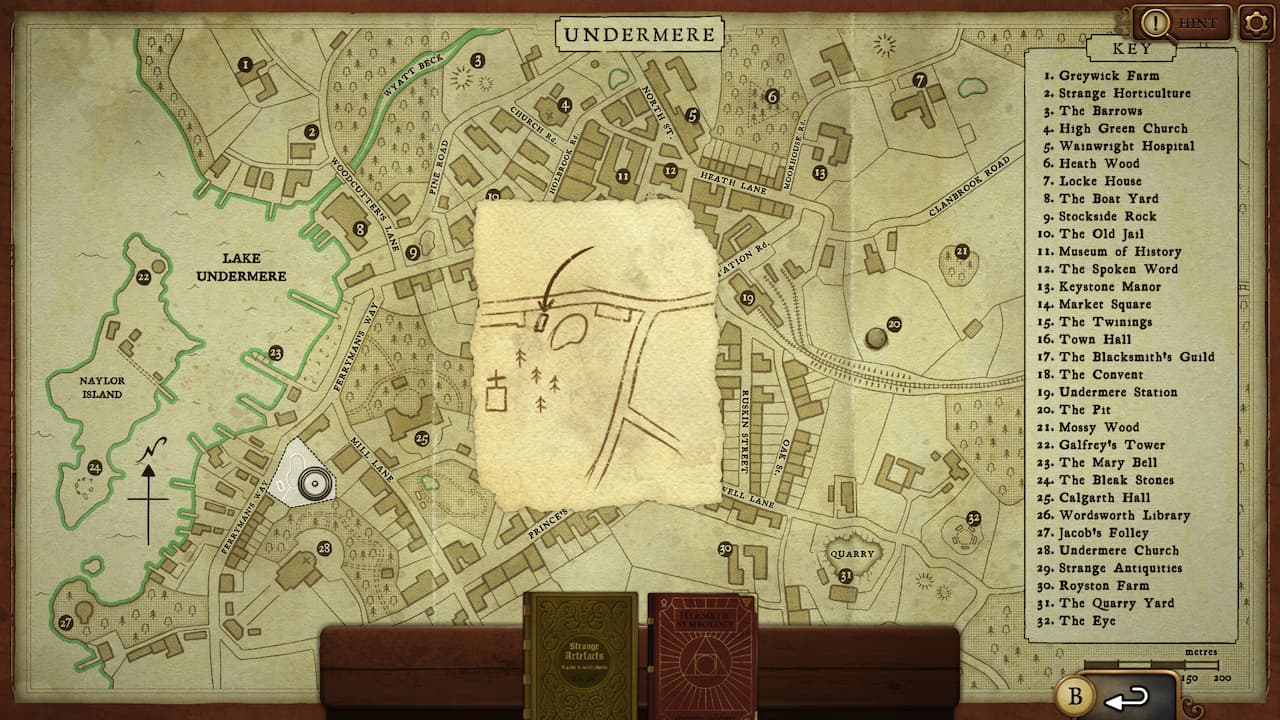
- Hugh Langston gives you a piece of map showing where to find an object. Open up your map and match up his drawing with a location. It’s near the church marked 28.
- Verona Green: Vessager.
End of day 3
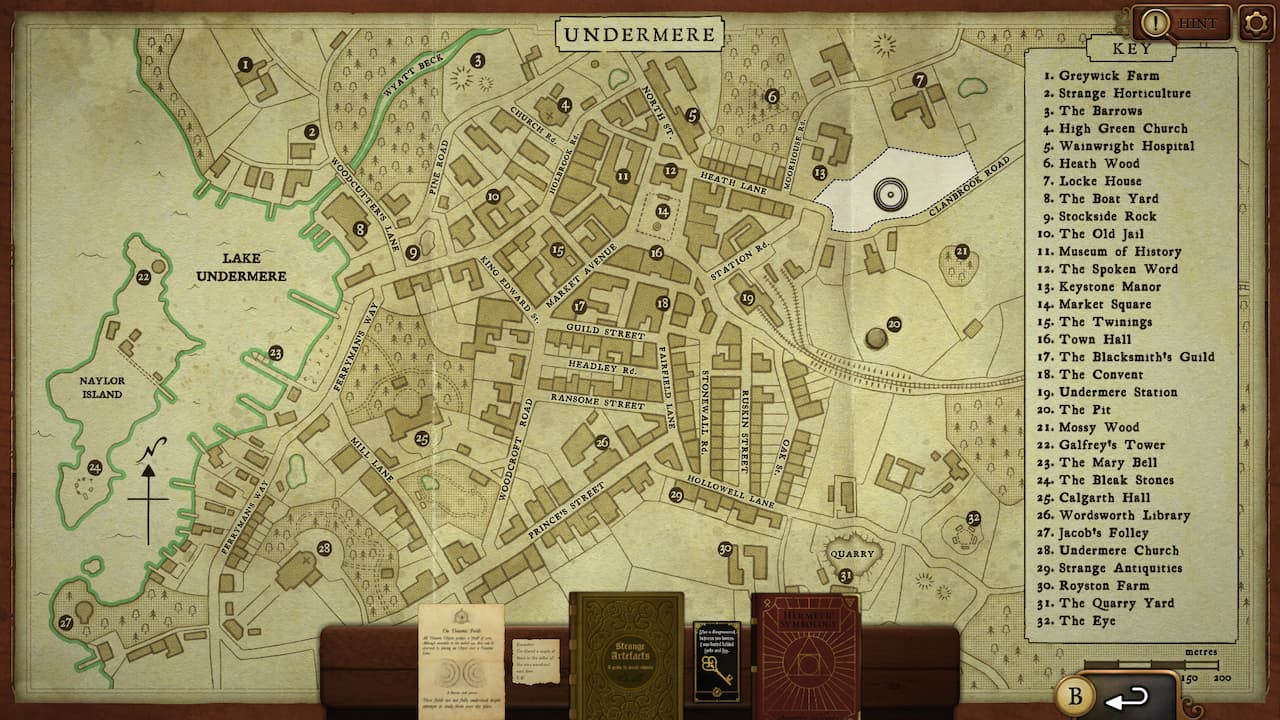
“After a disagreement between two houses, I was buried behind Locke and Key.”
Open up the map. 7 is Locke House and 13 is Keystone Manor. Choose the field behind them.
Day 4
- Eli White gives you a new item.
- Edith Moore needs something to banish inner demons and be a better person. Give her a Horned Shackle.
- Francesca Robertson: Sleep Vessel.
- Althea O’Shea: Silent Breath.
- Rufus Shelley: Daedalus Link.
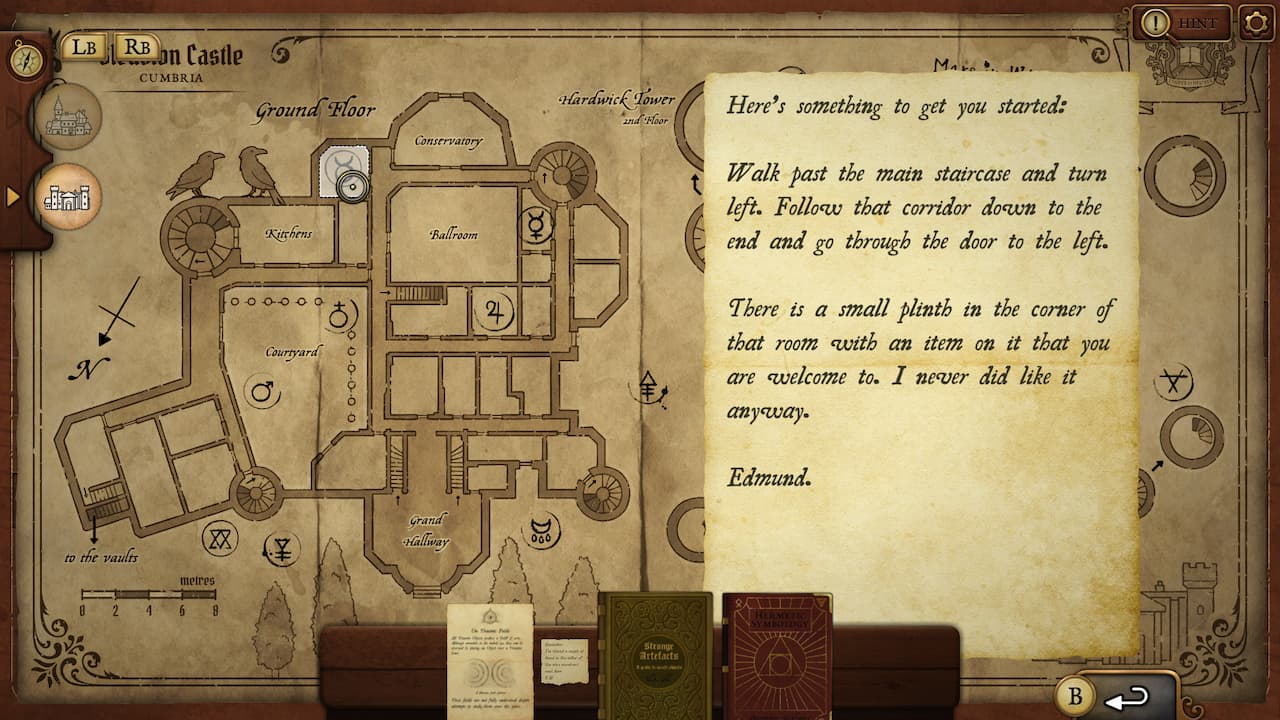
- Edmund Bishop gives you an invitation to Gleaston Castle. Open up the map he gives you. Follow the instructions on the second piece of paper he’s given you and click on the small room to the left of the conservatory.
- There’s also another note with your map. Switch to the map of Undermere and select the small note from E.W.: “I’ve stored a couple of items in the cellar of the wine merchant next door”. Strange Antiquities is 29 on the map, so click the attached building next door to get some more items.
End of day 4
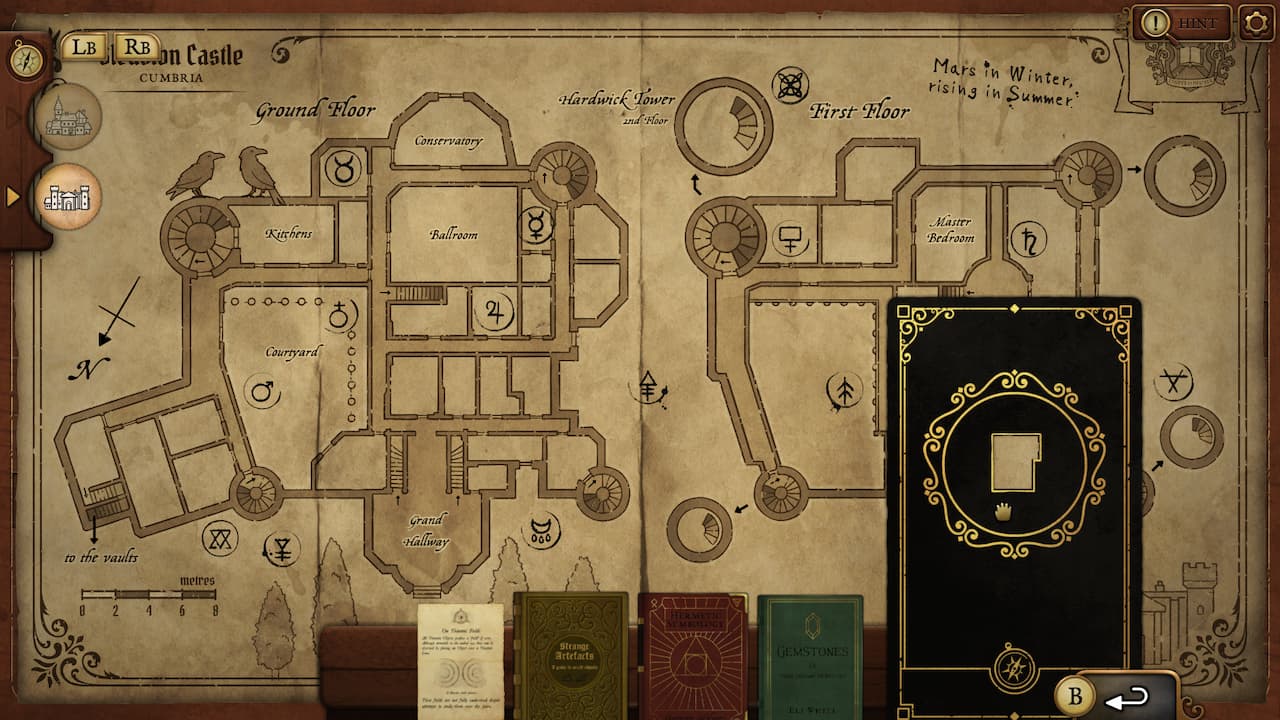
You’re given a card with a cutout. Looks like it will match something on the map.
Pull up the map of the castle and overlay the card on the room under the library. You’ll see it fits perfect. Click that room.
Day 5
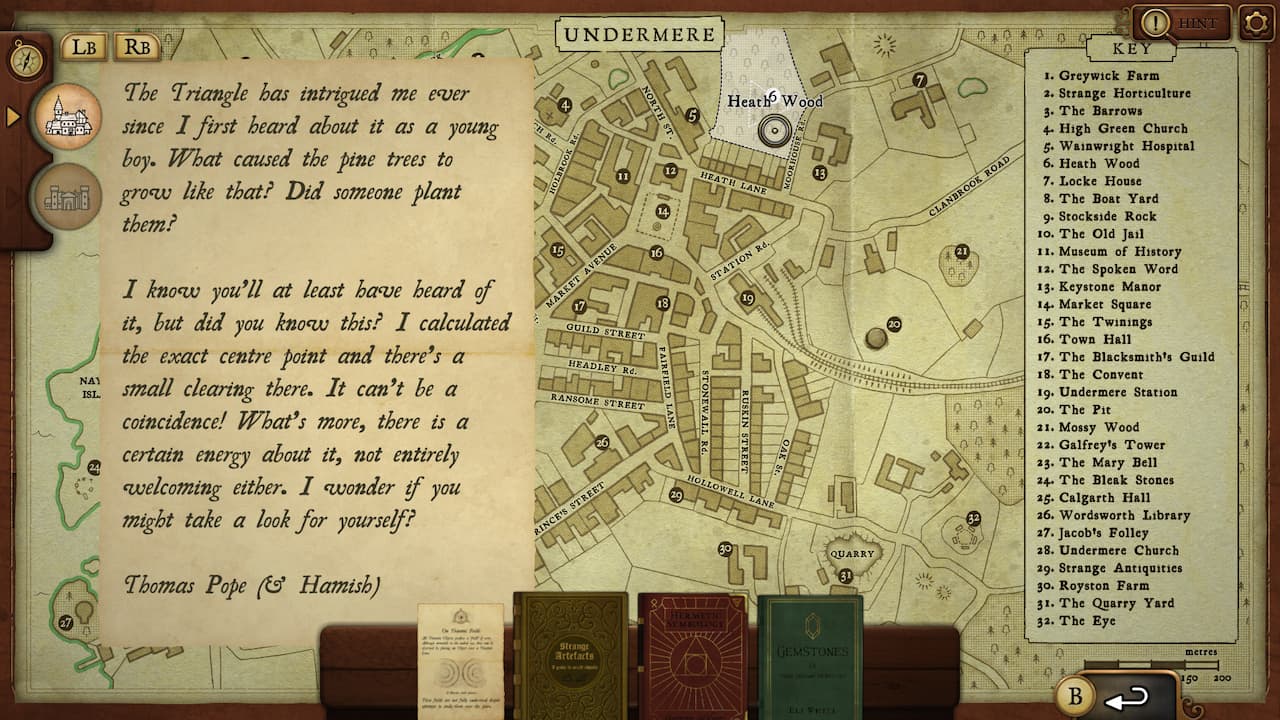
- David Chafer brings you a letter from Thomas Pope. He mentions a triangle of pine trees. Open up the map of Undermere. The triangle is in Heath Wood, no 6. Click it.
- Gus Foley: Orford Spire
- Eli White: Guise of Lillian
- Rebecca Rose: She wants either an Aries Remnant, which will help her sense colours, or a Spirit Eye, which allows users to see beyond the visible world. It’s your choice.
- Clarence Hawker: Sun Bond.
- Audrey Bell: Holgen Grimm.
End of day 5
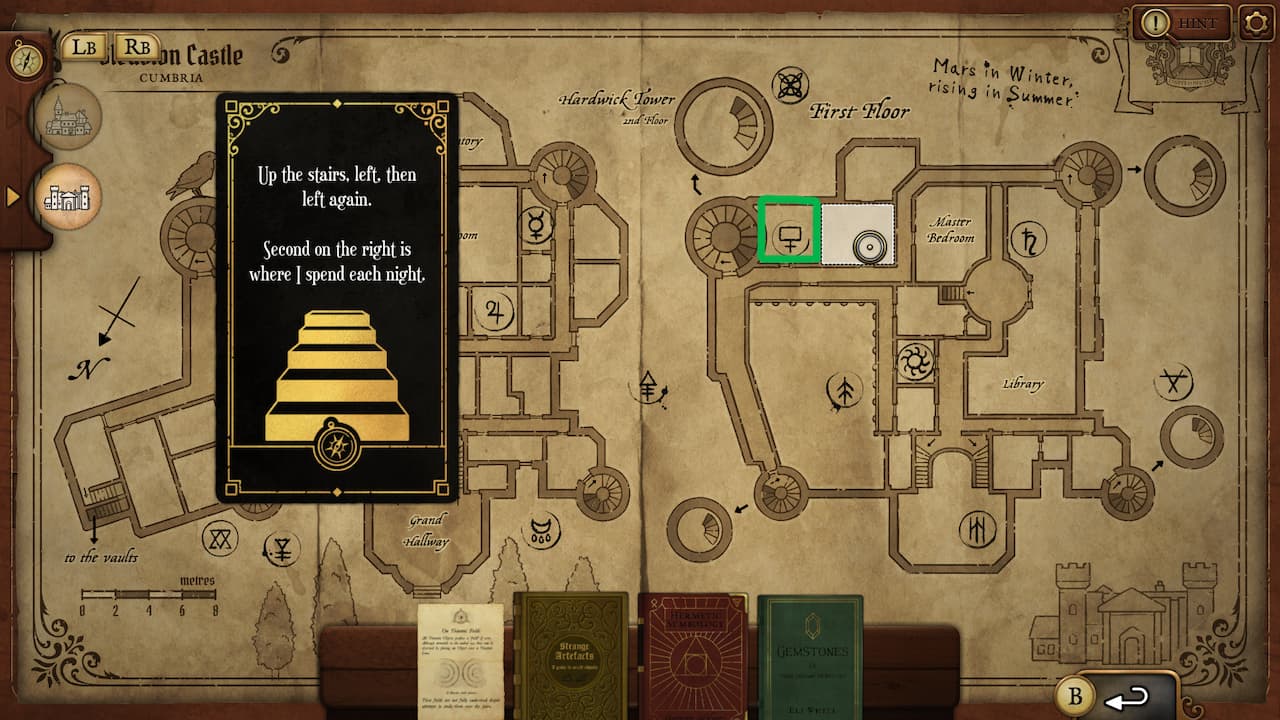
“Up the stairs, left then left again. Second on the right is where I spend each night”
It has to be referring to the castle. Pull up the castle map and click on the room next to the spiral staircase with what looks like a female symbol in it.
Day 6
- Helena Appleton: St John’s Anvil.
- Barton Potter: Elva Stone.
- Verona Green gives you new pages for your book.
- Frances Mason: Cussic Purifier.
- Simone Green: She gives you a piece of paper with the Alcove Key written on it. To open the alcove you need to place the Horned Shackle, the Evocant and the Selenic Totem on the three plinths under the carved symbol on your workspace. You’ll then be able to access some new items.
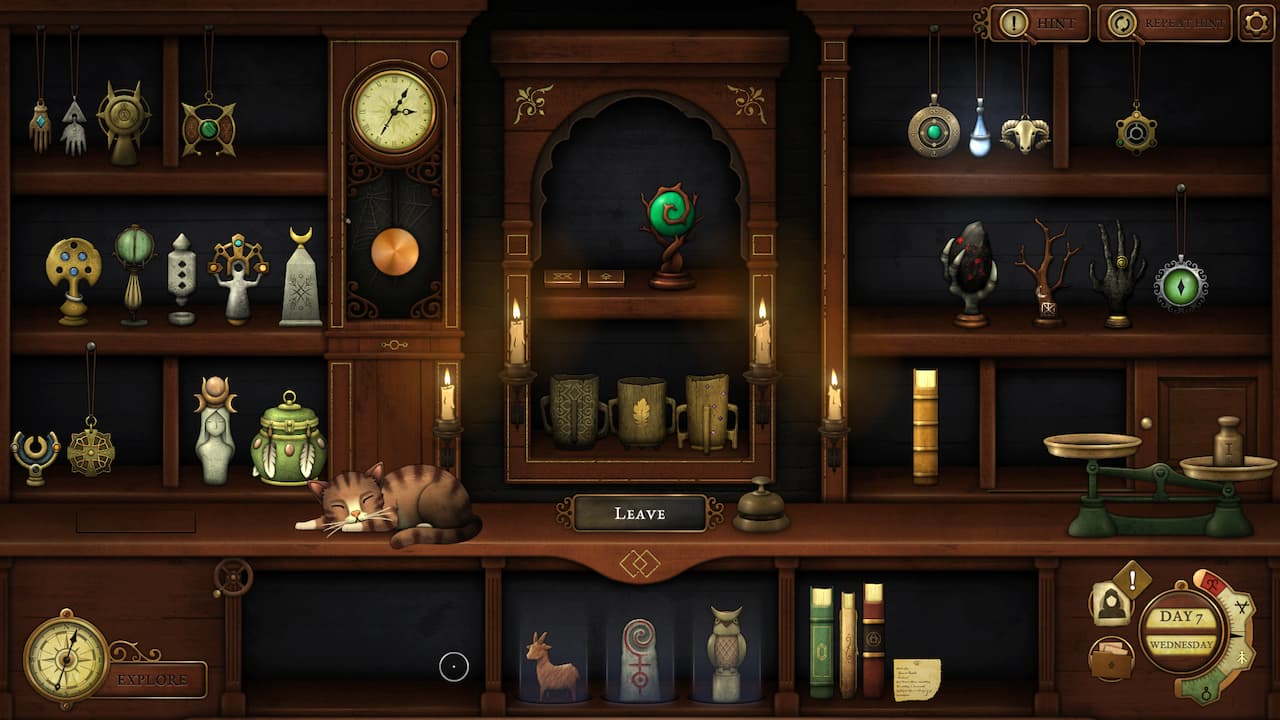
- Jim Wolfe: Hearing Charm
End of day 6
“The maiden in the tower points the way. I am buried among the trees”
Find the tower on the map – Galfreys Tower is no 22. Click it – you’ll find out that the statue is pointing due east. Go back to the map and find the trees that are directly east from the statue. Click 21 – Mossy Wood.
Day 7
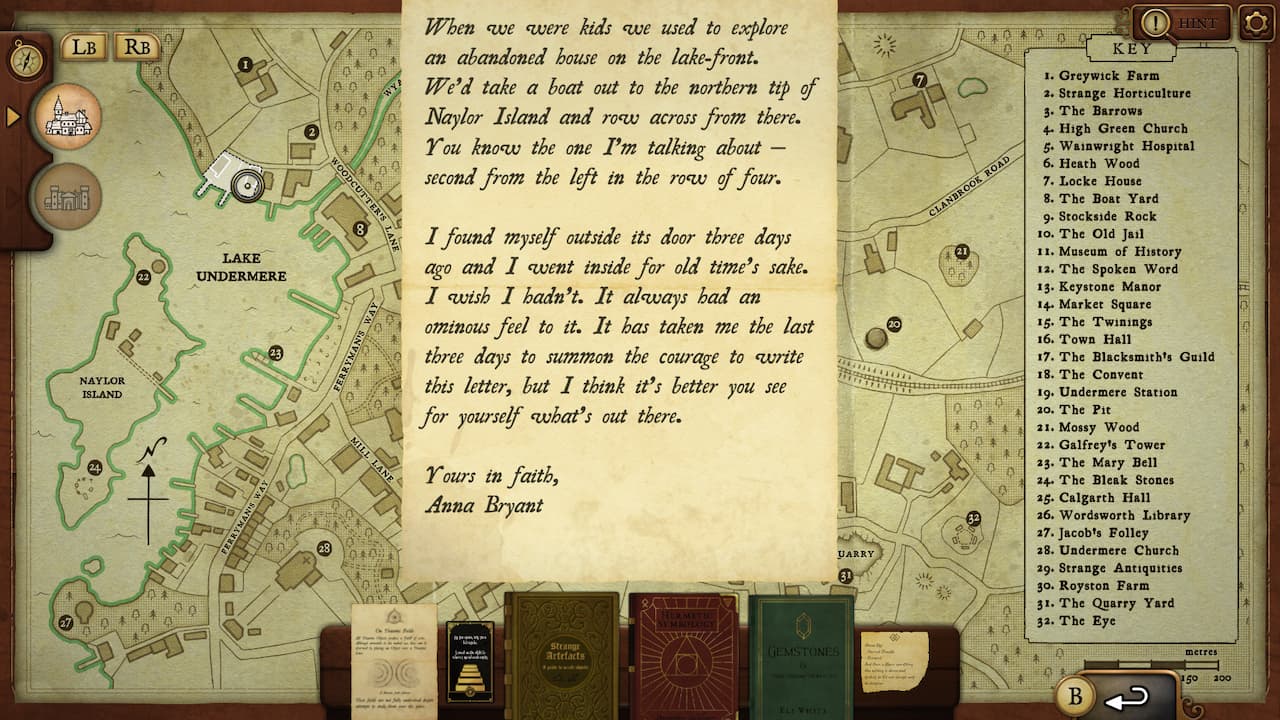
- Verona Green gives you a letter from Anna Bryant. It mentions a lakefront position. Follow the description in the letter to click the right location on your map of Undermere — just southwest of number 2. You’ll find a shrine that says “I open to the voice” and you’ll need to present an item here. The voice refers to a Voice of Cernunnos. Put this here to get a new item.
- Lester Crowley: Lead Heart.
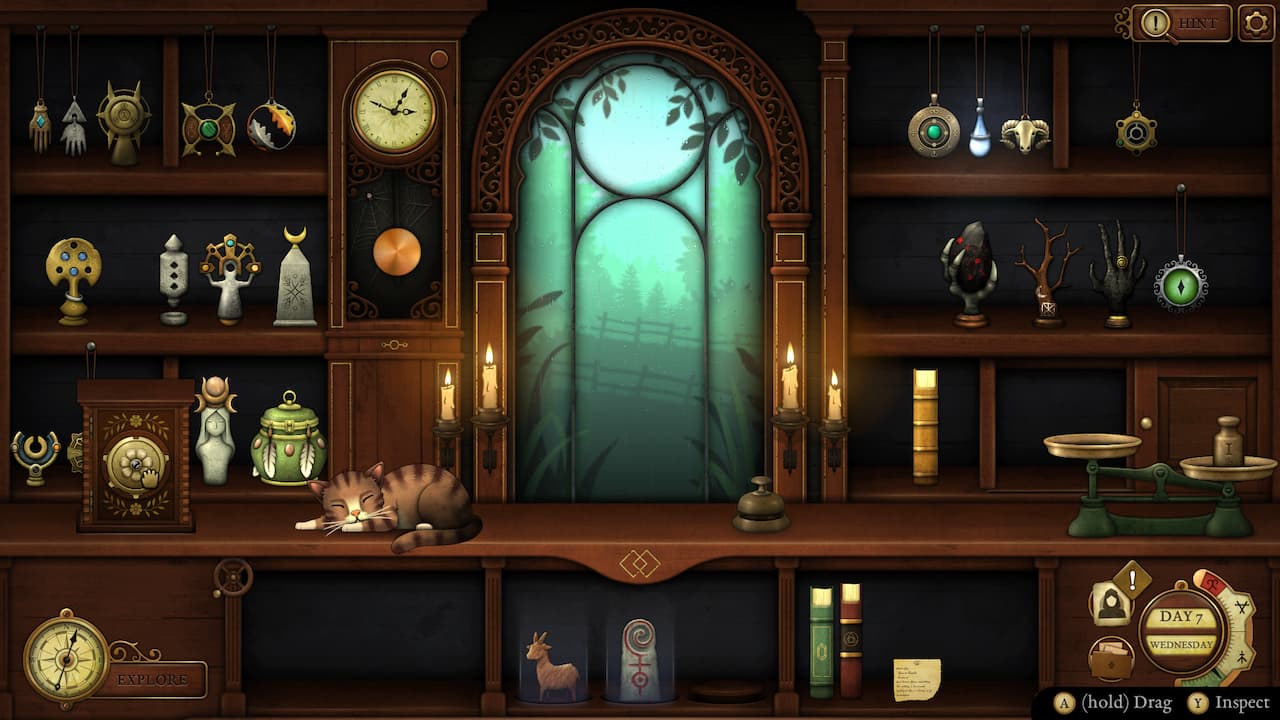
- Angus Eaton gives you a flower medallion. Investigate the item and click the third, fifth, sixth and seventh petals. Nodules should pop out that relate to where you’ve pressed. Turn the handle under your work station just to the left of the cat – a wooden box will pop out. Put the medallion in. There’s a new item and book inside.
- Eli White: Sithean Charm.
- Francesca Robertson: Needs to help her patients. Looking for a Restful Mether (for a meditative state) or a Witch’s Finger (painful purification of the body).
End of day 7
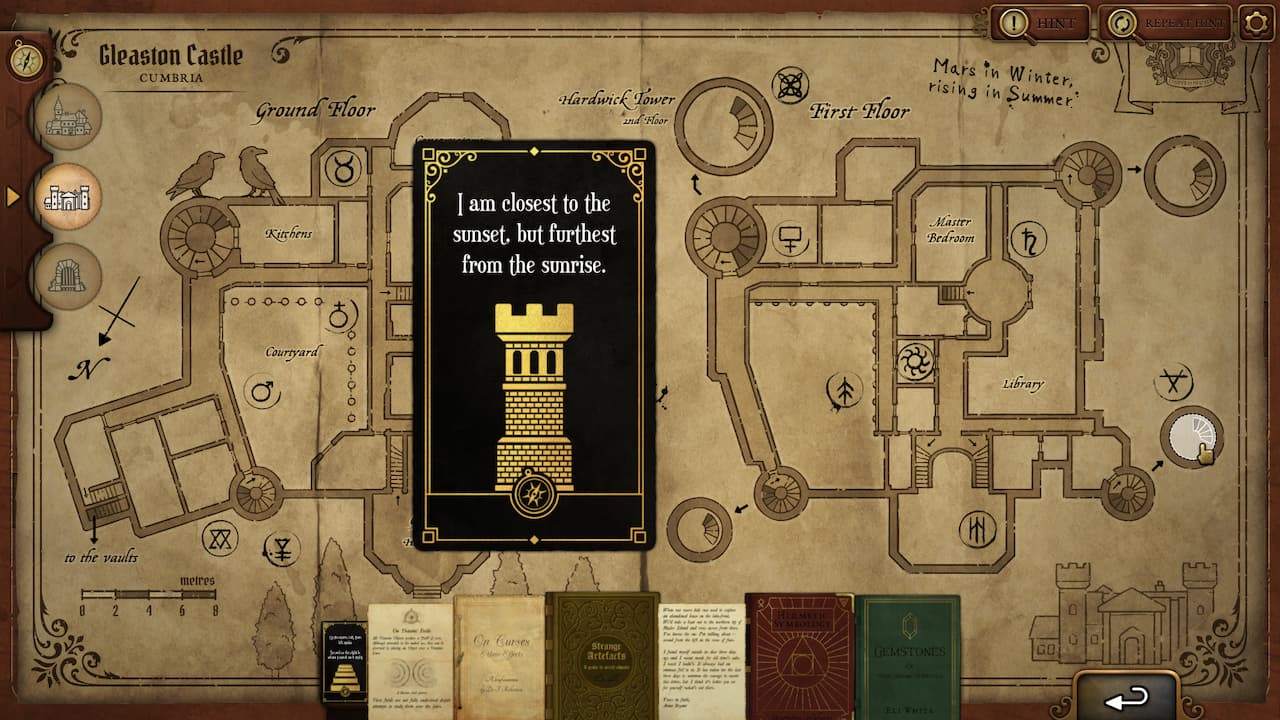
“I am closest to the sunset but furthest from the sunrise”
The sun sets in the northwest. The picture is a tower, so go to the Gleaston Castle map – that has towers!
Be aware that North is a different orientation according to the map, so northwest is towards the right. Click on the bottom right tower.
Day 8
- Francesca Robertson wants something with a feeling of love. Give her a Selenic Totem.
- Verona Green: Tenebran Cloak.
- Barton Potter gives you a message from Eli, and also wants a Valent. You’ve now got a map of the catacombs.
- Bonnie Robertson: Wants either a Grey’s Grace (to dispel melancholy) or a Corvan’s Might (an assassin’s tool).
End of day 8
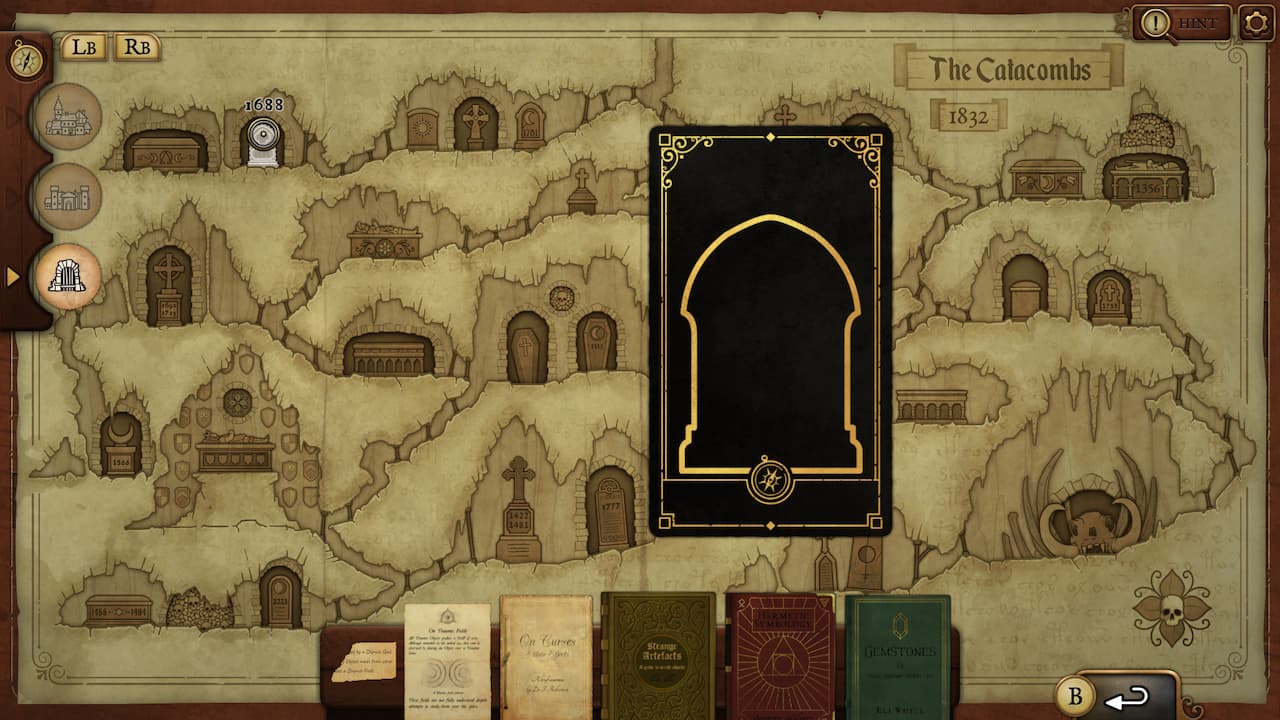
You’ll be given a card with a shape on it. Could it be a gravestone? Open up the catacomb map and look for a matching grave. Click the one in the top left that says 1688 on it.
Day 9
- Constance Bader: Amphisian Talon.
- Simone Green gives you a sketch with three symbols. We need a thaumic lens before we can do anything with them, so store this one away for now.
- Bonnie Robertson: If you didn’t give her Corvan’s Might before, she’s now holding your cat hostage for it. Open the map and go to the woods above 25, next to Ferryman’s Way. She needs a Diverging Hook or Corvan’s Might.
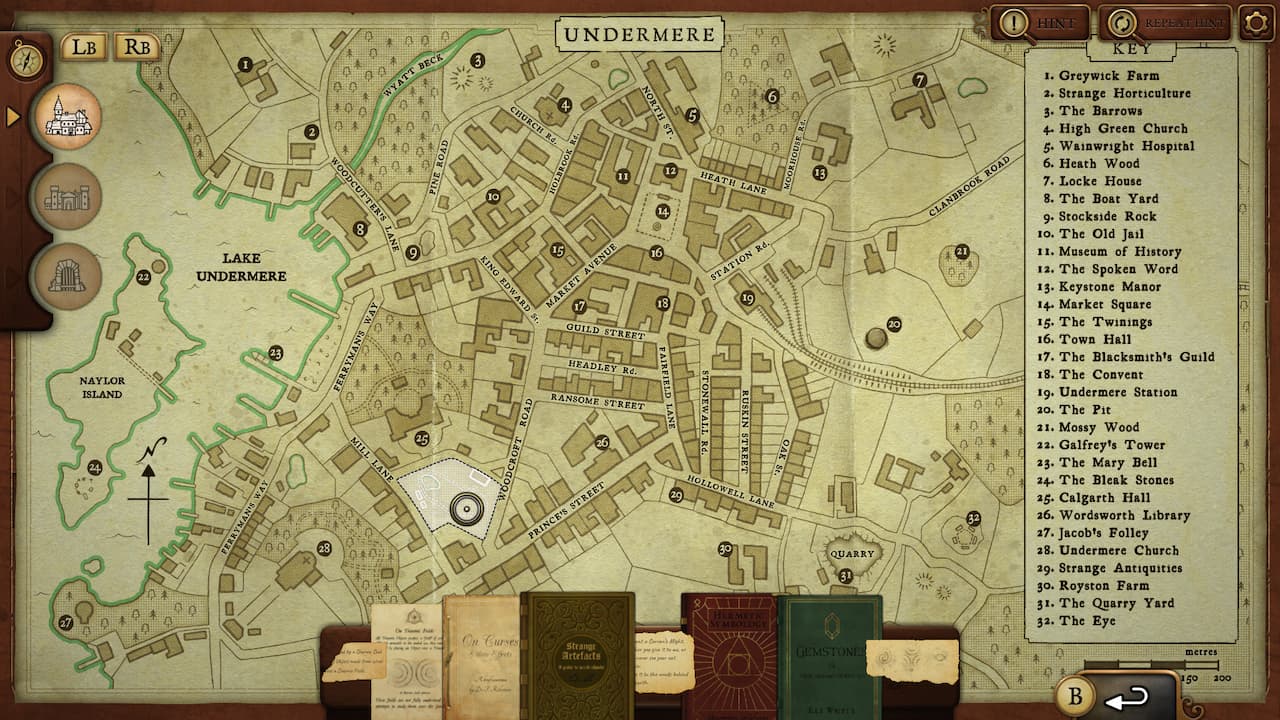
- The cat is on board the Mary Bell. Open your map and go to number 23 – the harbour on the left.
- Wyatt Collings: Wants something to help cure nightmares. Look in the curse book and you’ll see Noctic Sight. Search the index of your cursed objects book for ‘Noctic Sight’ and you’ll discover Moonstone Guardian – that’s what he needs.
- Verona Green: Sextrum.
End of day 9
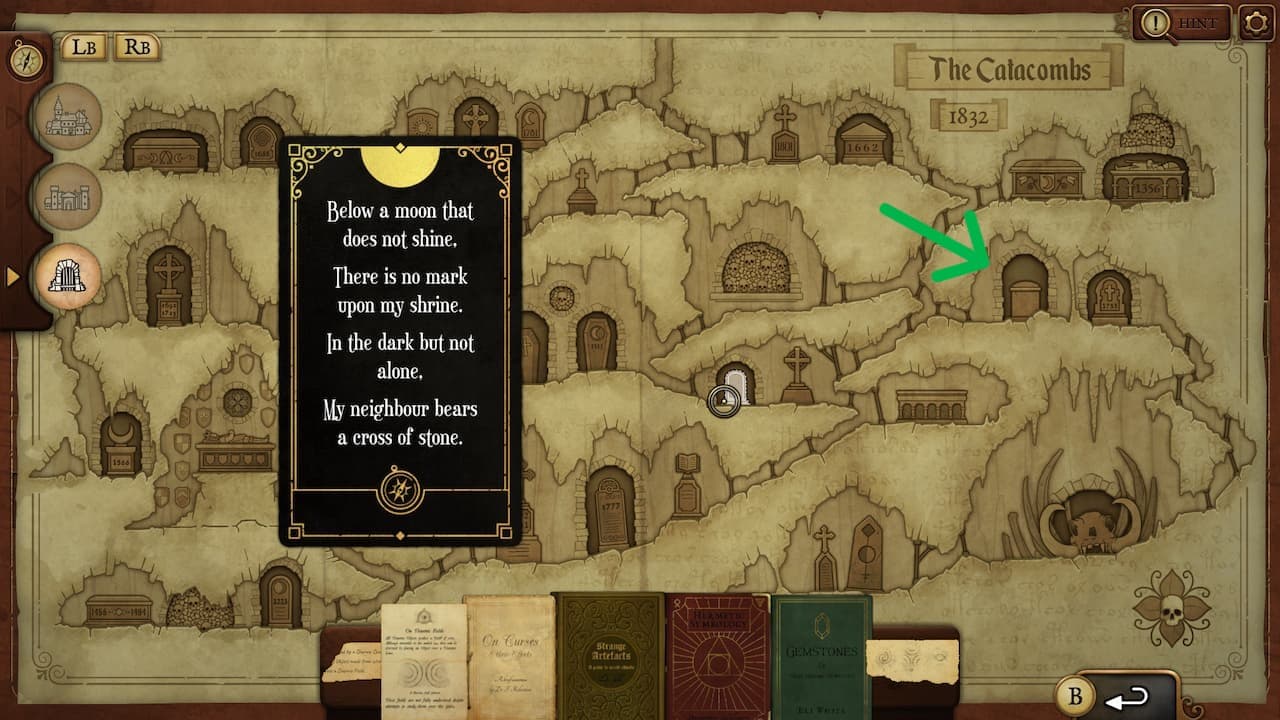
“Below a moon that does not shine, there is no mark upon my shrine.
In the dark but not alone, my neighbour bears a cross of stone.”
Open up the catacombs map. We’re looking for a blank tombstone next to a cross. There are two. The one we want is on the second level to the right of the map. Click it to get a new item.
Day 10
- Katherine Walpole: Eye of Cernunnos.
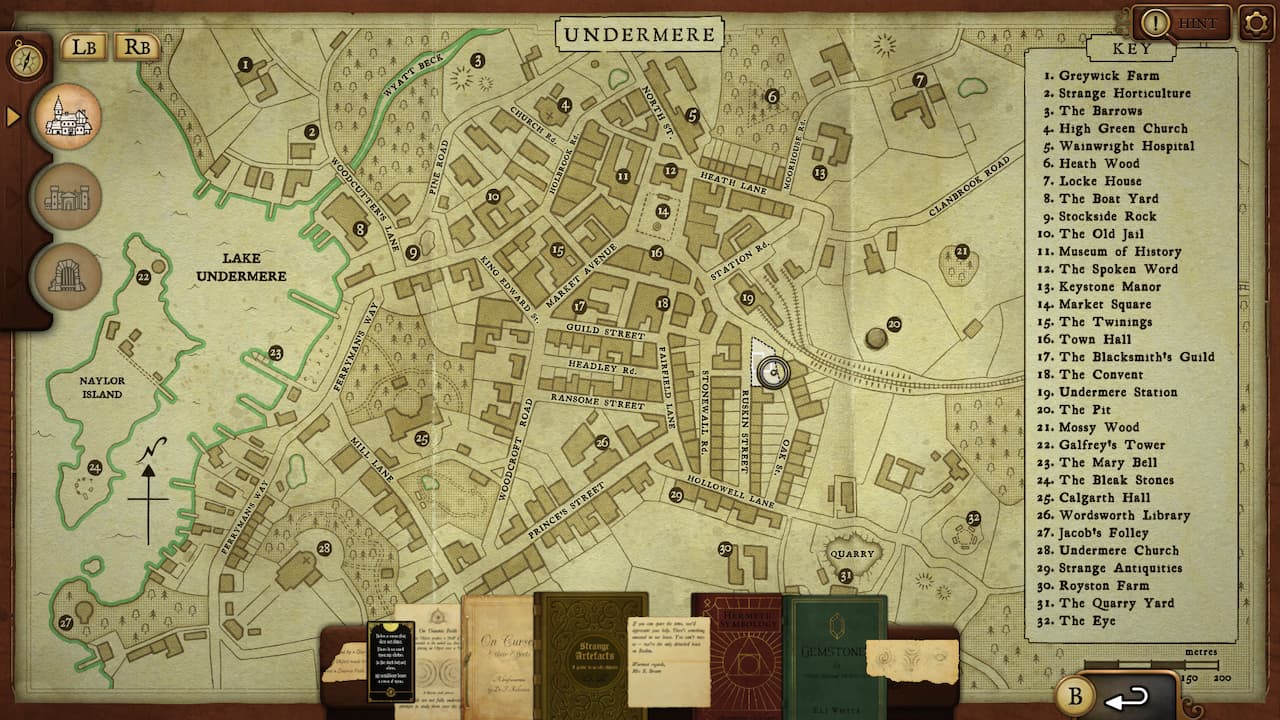
- David Chafer brings a letter from Mrs Bream asking for help. She lives in the detached house on Ruskin. Open your map. Look for Ruskin Street, just under no. 19. Click the one detached house. Use the Hearing Charm.
- Grenville Pearce: Shimmer
- Freddie Lamb: Needs something that protects from burns. There’s no ‘burn’ in the index of your book, but there is ‘fire’. You need a Cyrene Ward.
- Freddie will give you a small square before he leaves. You should now have 4 of these. Go down to your desk and slot the symbols around the edge – the pattern repeats so just look for other instances of the symbol and note the neighbours. Once you’ve put all four tiles in the right place, you’ll open up a thaumatic lens.
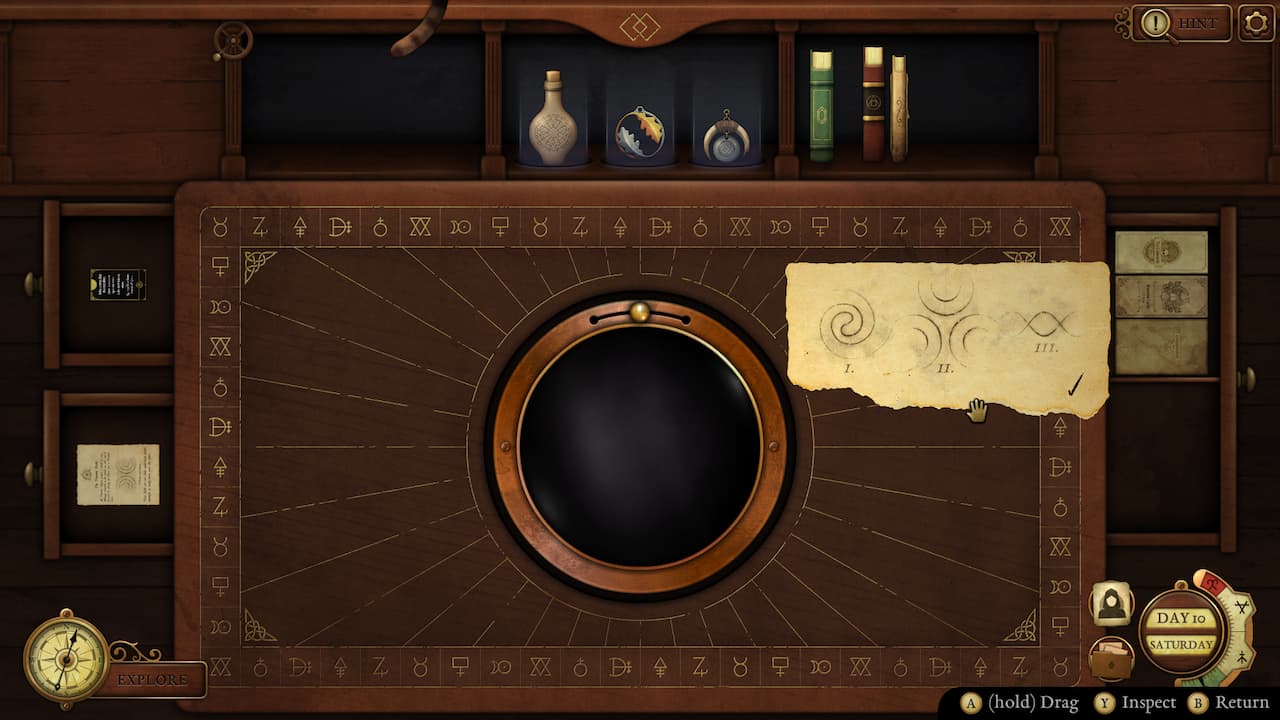
- We can now use the note we found earlier. Place objects in the lens to see the patterns they make. You’re looking for the three scribbled on the piece of paper. You need to place the following three objects on the plinth: Shadow Hold, Sithean Charm and Shield Charm. Take the new item.
- Audrey Bell: Veiled Phenn.
End of day 10
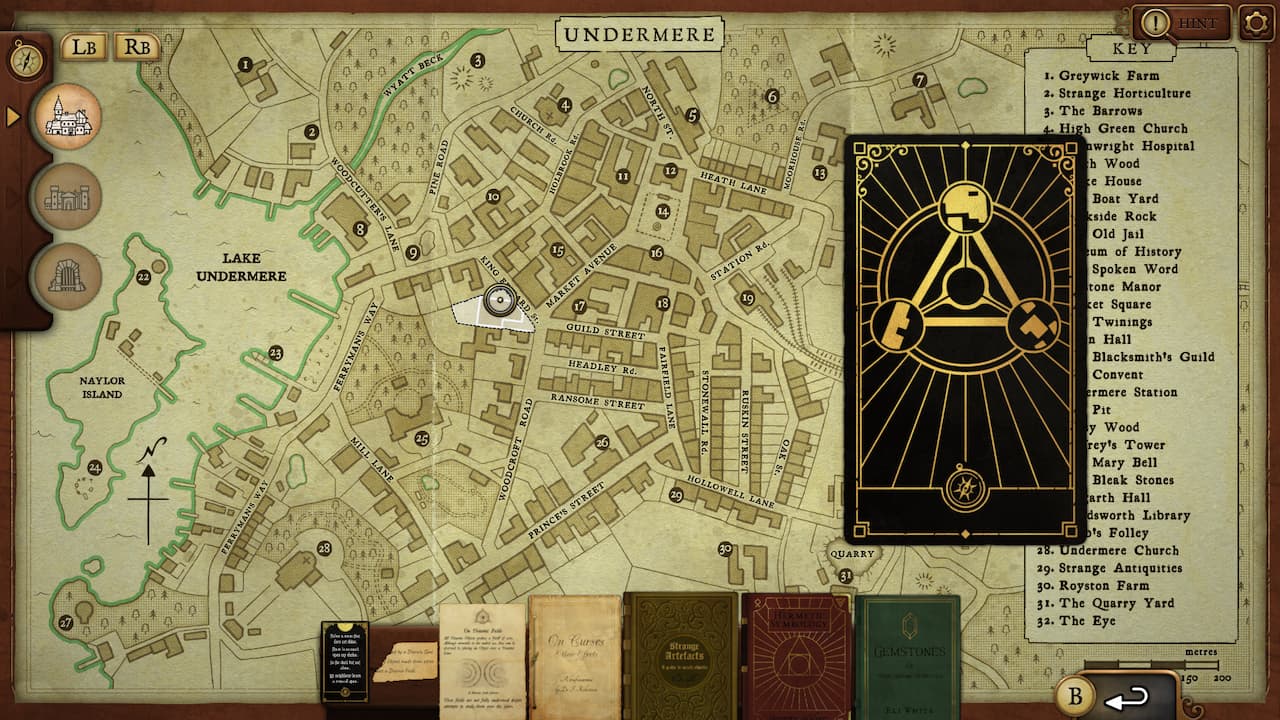
You’re given a card with a triangle pattern on it. It looks like it contains three pieces of a map. Open up the Undermere map.
The top circle matches location 15, the left circle matches buildings just under no 9, and the right circle matches a building just above 25 on Woodcroft Road. Choose the location in the centre of these three parts.
Day 11
- Sarah Barrington: She wants to breathe underwater. Look under ‘breathe’ in your book’s index. You need an Ascus.
- Rowena Hardwick: St. Cedric’s Thunder.
- Francesca Robertson: She needs Ambra, but before we can get it we need an Ethereal Key to open the locked section of your shelves.
How to open the locked section in Strange Antiquities
You likely won’t be able to open the locked section in your Strange Antiquities store until you’re prompted to in the story. First, you need to find the Ethereal Key. It’s a circular gold statue that has three gems on it. Pick it up and drag it in a circular motion: this will turn the object into a key shape. Use it on the locked cabinet to open it. Easy!
- Barton Potter: Wants something that can warn of imminent danger. Look up ‘danger’ in your book’s index. You need a Silent Breath.
- Peter Leland: Bonesguard.
End of Day 11
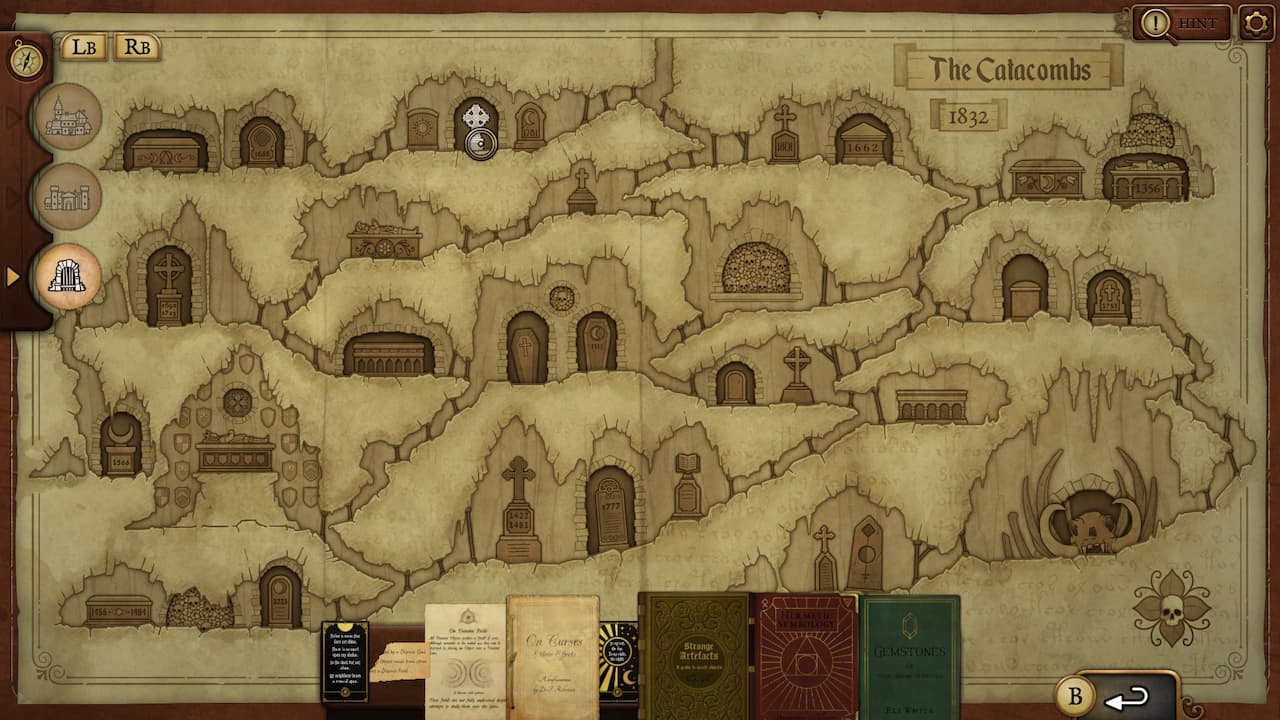
“To my left, the day. To my right, the night.”
Open up the catacombs map. Look for tombstones with sun and moon, and find one in between them. Its on the top row.
Day 12
- David Chafer gives you a letter from MBM. It mentions the catacombs and a place known as the hall of shields. There’s a place matching this description on the catacombs map but we can’t get there yet: we’re told of a Wandering Shroud spirit protection that can help us. Look up ‘Wandering Shroud’ in the artefacts book index and you’ll see the item you’re looking for is a Spirit Vault. However, it’s empty, so we can’t use it yet. The tooltip that pops up when we try says we have sent a letter to Barton Potter, so I suppose we just wait.
- Nancy Irwin: She’s been cursed and it looks like Black Heart (consult your curse book). Look up Black Heart in the index of your artifacts book – you need a Lamb’s Symphon.
- Thaddeus White brings you a new item.
- Simone Green gives you a note: “Three Resonant Objects. Lightest first, heaviest last”.
How to find three resonant objects in Strange Antiquities
The note you get from Simone Green in Strange Antiquities relates to three objects that can be put on the plinth to open up a new secret area. We need to find three resonant objects, and to do that we need a Resonance Compass. It’s the only item in your stock that looks plainly like a compass.
When you pick up the Resonance Compass, its arrow will move around, pointing to resonant objects. Move it around and you’ll see it will point to Elva Stone, Corvan’s Might and Ambra. Simone’s note says “Lightest first, heaviest last”. Use your scales to weigh them to see how much they weigh. Place them on the plinth in the following order: Ambra, Elva Stone, Corvan’s Might.
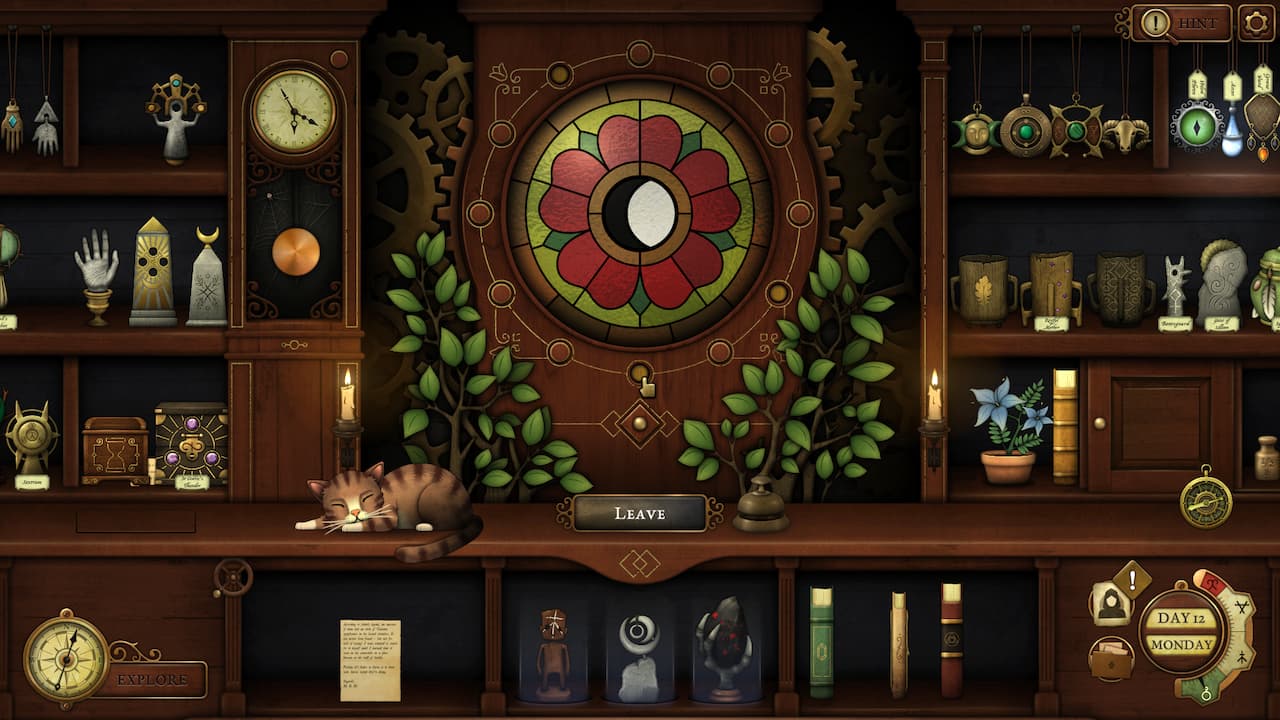
- When you’ve solved Simone’s note, a new area of your shop will open up showing a stained glass pattern and a phase of the moon. You’ll need to use your clock to solve this puzzle.
How to solve the moon puzzle in Strange Antiquities
When you place three items on the plinth in your Strange Antiquities shop, you’ll sometimes be given a moon puzzle. A stained glass window with a phase of the moon in the centre of it will appear. You’ll need to use the clock at the side of your service desk to solve these puzzles.
See the small button at the top right of your clock? Press it, and it’ll switch to a phase of the moon. Pull down your clock’s chime and the phase will cycle. Keep going until you find the phase that matches the one you’ve been given in the stained glass window. When they match, switch back to the regular clock face by clicking the small button again.
The clock’s three hands will be stuck in position. Note where they’re pointing. On the large stained glass, click the buttons around the edge that relate to each clock hand position, then click the button below. If you’ve got everything right, the image of the moon should lift away, revealing a new item.
- Francesca Robertson: Thaumic Needle.
- Audrey Bell: She wants either a Morgan’s Folly (makes people open to suggestion) or Fortinance (enhance physical strength).
End of day 12
“I am marked by Jupiter”
Look up the symbol for Jupiter in your symbols book. It looks a little like a fancy “4”. Open up the castle map and you’ll find this symbol just below the ballroom.
You’ll get a new note, and a torn note that matches half you already have.
Put them together and it reads: “The castle vaults are blocked Diurnic Seal. It can be opened by any Object made from silver or gold that produces a Diurnic Field.”
Open up your map of the castle and click on the vaults – it’s in the bottom left. When prompted use the Moonstone Guardian. You’ll be given a Bishop Square, which you’ll need to use to solve some future puzzles.
Day 13
- James Herschel: Acumenical.
- David Chafer delivers a letter from Barton. He tells us where to get a Wandering Shroud.
Where to find a Wandering Shroud in Strange Antiquities
You’ll need a Wandering Shroud before you can use your Spirit Vault to explore the catacombs. You can’t find one until you’ve heard back from Barton, so wait for his letter. Once it arrives, follow his instructions and go to The Barrows on your map of Undermere – it’s number 3. When prompted, use the Spirit Vault.
Now we have a Wandering Shroud, we can explore the catcombs. Bring up your catacombs map. Click the coffin surrounded by shields. Use the Spirit Vault.
We are given a clue and need to use another item: “The sun’s light will reveal my gift”. Use a Sun Bond. You’ll get a new item.
- James Herschel: Truth Conduit.
- Evelyn Bennett: Needs something to cure her apathy. She mentions “Grace of Grey”. We have an item called Grey’s Grace which is to dispel melancholy.
- Barton Potter: Wants a Pitt to open a secret doorway, or a Babellia to read an ancient inscription.
End of day 13
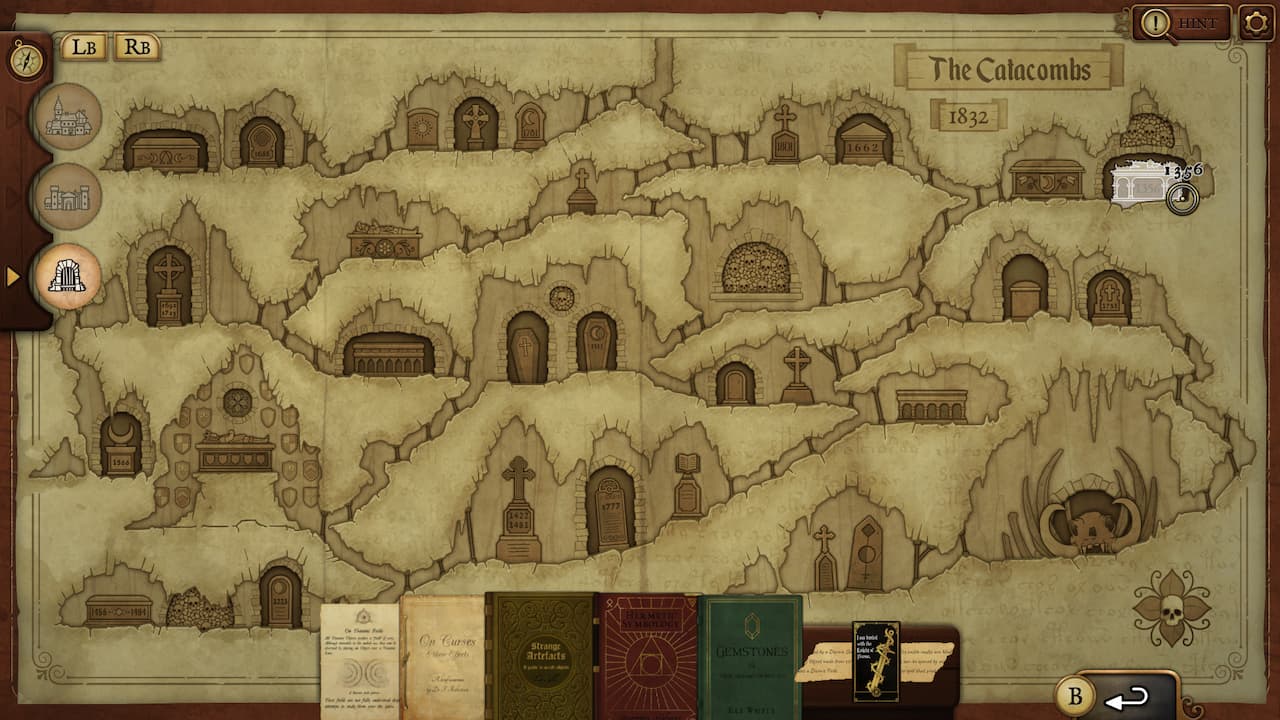
“I am buried with the knight of thorns”
Look up Knight of Thorns in the index of your objects book. It takes you to Shimmer and mentions that the Knight of Thorns died in 1356.
Go to the catacombs map and find a tomb engraved with 1356. It’s in the top right corner. Click it to get a new item.
Day 14
- Thomas Pope: Loem.
- Agnes Dent: Heart Chamber.
- Edmund Bishop: Gives you a note that reads “Blessings in Spring, rising in Autumn”.
What does “Blessings in Spring, rising in Autumn” mean in Strange Antiquities?
This strange note doesn’t make much sense on its own, but once you know how to solve it, it’s pretty straightforward. Remember the Bishop Square tool you acquired recently? You’ll need to use that here.
In your symbols book, look up ‘Blessing’: it’s a sidewards moon with what look like raindrops underneath. Pull up the castle map, and you’ll find this symbol on there. Pull out your Bishop Square. It says “Blessing in Spring”, so overlay the Bishop Square so the Blessing Symbol is in the ‘Spring’ segment of the Bishop Square — it’s symbolised by a leaf. Now, click the part of the map that appears in the Autumn segment, which is symbolised by an Acorn.
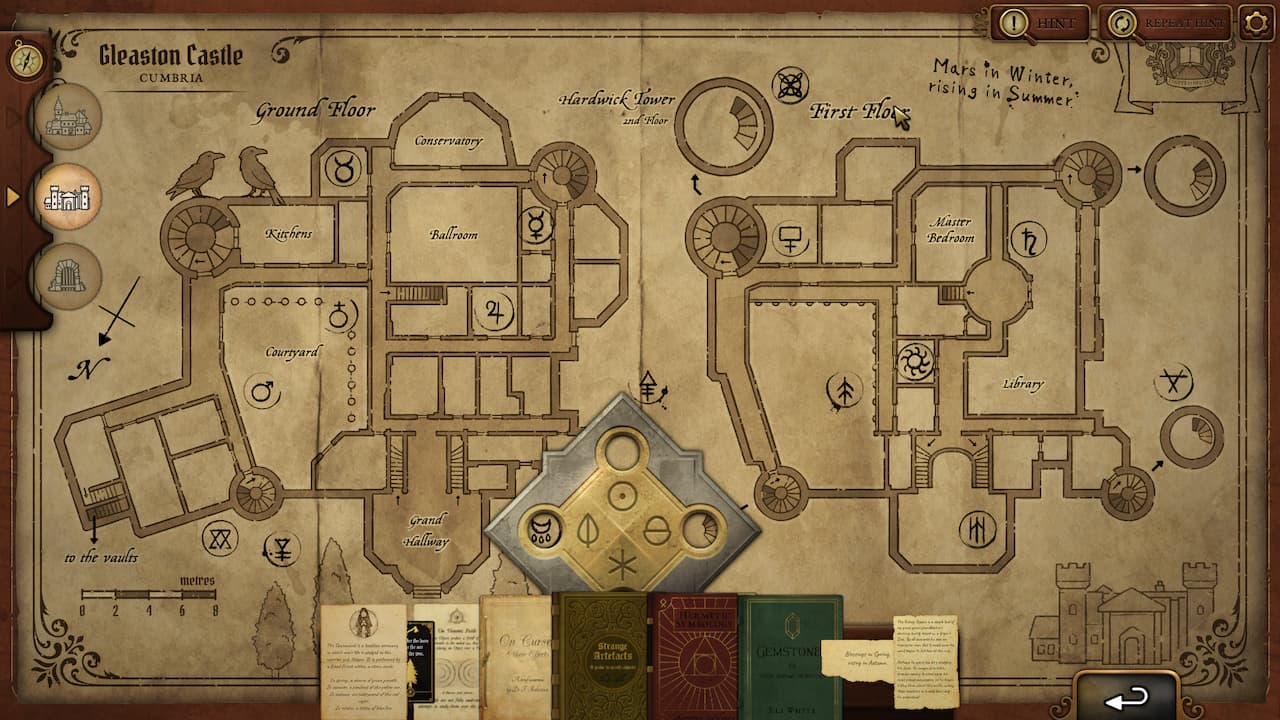
That’s all there is to it!
You’ll see on the castle map that it’s written: “Mars in Winter, rising in Summer”. Repeat the process, this time putting the mars symbol (the male symbol) in the winter segment of the Bishop Square (snowdrop). Click in the summer segment.
- Thaddeus White: Witherance.
- Jacob Priestly: He needs a type of mether – the wooden cups. Choose between Solemn Mether and Abrasive Mether. We chose Solemn.
- Francesca Robertson: Gowdian Siren.
End of day 14
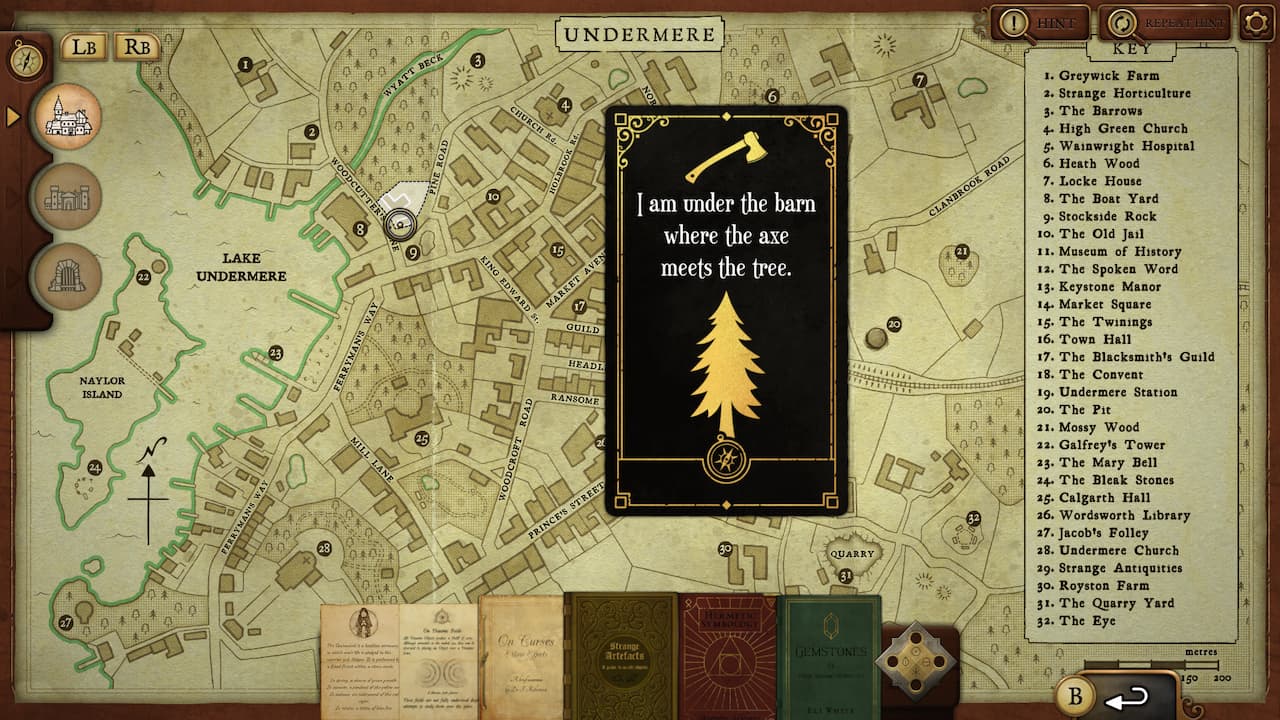
“I am under the barn where the axe meets the tree”
Open up your map of Undermere. Look at the street names – Woodcutter’s Lane joins with Pine Road. Click the buildings at this junction.
Day 15
- Simone Green delivers a curious note. We don’t have the items yet so we will come back to this later.
- Jacob Priestly: Shadow Anchor.
- Audrey Bell delivers a note. It mentions four items needed for a ritual performed in a stone circle.
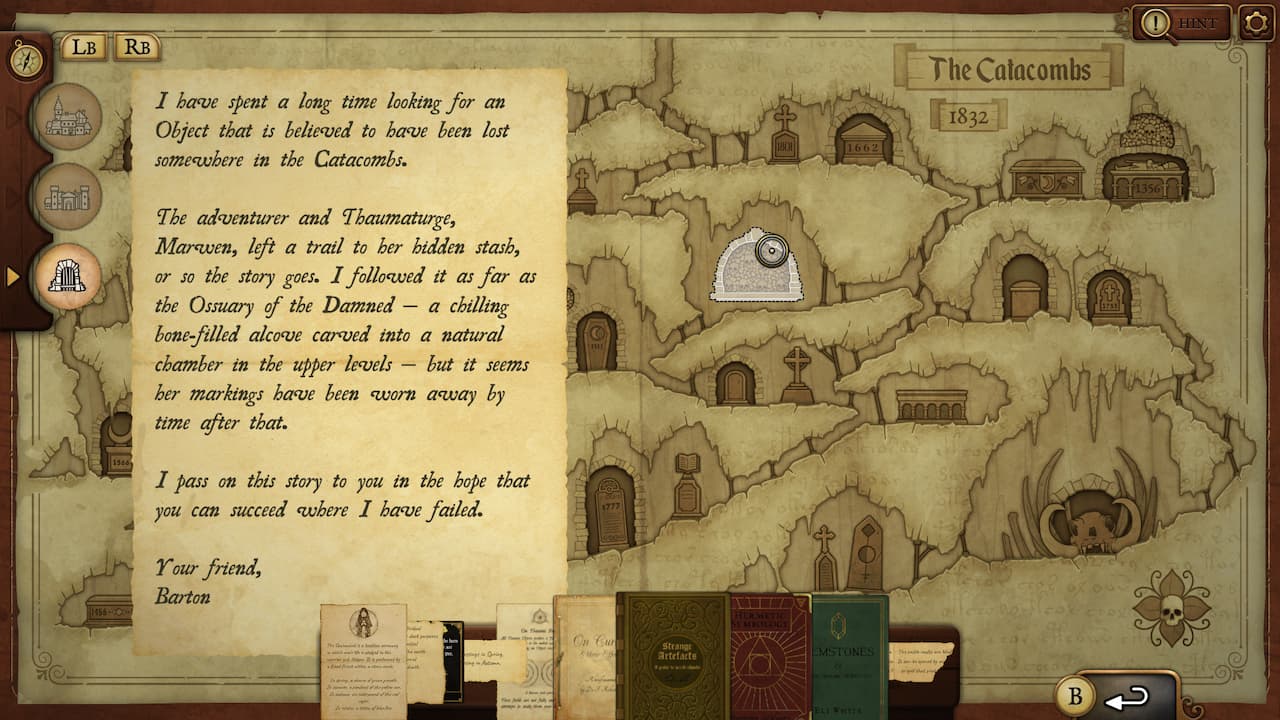
- David Chafer delivers a letter from Barton. He mentions a bone filled alcove in the catacombs where markings have worn away. Pull out your Catacombs map. The bone filled alcove is around the centre. Click on it and use a Carrick’s Candle.
- Verona Green: Give her Zephyrim (to channel anger into a powerful maelstrom) or Abrasive Mether, to purge unwanted memories.
End of day 15
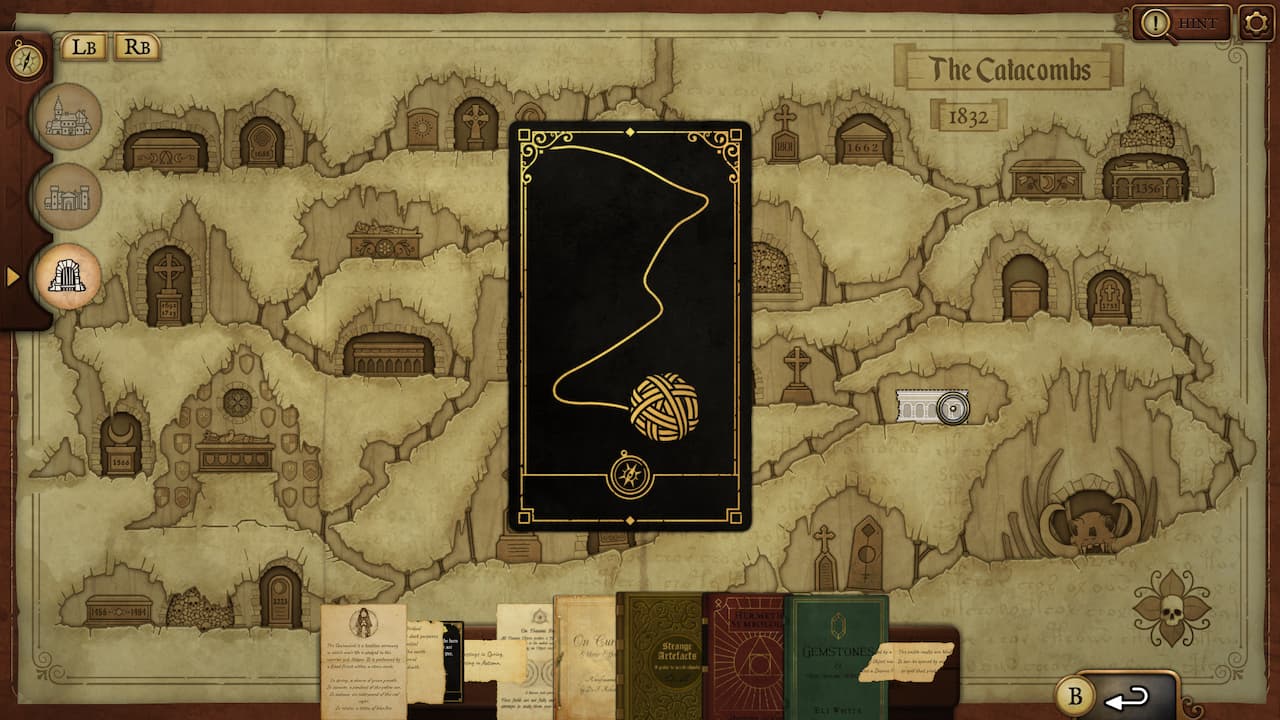
You’ll be given a card with a ball of string.
We’re looking for a piece of map with a path or line that matches the outline on the card. It’s on the catacombs map, towards the right hand side.
Day 16
- Marion Lancaster: Nephroquant.
- Franklin Underhill gives you business card for The Twinings on 2 Market Avenue. Open your map of Undermere and go to no. 15. You’ll get a new item, but you’ll also need to use a Wyxic Cord.
- With the new item, we can solve the note that Simone Green delivered yesterday.
How to solve Simone Green’s note in Strange Antiquities
On Day 15 in Strange Antiquities, you’ll receive a note from Simone Green that reads as follows:
“From the Individual: a stone for dark purposes
From the Celestial: a stone of the earth
From the Diurnal: a stone of death”
The stones it refers to are gemstones, so you’ll need to look through your book of gems to find a stone used for dark purposes, an Earth stone and a Death stone. The stones you’re looking for, then, are Bloodstone (black with red flecks), Jade (green) and Vivianite (dark blue-green).
Now, you need to find three items, each containing one of the gems. We used Corvan’s Might, Gowdian Siren and a Blood-Beck.
You’ll now need to solve a moon puzzle like you’ve done before.
- Edmund Bishop: Cassander.
- Gilbert Ames: Wants something to uncurse an object. Needs a Cussic Purifier.
- Lavinia Hawthorne: Griss.
- Leopold Morris: Needs something to defeat a basilisk. Look up basilisk in your object book index – you need Folium.
End of day 16
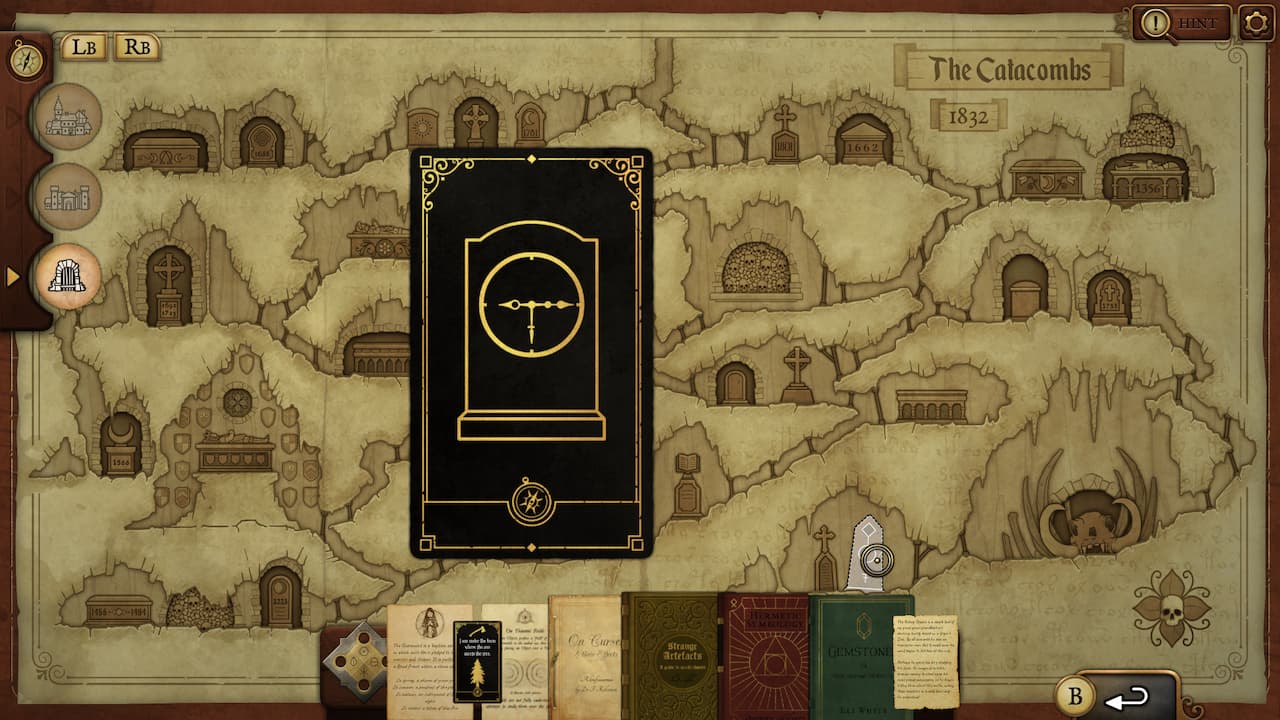
You’re given a card with an image of a clock pointing to 3, 6 and 9.
Pull the chime of the clock until the hands stop at 3,6 and 9. Pushing the small button tells you that this represents a half moon. Open up the catacombs map and find a tomb with a half moon engraving.
Day 17
- Thaddeus White: Give either a Dread Vivant (allows you to handle dangerous artefacts) or Lunima (keeps people away from places they aren’t welcome).
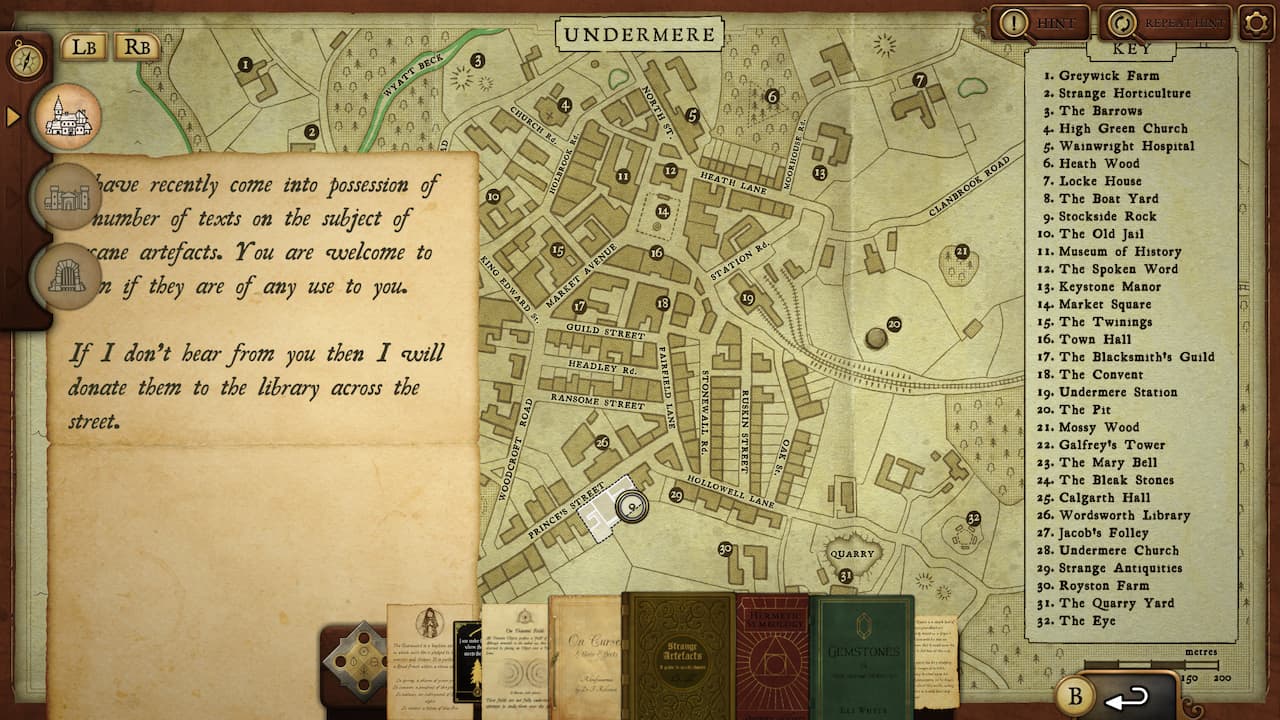
- David Chafer brings you a letter. It is unsigned, but it is from someone who lives across from a library. Open up your map of Undermere. The library is no. 26, so click the building opposite on Prince’s Street. You need an item that can help you translate. Look up “translation” in your object book index. You need a Babellia.
- Anna Bryant: Brighic Charm.
- Eli White – gives you a note about Pillar of Calaris.
- Isabelle Stowe: Needs something to lift her feeling of weakness and give her strength. Look up strength in your index. You need Fortinance.
- Susan Hill: Blood-Beck.
End of day 17
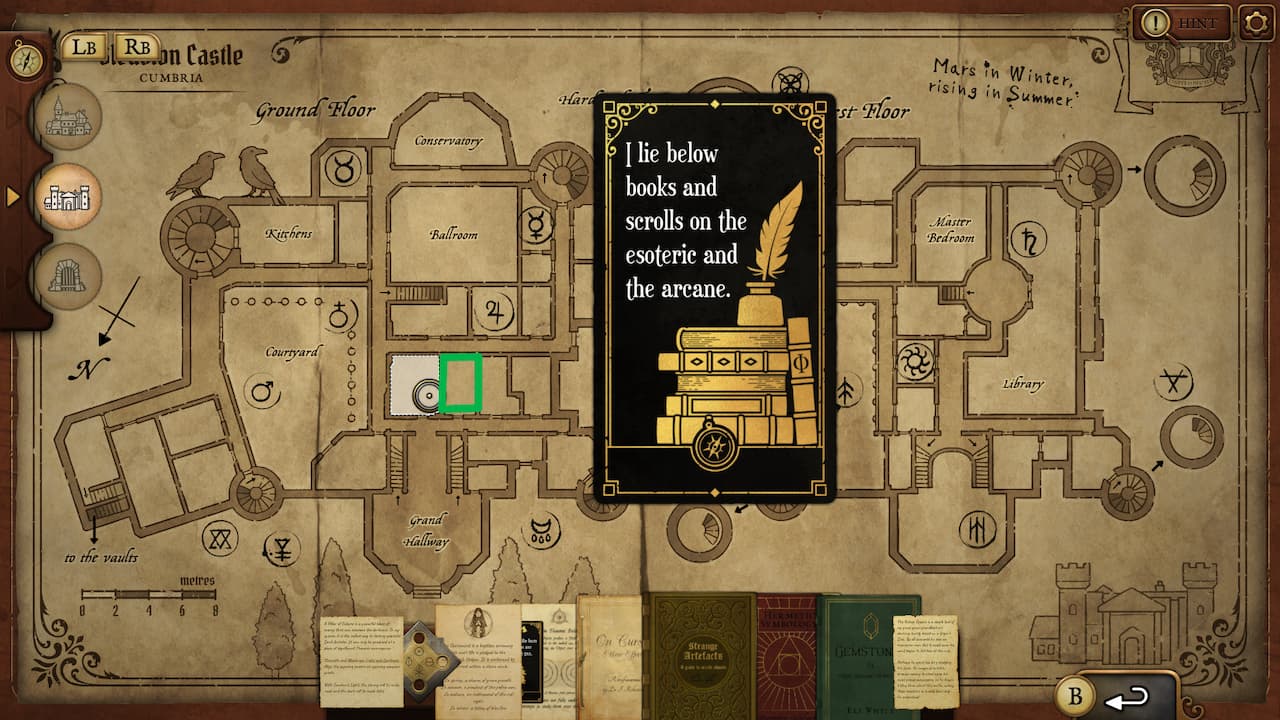
“I lie below books and scrolls on the esoteric and the arcane”
Where would books and scrolls be kept but in a library? Open your map for the castle and click on the library. The text will tell you about arcane books, and note the precise point in the library where these books live. Since the note mentions ‘below’, we want the ground floor – click the room which will be directly underneath. It’s the room directly across from the right grand hallway staircase.
Day 18
- Eli White – mentions items being stored in Strange Antiquities’ vault, and that instructions are in your desk drawer. Look in the top left drawer and you’ll find the note with the instructions you need to find the Nalean Casket.
How to access Strange Antiquities’ vault and get the Nalean Casket.
On Day 18, Eli White mentions Strange Antiquities’ vault. He’s hidden the Nalean Casket there — the object you need at the end of the game. Look in the top left drawer of your desk (use your d-pad to move down the screen), and you’ll find the note. It reads:
“A candle that gives off no light
An anchor that has never touched the ocean
A finger, but not of flesh”
The note references three items that need to be placed on the store’s plinth in order to open the vault. On the plinth, place Carrick’s Candle, Shadow Anchor and Witch’s Finger.
Solve the moon puzzle to get your final item.
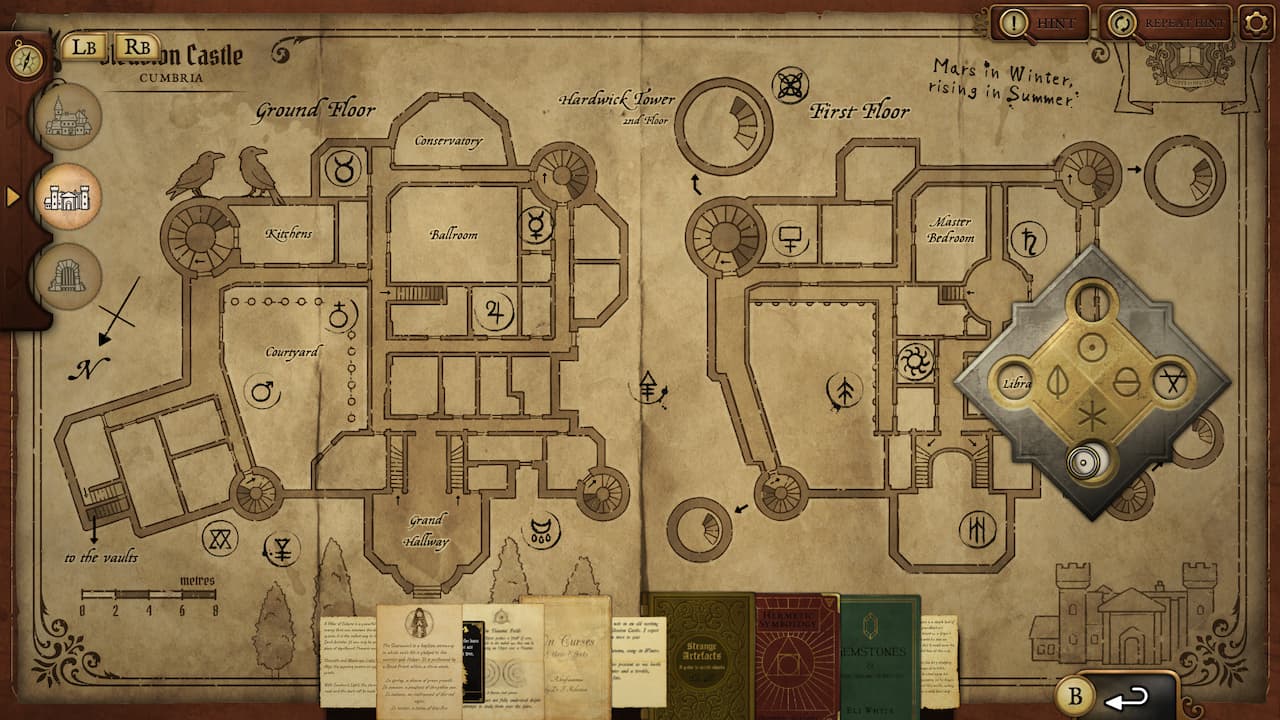
- David Chafer – delivers a note from E.B. It says “Fear in Autumn, rising in Winter”. Go to the castle map and use the Bishop Square. The symbol for fear is 3 crossed lines, seen near the bottom right tower on the first floor. Autumn is the acorn, so align the Bishop Square. Click in Winter, the snowdrop.
- Eli White – He says to bring the casket to the pit. This is the last section of the story, and the choices you make will shape what ending you get. You don’t need to follow him to the pit if you don’t want to — alternate endings are available if you’d rather. Scroll down to see.
Strange Antiquities ending – what to do at the Pit
Open your map of Undermere and go to no. 20.
We now need to place four correct items:
- Strength – in North, place Fortinance
- Weakness – in South, place Witherance
- Light – in West, place Sun Bond
- Darkness – in East, place Tenebran Cloak
Click ‘Back to text’, and you’ll be prompted to place the Light of Corchen.
Now you need to use a Wyxic Cord or a Nalean Casket.
Strange Antiquities multiple endings
There are multiple endings to Strange Antiquities, and the ending you get will depend on the choices you make while playing and the items you use in the ultimate scenes.
If you don’t want to go to the Pit with Eli White, you can choose to go to the Bleak Stones with Audrey Bell to be part of the ritual.
Remember the note that Audrey Bell brought? You can follow this instead of Eli’s instructions for an alternative ending.
Open up your map and go to The Bleak Stones, no. 24.
After the text, insert the following items:
- In spring (the leaf): Sithean Charm
- In summer (the circle and dot): Sun Bond
- In autumn (acorn): Weaving Edge
- In winter (snowflake): Vessager
You’ll then need to give the Nalean Casket, then choose between St. Cedric’s Thunder or Corvan’s Might.
Strange Antiquities: Item guide
Below you’ll find a list of all items in Strange Antiquities along with a brief description of their appearance, and a small photo to identify them with. Once you’ve found an item, make sure you label it and store it appropriately so you can easily find it again.
We’ve listed all items below in alphabetical order.
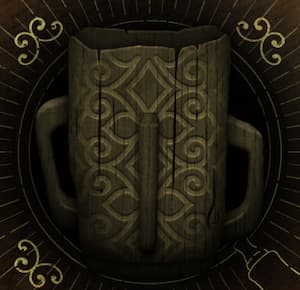 | Abrasive Mether |
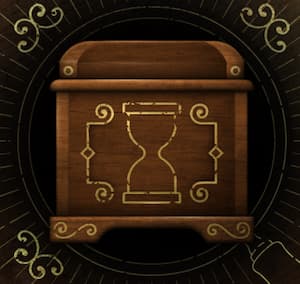 | Acumenical |
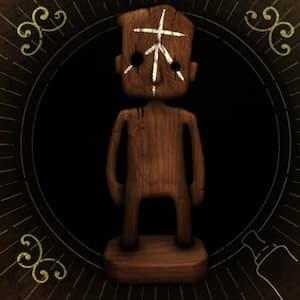 | Ambra |
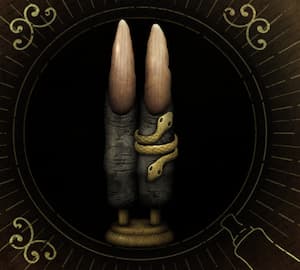 | Amphisian Talon |
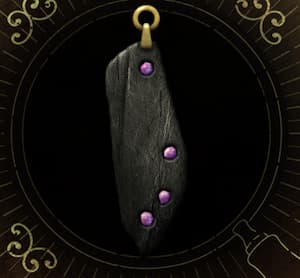 | Aries Remnant A black pendant with four purple gems. |
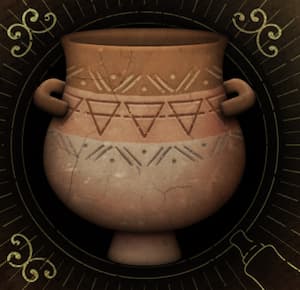 | Argyll |
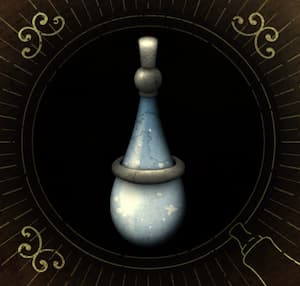 | Ascus |
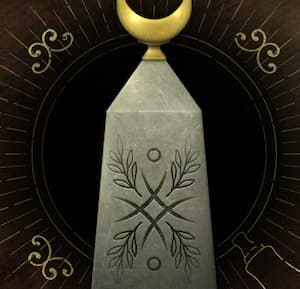 | Babellia |
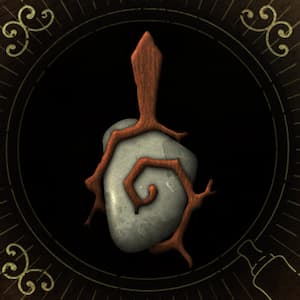 | Binding Seed |
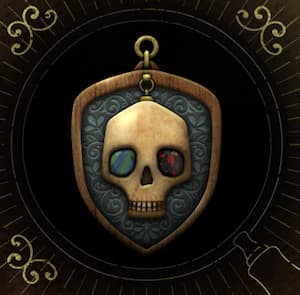 | Blood-Beck |
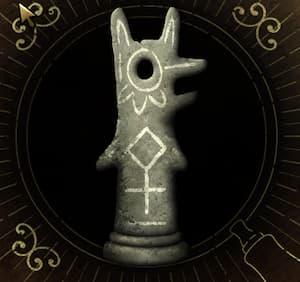 | Bonesguard |
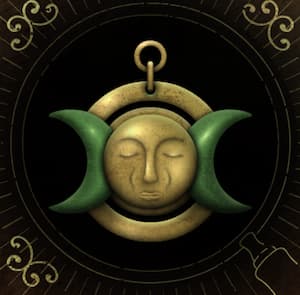 | Brighic Charm |
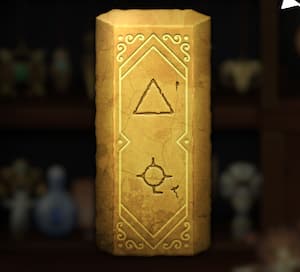 | Carrick’s Candle |
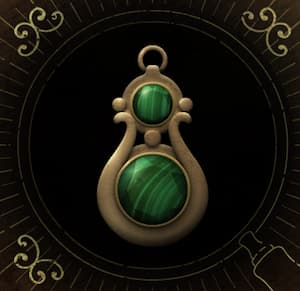 | Cassander |
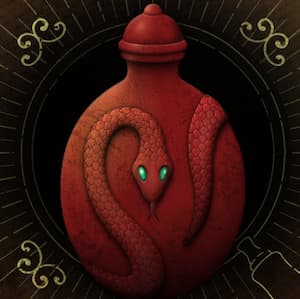 | Corchenna |
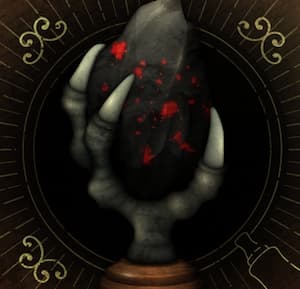 | Corvan’s Might |
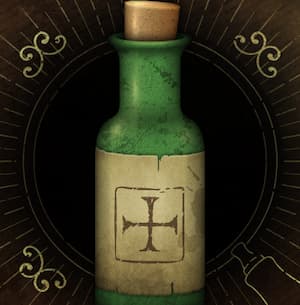 | Cussic Purifier |
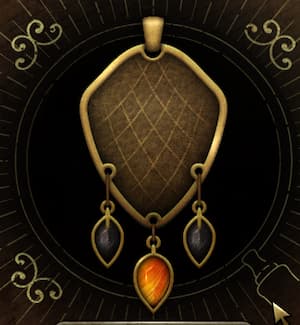 | Cyrene Ward |
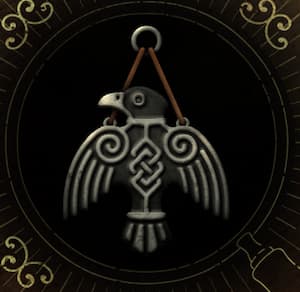 | Daedalus Link |
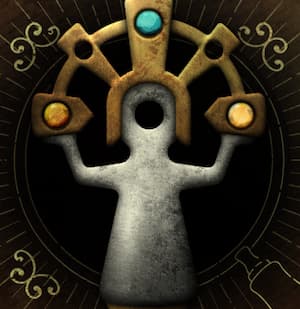 | Diverging Hook |
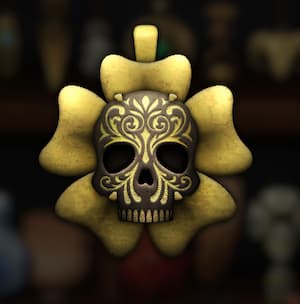 | Dread Vivant |
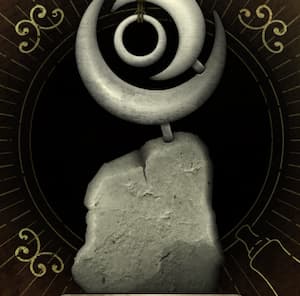 | Elva Stone A moon-shaped metal attached to a rough rock base. |
 | Ethereal Key |
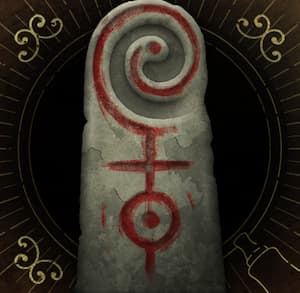 | Evocant |
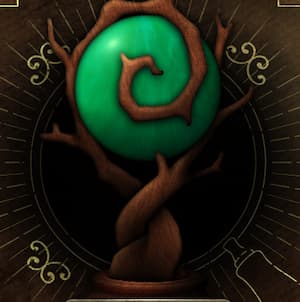 | Eye of Cernunnos |
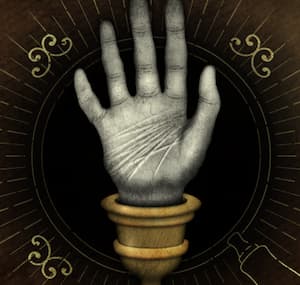 | Folium |
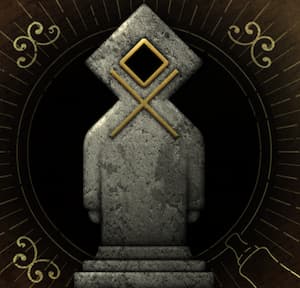 | Fortinance |
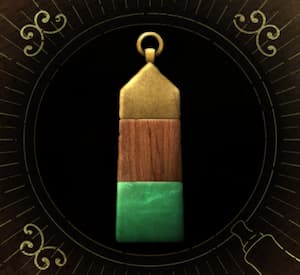 | Gowdian Siren |
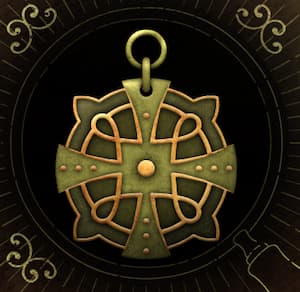 | Grey’s Grace |
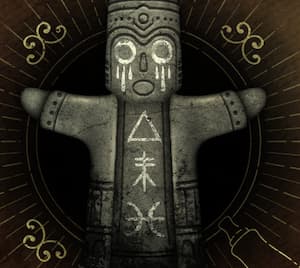 | Griss |
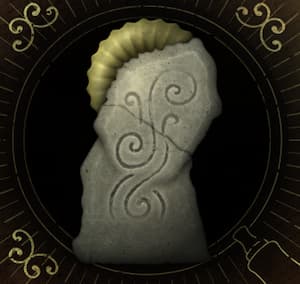 | Guise of Lillian |
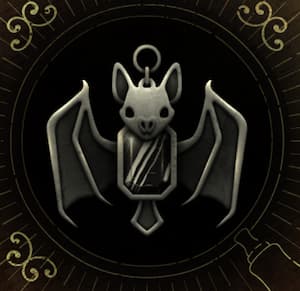 | Hearing Charm |
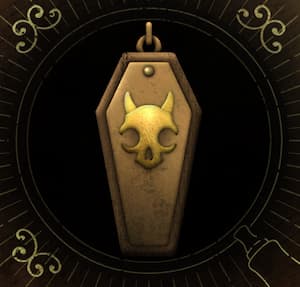 | Heart Chamber |
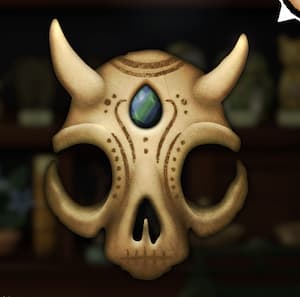 | Holgen Grimm A horned skull mask with a gem on its head. |
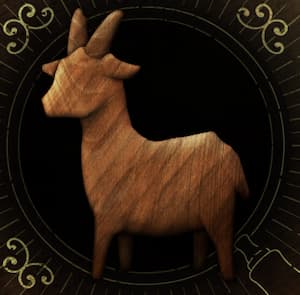 | Horned Shackle |
 | Hunter’s Boon |
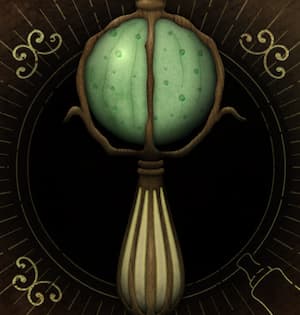 | Lamb’s Syphon |
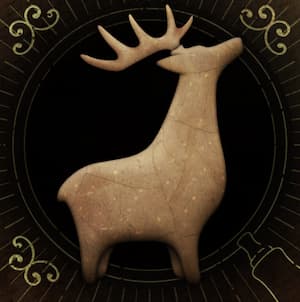 | Lead Heart |
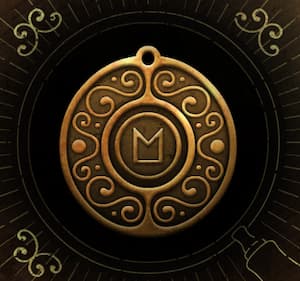 | Libula |
 | Light of Corchen |
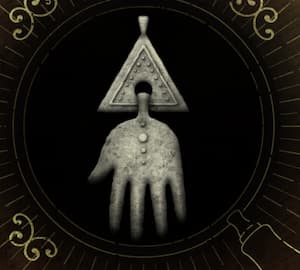 | Loem |
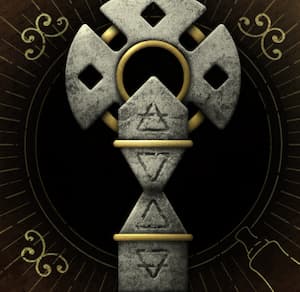 | Lunima |
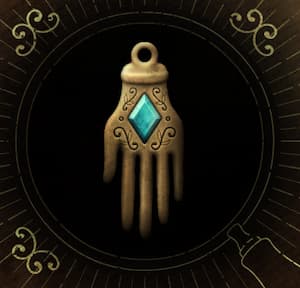 | Manus |
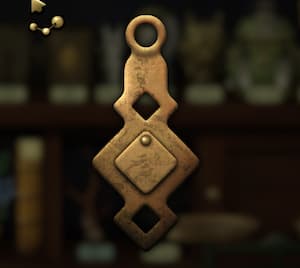 | Morgan’s Folly |
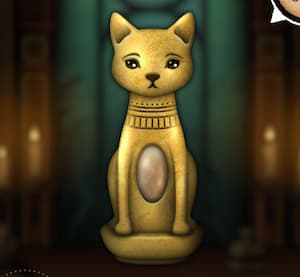 | Moonstone Guardian |
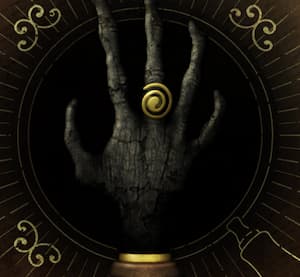 | Nephroquant |
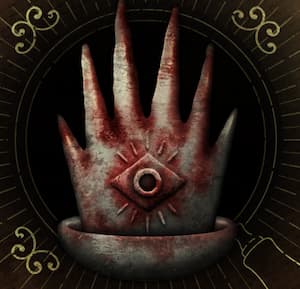 | Orford Spire |
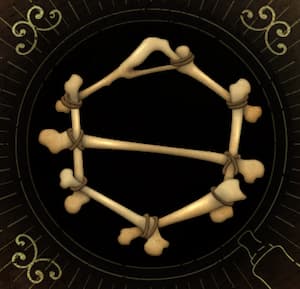 | Ossic Ring |
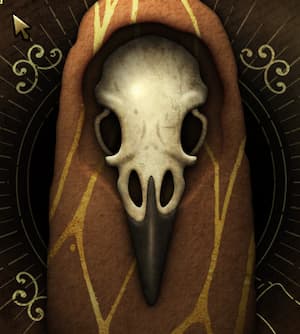 | Pitt |
 | Resonance Compass |
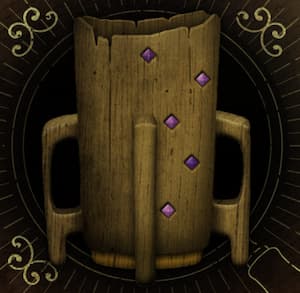 | Restful Mether |
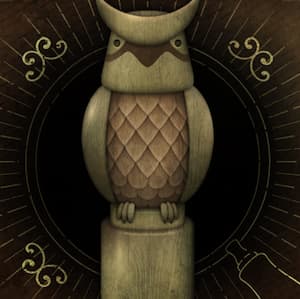 | Selenic Totem |
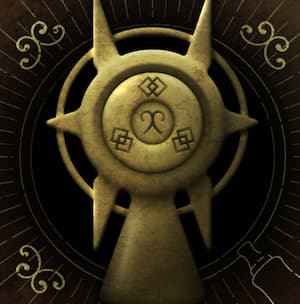 | Sextrum |
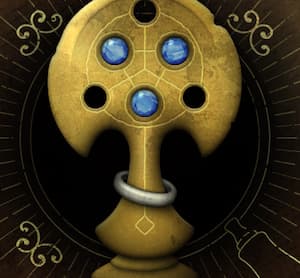 | Shadow Anchor |
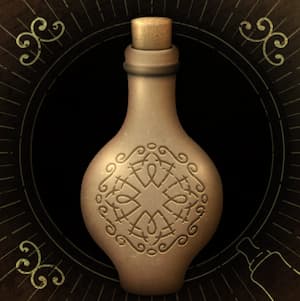 | Shadow Hold |
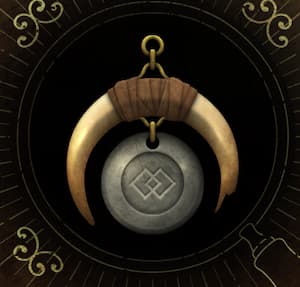 | Shield Charm Pendant on what looks like a bone or antler. Has two squares etched into it. |
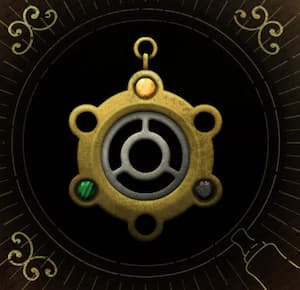 | Shimmer |
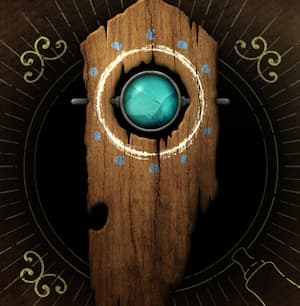 | Shinn |
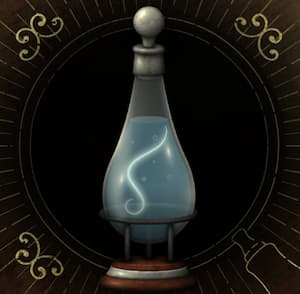 | Silent Breath |
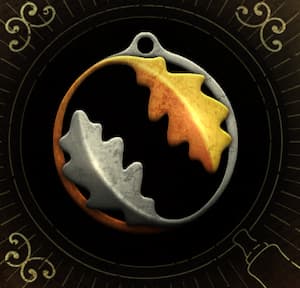 | Sithean Charm |
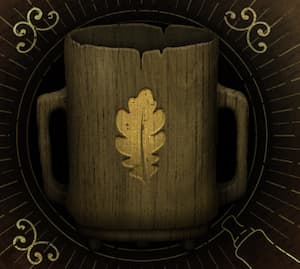 | Solemn Mether |
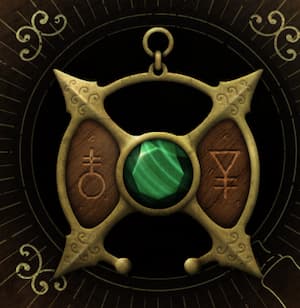 | Spirit Eye |
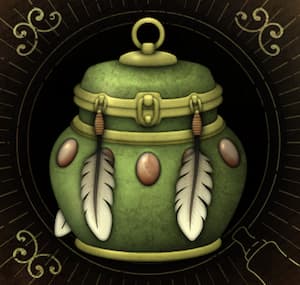 | Spirit Vault |
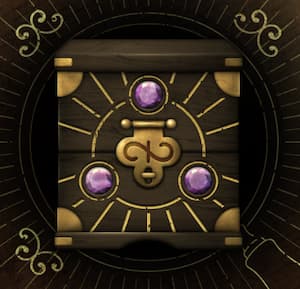 | St. Cedric’s Thunder |
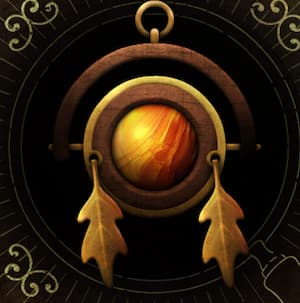 | St. John’s Anvil |
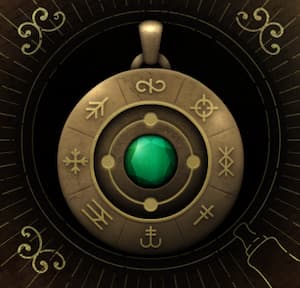 | Storm Ward |
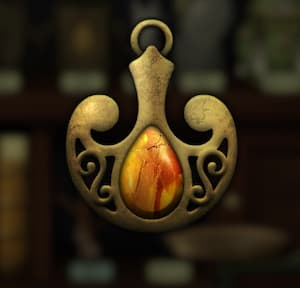 | Sun Bond |
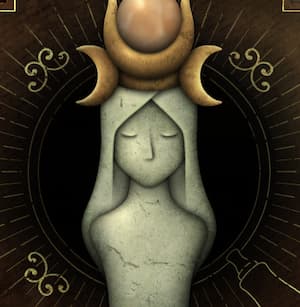 | Tenebran Cloak |
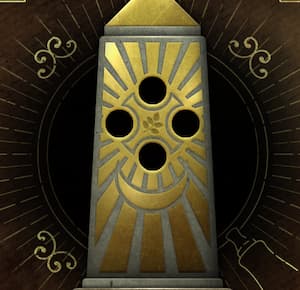 | Thaumic Needle |
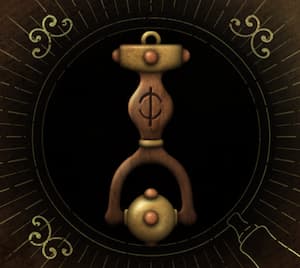 | Tormund’s Bane |
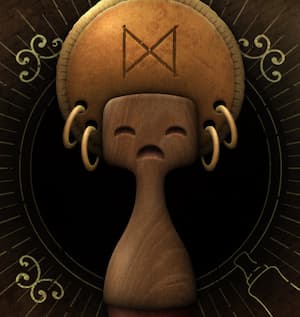 | Truth Conduit |
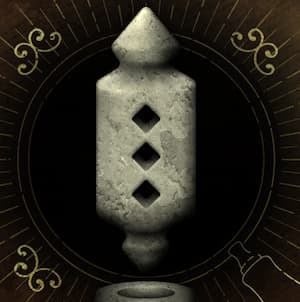 | Valent |
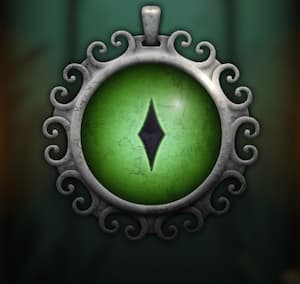 | Veiled Phenn |
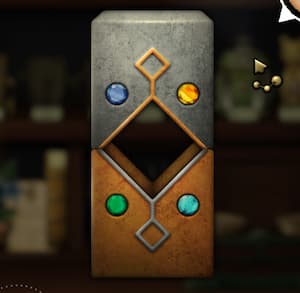 | Vessager |
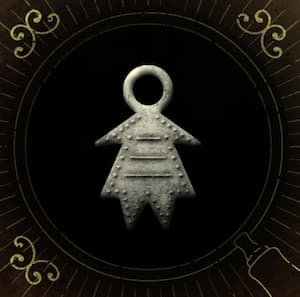 | Water’s Shadow |
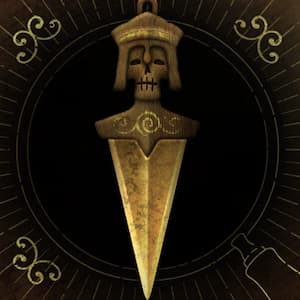 | Weaving Edge |
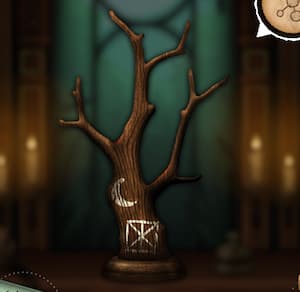 | Witch’s Finger |
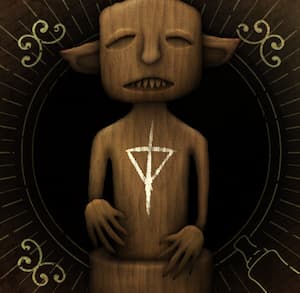 | Witherance |
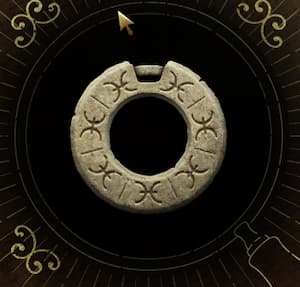 | Wyxic Cord |
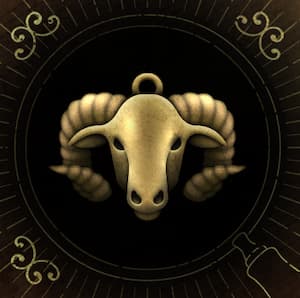 | Zeah |
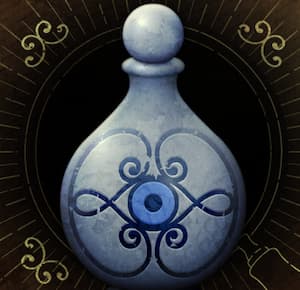 | Zephyrim |
Did you find this guide helpful? Please consider making a one-off donation to GameSpew. All money raised goes directly towards the running costs of the site and helps us continue to make guides, walkthroughs and more content.